Developer Insights
Join millions of viewers! Our engineers craft human-written articles solving real-world problems weekly. Enjoy fresh technical content and numerous interviews featuring modern web advancements with industry leaders and open-source authors.
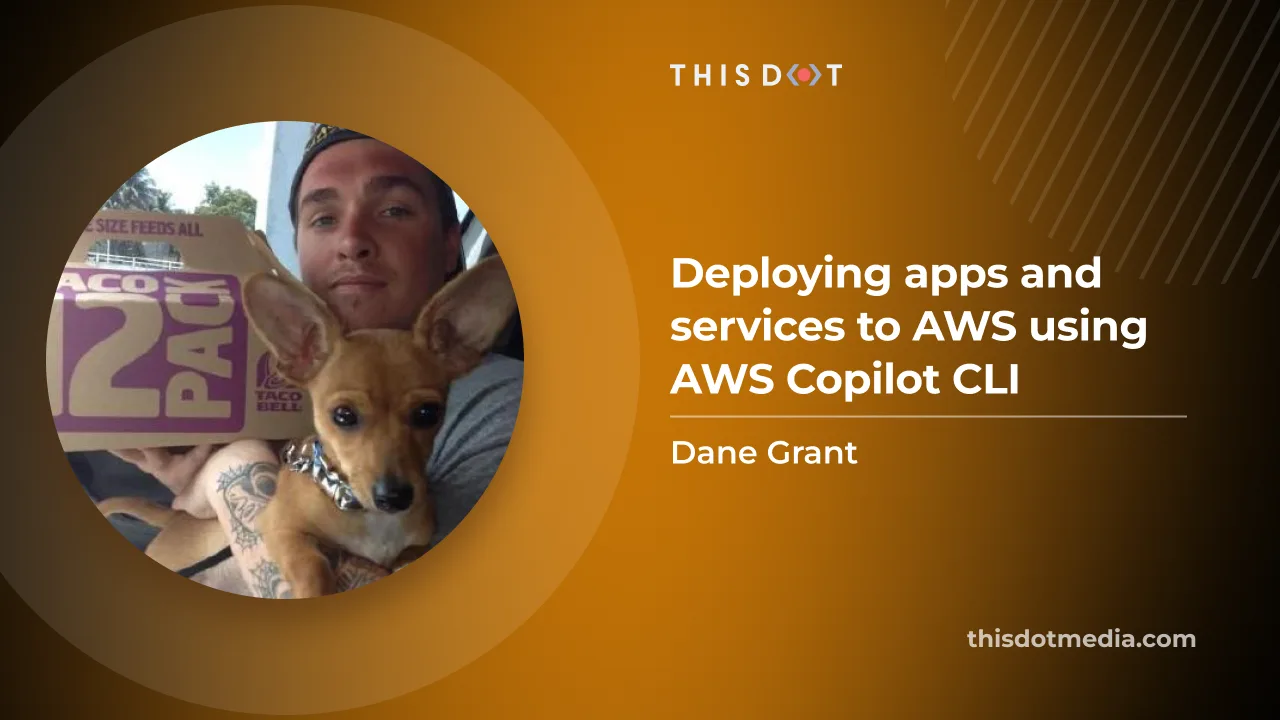
Deploying apps and services to AWS using AWS Copilot CLI
Learn how to leverage AWS Copilot CLI, a tool that abstracts the complexities of infrastructure management, making the deployment and management of containerized applications on AWS an easy process...
Jan 3, 2024
6 mins
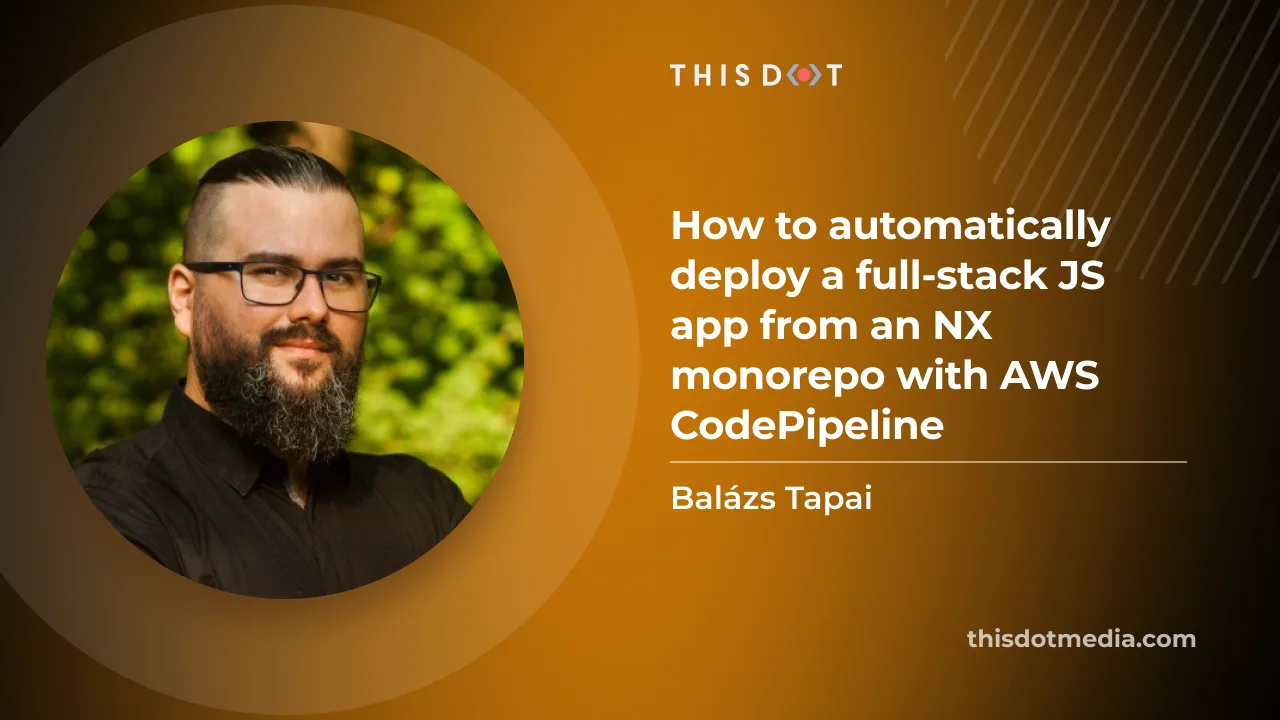
How to automatically deploy your full-stack JavaScript app with AWS CodePipeline
In our previous blog post we set up a horizontally scalable deployment for our full-stack javascript app. In this article we would like to show you how to set up AWS CodePipeline to automatically deploy changes to the application....
Sep 15, 2023
9 mins

How to host a full-stack app with AWS CloudFront and Elastic Beanstalk
You have an SPA with a NestJS back-end. What if your app is a hit? You need to be prepared to serve thousands of users? You might need to scale your API horizontally, which means you need to have more instances running behind a load balancer....
Sep 11, 2023
12 mins

Utilizing AWS Cognito for Authentication
Utilizing AWS Cognito for Authentication AWS Cognito, one of the most popular services of the Amazon Web Services, is at the heart of many web and mobile applications, providing numerous useful user identity and data security features. It is designed to simplify the process of user authentication and authorization, and many developers decide to use it instead of developing their own solution. "Never roll out your own authentication" is a common phrase you'll hear in the development community, and not without a reason. Building an authentication system from scratch can be time-consuming and error-prone, with a high risk of introducing security vulnerabilities. Existing solutions like AWS Cognito have been built by expert teams, extensively tested, and are constantly updated to fix bugs and meet evolving security standards. Here at This Dot, we've used AWS Cognito together with Amplify in many of our projects, including Let's Chat With, an application that we recently open-sourced. In this blog post, we'll show you how we accomplished that, and how we used various Cognito configuration options to tailor the experience to our app. Setting Up Cognito Setting up Cognito is relatively straightforward, but requires several steps. In Let's Chat With, we set it up as follows: 1. Sign in to the AWS Console, then open Cognito. 2. Click the "Create user pool" to create a user pool. User Pools are essentially user directories that provide sign-up and sign-in options, including multi-factor authentication and user-profile functionality. 3. In the first step, as a sign-in option, select "Email", and click "Next". 4. Choose "Cognito defaults" as the password policy "No MFA" for multi-factor authentication. Leave everything else at the default, and click "Next". 5. In the "Configure sign-up experience" step, leave everything at the default settings. 6. In the "Configure message delivery" step, select "Send email with Cognito". 7. In the "Integrate your app" step, just enter names for your user pool and app client. For example, the user pool might be named "YourAppUserPool_Dev", while the app client could be named "YourAppFrontend_Dev". 8. In the last step, review your settings and create the user pool. After the user pool is created, make note of its user pool ID: as well as the client ID of the app client created under the user pool: These two values will be passed to the configuration of the Cognito API. Using the Cognito API Let's Chat With is built on top of Amplify, AWS's collection of various services that make development of web and mobile apps easy. Cognito is one of the services that powers Amplify, and Amplify's SDK is offers some helper methods to interact with the Cognito API. In an Angular application like Let's Chat With, the initial configuration of Cognito is typically done in the main.ts file as shown below: ` How the user pool ID and user pool web client ID are injected depends on your deployment option. In our case, we used Amplify and defined the environment variables for injection into the built app using Webpack. Once Cognito is configured, you can utilize its authentication methods from the Auth class in the @aws-amplify/auth package. For example, to sign in after the user has submitted the form containing the username and password, you can use the Auth.signIn(email, password) method as shown below: ` The logged-in user object is then translated to an instance of CoreUser, which represents the internal representation of the logged-in user. The AuthService class contains many other methods that act as a facade over the Amplify SDK methods. This service is used in authentication effects since Let's Chat With is based on NgRx and implements many core functionalities through NgRx effects: ` The login component triggers a SignInActions.userSignInAttempted action, which is processed by the above effect. Depending on the outcome of the signInAdmin call in the AuthService class, the action is translated to either AuthAPIActions.userLoginSuccess or AuthAPIActions.userSignInFailed. The remaining user flows are implemented similarly: - Clicking signup triggers the Auth.signUp method for user registration. - Signing out is done using Auth.signOut. Reacting to Cognito Events How can you implement additional logic when a signup occurs, such as saving the user to the database? While you can use an NgRx effect to call a backend service for that purpose, it requires additional effort and may introduce a security vulnerability since the endpoint needs to be open to the public Internet. In Let's Chat With, we used Cognito triggers to perform this logic within Cognito without the need for extra API endpoints. Cognito triggers are a powerful feature that allows developers to run AWS Lambda functions in response to specific actions in the authentication and authorization flow. Triggers are configured in the "User pool properties" section of user pools in the AWS Console. We have a dedicated Lambda function that runs on post-authentication or post-confirmation events: The Lambda function first checks if the user already exists. If not, it inserts a new user object associated with the Cognito user into a DynamoDB table. The Cognito user ID is read from the event.request.userAttributes.sub property. ` Customizing Cognito Emails Another Cognito trigger that we found useful for Let's Chat With is the "Custom message" trigger. This trigger allows you to customize the content of verification emails or messages for your app. When a user attempts to register or perform an action that requires a verification message, the trigger is activated, and your Lambda function is invoked. Our Lambda function reads the verification code and the email from the event, and creates a custom-designed email message using the template() function. The template reads the HTML template embedded in the Lambda. ` Conclusion Cognito has proven to be reliable and easy to use while developing Let's Chat With. By handling the intricacies of user authentication, it allowed us to focus on developing other features of the application. The next time you create a new app and user authentication becomes a pressing concern. Remember that you don't need to build it from scratch. Give Cognito (or a similar service) a try. Your future self, your users, and probably your sanity will thank you. If you're interested in the source code for Let's Chat With, check out its GitHub repository. Contributions are always welcome!...
Jul 19, 2023
6 mins

Utilizing API Environment Variables on Next.js Apps Deployed to AWS Amplify
Although Next.js is a Vercel product, you may choose not to deploy to Vercel due to their pricing model or concerns with vendor lock-in. Fortunately, several other platforms fully support deployment of Next.js including AWS Amplify. Whether you’re using the Next.js app directory or not, you still have API routes that get deployed as serverless functions to whatever cloud provider you choose. This is no different on AWS Amplify. However, Amplify may require an extra step for the serverless functions if you’re using environment variables. Let’s explore how AWS Amplify is deploying your API routes, and how you can properly utilize environment variables in this context. How AWS Amplify manages Next.js API Routes When you deploy Next.js apps via Amplify, it takes the standard build outputs, stores them in S3, and serves them from behind a Cloudfront distribution. However, when you start introducing server side rendering, Amplify utilizes Lambda Edge functions. These edge functions execute the functionality required to properly render the server rendered page. This same flow works for API routes in a Next.js app. They’re deployed to individual lambdas. In Next.js apps, you have two (2) types of environment variables. There are the variables prefixed with NEXT_PUBLIC_ that indicate to Next.js that the variable is available on the frontend of your application and can be exposed to the general public. At build time, Amplify injects these variables, and values that are stored in the Amplify Console UI, into your frontend application. You also have other environment variables that represent secrets that should not be exposed to users. These will not be included in your build. However, neither set of these variables will be injected into your API routes. If you need any environment variable in your API routes, you will need to explicitly inject these values into your application at build time so they can be referenced by the Next.js systems, and stored alongside your lambdas. Injecting Environment Variables into the Amplify Build By default, Amplify generates the following amplify.yml file that controls your application’s continuous delivery (CD). The following is that default file for Next.js applications: ` To inject variables into our build, we need to write them to a .env.production file before the application build runs in the build phase. We can do that using the following bash command: ` env pulls all environment variables accessible. We use the pipe operator (|) to pass the result of that command to the grep -e which searches the output for the matching pattern. In this case, that’s our environment variable which will output the line that it is on. We then use the >> operator to append to the .env.production file, or create it if it does not exist. Be careful not to use a single > operator as that will overwrite your file’s full content. Our amplify.yml should now look like this: ` It is important to note that you have to do this for all environment variables you wish to use in an API route whether they have the NEXT_PUBLIC_ prefix or not. Now, you can use process.env.VARIABLE NAME] in your API routes to access your functions without any problems. If you want to learn more about environment variables in Next.js, [check out their docs. Conclusion In short, AWS Amplify deploys your Next.js API routes as Lambda Edge functions that can’t access your console set environment variables by default. As a result, you’ll need to use the method described above to get environment variables in your function as needed. If you want to get started with Next.js on Amplify today, check out our starter.dev kit to get started, and deploy it to your AWS Amplify account. It’ll auto-connect to your git repository and auto-deploy on push, and collaborating with others won’t cost you extra per seat....
Jun 16, 2023
3 mins
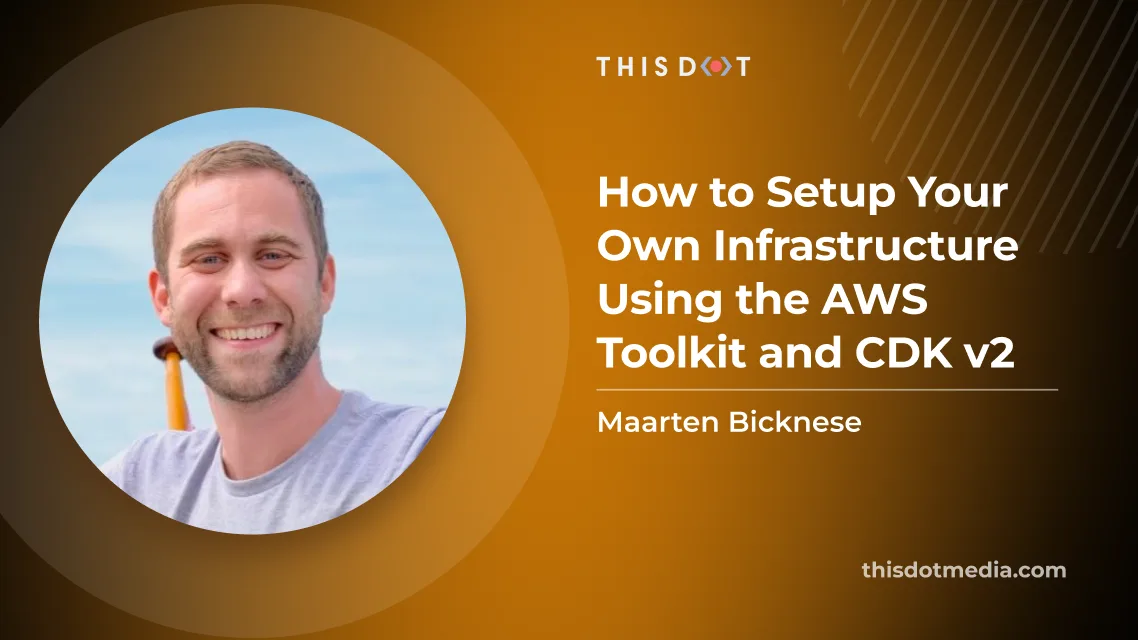
How to Setup Your Own Infrastructure Using the AWS Toolkit and CDK v2
Suppose you want to set up your infrastructure on AWS, but avoid going over the manual steps, or you want reproducible results. In that case, CDK might be the thing for you. CDK stands for Cloud Development Kit; it allows you to program your hosting setup using either TypeScript, JavaScript, Python, Java, C#, or Go. CDK does require you to be familiar with AWS terminology. This series will explain the services used, but it might be a good idea to read up on what AWS offers. Or read one of our earlier articles on AWS. CDK is imperative, which means you can code your infrastructure. There is a point to be made, however, that it behaves more like a declarative tool. All the code one writes ends up in a stack definition. This definition is sent to AWS to set up the desired services, or alter an already running stack. The imperative approach allows one to do easy conditional statements or loops without learning a new language. AWS Toolkit To make things easier for us, AWS offers the AWS Toolkit for VS code. The installation of the plugin in VS Code is straightforward. We had some issues with the authentication, and recommend using the "Edit credentials" route over the "Add a new connection" option. When on the account start page, select the profile you'd like to use. Open the accordion, so it shows the authentication options. Pick "Command line or programmatic access" to open a dialog with the required values. Click the text underneath the heading "Option 2: Add a profile to your AWS credentials file". This will automatically copy the values for you. Next, go back to VS Code, and paste these values into your credentials file. Feel free to change the name between the square brackets to something more human-readable. You can now pick this profile when connecting to AWS in VS Code. First stack With our handy toolkit ready, let's deploy our first stack to AWS using CDK. For this, the CDK needs to make a CloudFormation stack. In your terminal, create a new empty directory (the default name of the app will be the same as your directory's name) and navigate into it. Scaffold a new project with ` This will create all the required files to create your stack in AWS. From here on, we can bootstrap our AWS environment for use with CDK. Run the bootstrap command with the profile you’ve configured earlier. For example, I pasted my credentials, and named the profile ‘sandbox’. ` CDK will now create the required AWS resources to deploy our stack. Having all our prerequisites met, let’s create a lambda to test if our stack is working properly. Create a new JavaScript file lambda/Hello.js containing this handler ` And add our lambda to our stack in the constructor in lib/-stack.ts ` That’s all we need to deploy our lambda to our stack. We can now run the deploy command, which will compare our new local configuration with what is already deployed. Before any changes are pushed, this diff will be displayed on your terminal, and ask for confirmation. This is a good moment to evaluate whether what you’ve written has correctly translated to the desired infrastructure. ` This same command will push updates. Note that you will only see the diff and confirmation prompt when CDK is about to create new resources. When updating the contents of your Lambda function, it simply pushes the code changes. Now in VS Code, within your AWS view, you’ll find a new CloudFormation, Lambda, and S3 bucket in the explorer view. Right click your Lambda to “Invoke on AWS”. This opens a new window for that specific Lambda. In the right-hand corner, click “Invoke”. The output window will open, and you should see the returned payload including the message we set in our handler. This is not very practical yet. We’re still missing an endpoint to call from our client or browser. This can be done by adding a FunctionURL. Simply add the following line in your stack definition. The authentication is disabled for now, but this makes it possible to make a GET request to the lambda, and see its result. This might not be the desired situation, and AWS offers options to secure your endpoints. ` After redeploying this change, right click your Lambda in VS Code and copy the URL. Paste it in your browser and you should see the result of your Lambda! Our first stack is deployed and working. Cleanup By following this article, you should remain within the free tier of AWS and not incur any costs. To keep costs low, it’s a good practice to clean up your stacks that are no longer in use. ` The CDK destroy command will remove your stack, but leaves the CDK bootstrapped for future deployments. If you want to fully remove all resources created by following this article, also remove the CloudFormation and S3 bucket. This can be done through VS Code by right clicking your CloudFormation and selecting “Delete CloudFormation Stack” and simply “Delete” for the associated S3 bucket. This brings you back to a completely clean slate and future use of the CDK should be bootstrapped again. Round up You should now be able to bootstrap CDK, Create a stack, and run a Lambda function within the stack which is accessible through a FunctionURL. You can grow your stack by adding more Lambda functions, augmenting the logic of those functions, or adding other AWS resources not covered in this article. The setup created can be torn down and recreated in the exact same way over and over, making it easy to share with your team. Changes are incremental, and can be rolled back if need be. This should offer confidence in managing your infrastructure, over manually creating it through the AWS console. Have fun building your own infrastructure!...
Mar 8, 2023
5 mins
Building Your First Application with AWS Amplify
AWS (Amazon Web Services) is popular for the cloud solution it provides across the globe, in various regions with data centers. In this article, we will be looking at a particular platform by AWS for frontend developers, AWS Amplify. AWS Amplify is a set of tools and features that let web and mobile developers quickly and easily build full-stack applications on AWS. This article is a summary of JavaScript Marathon: AWS for Frontend Developers with Michael Liendo. If you want a more detailed explanation of building and deploying frontend apps with AWS Amplify, I recommend you go and check out the video! Application User Flow Most applications need certain key features to be created for users. Let’s explore a few of them. - User Login: - This can be created by spinning up an ExpressJS application with Authentication, and handling things like user hashing, password policy, and forgot password. - API integration: - This is another common need as we typically need to handle user data with a backend application. - Database: - Most applications store user information. This would be key in creating an interactive user experience in an application. Bringing these services together can be a lot for many developers. Developers will also have to consider application scalability as the users increase. AWS Amplify AWS Amplify is built to specifically handle scale for frontend developers, and also provides the opportunity for an application to scale as the application and users grow. With scalability handled, this allows developers to focus on providing value for their users versus having to worry about scalability at every stage. AWS Amplify Tools AWS Amplify tools for building and deploying frontend applications include: - CLI: To connect frontend with AWS backend cloud resources. - UI Components: AWS UI components library is an open-source design system with cloud-connected components and primitives that simplify building accessible, responsive, and beautiful applications. - Hosting Solution: For deploying frontend applications, static sites, and server-side apps, with a CI/CD pipeline. - Amplify Studio: A GUI for UI to plug a Figma component and automatically convert it into a ReactJS component. Walking back to how AWS will help manage the user journey we listed above and make developer lives easier, here are some of the services provided by AWS that help spin up applications with ease: - User Login: For user login, we can use Amazon Cognito, AWS’s user directory service to handle user authentication, password policies, forgot password, and more. - API: For API access, we can use AWS AppSync, a serverless GraphQL and Pub/Sub API service. - Database: for Database, we can use Amazon’s DynamoDB, which is a fully managed, serverless, key-value NoSQL database. - Storage: for assets storage, we can be use Amazon Simple Storage Service (Amazon S3). Building a Project & Project Setup Now that you’re familiar with a few of the services we can use to build an application easily, let’s get started and build one together! Before we start, let’s install the AWS Amplify CLI. Run: ` This will give us access to use Amplify’s commands for our application. The Application We will be building a Next framework application. This application will be a collection of pictures of Dogs. To scaffold a Next application, run: ` Now cd into the application directory. ` Install the packages and dependencies we will be using from AWS: ` Now, open the project in your code editor. We will be using VS Code. First, we will wrap the root component in an AmplifyProvider component. Open _app.js and replace the code: ` This is to make the application aware of Amplify. We also imported the style library from the React Amplify library. We will be using the install amplify CLI tool to initialize the Amplify configuration in our project. To do this, run: ` You can modify the properties as well, but for this demo, we will leave it as default, and when it asks Initialize the project with the above configuration? we will choose NO. This is because we will replace the src directory with a . directory and the build directory replace with .next directory. If you don’t already have AWS credentials set up, Amplify will walk you through setting up new credentials. For this demo, we will be accepting the default credentials settings provided, but we recommend you follow with the required information for your project. Check out the Documentation to learn more. AWS will add a few cloud functions and create a configuration file in the project directory, aws-exports.js. You can add services to your Amplify project by running the amplify add command. For example, to add the authentication service (AWS Cognito), run: ` This will ask for the type of security configuration you want for the project. Next, it asks how you want users to authenticate. This will add authentication to your application. To test it out, let's edit the index.js file and replace the content: ` Now, run the application in dev environment: ` Navigate to the dev localhost URL in the browser, http://localhost:3000/. The landing URL is now authenticated, and requires a username and password to login. The application now has full authentication with the ability to sign in: There is a registration function and user detail fields: There is also a forgotten password function that emails the user a code to reset the password, all from just a few lines of code: This is a fully functioning application with authentication included locally. To use the full authentication, we will need to push the application to AWS service. To do that, run: ` This will list services created in the application and prompt if you want to continue with the command. Upon accepting, it will push the application to the cloud and update the amplify-exports.js configuration file with the cloud configuration and AWS services that we enabled in our application. Now, let's modify the _app.js to apply the Amplify configurations. Add the Amplify and config imports as follows: ` The authentication configuration handles form validation out-of-the-box including password policy and email, or phone number verification depending on what you choose. You can view ampliy-exports.js to confirm the configuration options available for the project. Now to add an API to the application, run: ` For this demo, we will choose GraphQL for the API service, API key for authentication, and Amazon Cognito. Everything else will be the default. Amplify will auto generate the GraphQL schema for the project, which you can modify to fit your use case. Push the API updates to AWS: ` Amplify will trigger to generate code for your GraphQL API. We suggest you accept the default options. Storage We’ll add a storage service to our project to allow users to upload favorite dog images. Run: ` You can apply default settings or modify it to fit your use case. Building a Demo app Now that we have prepared the project, let’s modify index.js to implement file upload for authenticated users. ` Walk Through First, we created a state to hold a list of dogs’ data from the API. We then declared an async function to handle the form submission. Using the AWS component library, we loop through the dogItems, rendering each item to display the uploaded image and details of the dog. We imported the Storage module from amplify, passed dogPicFile to dogPicName for upload, and set the level to protected to give user access only to read and update data. Then, we imported the API module from amplify, and the destructured data property. Using the GraphQL code generated for us by amplify when we run amplify add api, we imported createDogs from mutations so we can post form data to the database with GraphQL. We set a new state with the return data from the database. With React’s useEffect, we declared an async function to fetch data from the database with GraphQL query, and set the state with the returned data, and we call the fetchDogData. To test the application, run: ` Conclusion In this article, we learned how to use AWS Amplify to implement authentication, integrate an API with your frontend application, connect with a database, and also how to store files in AWS storage. This can all be accomplished within a short time, and using very few lines of code. If you want a more detailed explanation of the content covered in this write up, I recommend you watch the video by JavaScript Marathon: AWS for Frontend Developers with Michael Liendo on This Dot’s YouTube Channel. What are you planning on building with AWS Amplify?...
Sep 19, 2022
8 mins
Performing a Migration in AWS Amplify
Back-end migrations can be a tricky task if you're going in blind, and it may take a few attempts before you know the ins and outs of a specific technology being used. Those with experience in AWS will understand that sometimes things don't always go according to plan when performing even the most common tasks in Amplify, and migration of an app from one app ID to another can seem like a huge undertaking. In this guide, we'll look at how to: - Reference a new app - Create a new back-end environment for the migration - And verify our deployment works > This guide assumes you have an existing application created. Before Attempting a Migration Migration can be seen as a refactor of sorts, except it's the entire project that needs to move and work. In any refactoring effort, taking into account all the moving parts is key. But with Amplify, these parts are all tied to policies while creating the environment. What this means for Amplify is that with an existing app, we have the option to use already generated policies or perform a manual shifting of resources. With the first option, policies and references are already mapped for how the BE would rebuild. However, in option two, there may not be an easy transition of resources especially if the application is large and/or is being upgraded as part of the migration processes. In the case of an older application, it may be easier to manually migrate because the upgrade process might not take into account some older pattern. > We'll use the first option of a simpler migration by referencing the new app id. Initial Setup Amplify behaves similarly to git. To get started, first follow a git-like workflow by fetching the latest: ` > It's recommended to commit the latest stable code to your source control of choice in case the migration goes wrong. In the new AWS account, where this app will live, we need to create a space for it to live. Thankfully, Amplify docs give a step-by-step guide on configuring a new app space. Referencing the New AWS App At this point, if you've created a new app in a new account, then there should be a default staging environment. We won't use that one because we want at least one working, clean environment in case we need to start over (by deleting the environment). Clear old environments Take a look at the contents of team-provider-info.json and look for AmplifyAppId under any existing environments. Depending on the current environment selected, Amplify Actions will be performed against that environment at that app id. This isn't useful to use because generating a new develop environment will have: 1. A name conflict in this file 2. New environments created in the same app > If you used the wrong credentials creating the env, a new app under the old account will be created at the new app id. Generate an env at the new app id Typically we'd perform amplify env add to add an environment to an existing app. However, we need to reference the new app. So we'll initialize a new app instead: ` > Found in the Amplify Docs for commands amplify-cli here The Amplify-Service-Project-AppId can be found by: 1. Navigating to AWS Amplify 2. Selecting the app 3. Selecting App settings > General 4. Selecting the end part of the App ARN Because there won't be environments to read from team-provider-info.json, it won't prompt for using an existing environment. Follow the interactive prompts for your configuration needs. Verify the new environment and push To verify that everything went well, look again AmplifyAppId in team-provider-info.json under the new environment. This should match with the Amplify Console. Now we push: ` Verify Successful Deployment All's that's left now is to wait while Amplify recreates the policies for all your back-end parts. If it all went well, you should have no failures in the terminal, and see the deployment success in Amplify Console with references to your API, functions, etc. like: If you have a front-end, re-attach the source control of choice. Cleanup The final step after everything is working is to remove references to the old application. We did this partially by deleting old environments in team-provider-info.json. Now we have to delete the old app from the old account, and we're done!...
Jan 7, 2022
4 mins

NX e2e testing with AWS Amplify
CI/CD helps you automate most of your testing and build processes. AWS Amplify can help you with that, but sometimes it is not that straightforward. In this guide, we show you how to set up e2e testing with an NX workspace using Amplify build tools....
May 5, 2021
4 mins
Deploying a Vue Static Front-End to AWS
While there are easier solutions to deploying static content to the web, by manually deploying a front-end to AWS, you'll gain a deeper understanding of the services available to you....
Apr 14, 2021
13 mins
Comparing App Platforms with Heroku/Salesforce, AWS, and Vercel
Introduction Recently on This Dot's Build It Better show, I had the opportunity to sit down with some folks from popular platform as a service vendors. I asked them to tell me about what got them excited about their platforms, and what advice they have to offer to help viewers choose which platform is best for them. Salesforce/Heroku I spoke with Julian Duque and Mohith Shrivastava from Salesforce about their "low code" products, and how those products are enhanced by their Heroku platform for "pro code" solutions. Salesforce makes it easy for almost anyone to get started building and running cloud apps whether they're software engineers or not. The Salesforce Platform offers a wide variety of low-code products that make it simple for non-developers to build apps, and Heroku provides a streamlined set of tools and services for running custom software applications using a wide array of application development frameworks and programming languages. I personally really love the simplicity and flexibility of the Heroku platform. I've used it for tons of projects over the years. You can host almost any application, built using any language or framework, using Heroku's buildpack technology. Heroku Buildpacks are sets of scripts that automate your app's build and deployment steps. Official Buildpacks for a dozen different platforms are available for use and in most cases, Heroku can automatically detect which one your app needs when you deploy your code. If your stack isn't supported by an official buildpack, you can build your own or use one of the many community maintained buildpacks for languages and frameworks that don't have first party support. Another benefit of Heroku is that each Heroku app has an internal Git repository and all you need to do to deploy your code is push your code to that repository using git push. There are no additonal tools required for deployments. Not only does this simplify the process of deploying your code by hand, but it also means that Heroku is automatically compatible with any CI/CD system that supports Git, which is almot all of them by now. In addition to custom applicaiton hosting, Heroku also has PaaS integrated offerings for PostgreSQL, Redis, and Apache Kafka that can all be managed through the Heroku dashboard or CLI. Even though I'm a long time user of Heroku, I wasn't really aware of everything that Salesforce brings to the table. Heroku offers a strong platform for pro code applications, but in addition, the Salesforce Platform provides a variety of low code tools that can be used to build applications by people who aren't experienced in custom software development. These tools allow businesses to begin the digital transformation process without needing to bring on a large in-house IT staff. There are point and click tools for managing authentication and identity as well as automating workflows and building user interfaces. They even offer a product called Einstein that can imbue your workflows with AI powers. However, you don't need to worry about outgrowing the low code solutions because the Salesforce Platform can also be integrated with pro code applications hosted in the Heroku ecosystem. This makes Salesforce/Heroku a great platform that businesses can rely on all the way through their digital transformation process. Technology isn't the only thing that sets Salesforce and Heroku apart from their competition. They also provide a couple of huge documentation libraries. For the Salesforce Platform, you can head to their Salesforce Trailhead site. Trailhead offers interactive courses and learning tracks that will teach you how to build applications from the ground up on the Salesforce Platform. Heroku also has an expansive documentation library that not only applies directly to the Heroku platform, but I've used their documentation personally many times to assist in resolving problems with my applications on other platforms. The Heroku documentation site is not only comprehensive, but it's also easier to consume than that of many of their competitors (I'm looking at you Amazon). And finally, when documentation isn't enough, Heroku and Salesforce also have excellent support teams who will work quickly to resolve any problems you're experiencing with their platform, and in many cases they can act proactively before you are aware you have a problem. Vercel I also spoke with Lee Robinson from Vercel. Vercel is a platform that's quite similar to Heroku in a lot of ways. However they are laser focused on providing a great hosting platform for your Jamstack applications. While Heroku can support a nearly limitless number of programming languages and application frameworks, Vercel is focused on providing the best possible experience for "serverless" Javascript apps. These are apps that use a hybrid or static JavaScript framework for building frontends and backends that are powered by NodeJS serverless functions. Serverless functions written in Python, Go, or Ruby are also supported, but there are no options for supporting functions written in languages that aren't officially supported. Compared to Heroku's flexibility, one might take this to mean that Vercel is an inferior platform, but this isn't the case at all. What Vercel doesn't offer in terms of flexibility, they make up for in developer experience. Where Heroku provides the simplicity of being able to effortlessly scale your applications by dragging a slider, Vercel takes the simplicity to the extreme and automagically scales your applications without needing to ever even use the dashboard or CLI. Not only do they completely automate and manage all the complexities of scaling your app to meet the demands of your users, you also get the benefit of having the Vercel Edge Network CDN to ensure your app is always available and performant no matter where your users are located geographically. This is all part of every single app hosted on Vercel, even the free tier! Vercel also provides additional tools to help you supercharge your development workflows and improvement cycles. "Develop. Preview. Ship" is Vercel's mantra. To help developers achieve this, not only do they provide Git-based deployments, but for each branch or pull request opened via version control, Vercel provides a "preview URL" which is connected to a preview version of your application that reflects the code on that branch/PR. This eliminates the need for complicated staging and QA workflows, since preview URLs provide isolated environments for testing and demoing new features. Another mantra Lee shared with me is the idea that "developers are scientists." As developers, we can use data to inform how we build the solutions we work on, but often that data can be cumbersome or difficult to obtain. Vercel simplifies the data collection process by offering a high quality analytics platofrm to help you understand how your applicaiton performs, not only in terms of response performance but also tracking frontend user experience metrics like layout shift and input delay. Being able to easily collect and visualize these metrics allows you to really be a scientist and always be able to justify priorities and improvements to your products with real user data. Another interesting aspect of Vercel is that they've also created a NodeJS application development framework in-house called Next.js that is meant to pair perfectly with their platform. It provides a "zero-configuration" framework for building applications with NodeJS and React. It's an incredibly flexible platform that can support the simplest one-page statically rendered applications, but also can support request-time server-side frontend rendering and custom backend API endpoints supproted by Vercel's serverless functions. To help new and experienced developers alike, Vercel offers a library of starter projects using Next.js and/or other JavaScript frameworks you can use to get your project started with just a few button clicks. Amazon Web Services I spoke with Nader Dabit from Amazon about their new Amplify platform. Amazon has been the biggest player in the PaaS marketplace for well over a decade now. Most developers have used an EC2 virtual server or stored application assets and uploads in S3. What developers may not know is that Amazon offers more than 200 different services for use by developers and other business users. Ec2 and S3 are pretty simple and straightforward, but branching out into the broader ecosystem or learning to tie everything together can be pretty intimidating. This isn't a big deal for companies like Netflix or AirBnB who can afford to bring in devops engineers that are already AWS experts, but historically it's been a lot more difficult for less exprienced developers to take full advantage of what AWS has to offer. With Amplify, the AWS team is hoping to demystify the process and give new and experienced developers a way to work with the core AWS platform in a more streamlined way. Instead of having to udnerstand which service to use out of a list of 200+ services with intimidating names, Amplify selects a smaller subset of these services and gives them less esoteric names. So Amazon Cognito becomes "Authentication" and AWS Lambda becomes "Functions". They also provide simplified client libraries over the traditional AWS SDK that are compatible with JavaScript, Android, iOS and Flutter. Another neat thing about the Amplify platform is that they, like Salesforce, are steering users toward Amazon's low code tools like AWS AppSync and API Gateway, and making it easier for developers to integrate with AWS tools for things like AI/ML predictions and PubSub. Also like Salesforce, if developers outgrow the lowcode tools, it's easier than ever to expand out to the boader ecosystem and some of the more specialized services that amazon offers. In addition to making it easy to build your application's backend with little or no code, Amplify also offers the frontend components you need to build interactive web or mobile apps. Amplify UI components are available for React, Angular, Vue and more. And of course, on top of the simplified Amplify toolchain, AWS still provides the same 200+ services they've traditionally offered. So if you outgrow Amplify, or need services that aren't compatible with it, you can always integrate offerings outside of the Amplify ecosystem with other AWS services. Another thing I really like about Amplify, and AWS in general, is the pricing. All of the Amplify services have a free tier. This makes it useful for hobby projects or to keep development costs low before you launch your applications. Also, it's important to note that the other services like Heroku and Vercel are often based on AWS themselves (. As such, buying services direct from AWS will usually save you at least a little bit of money over using a more managed service. Conclusion Developers have a ton of choices when they are choosing a platform to build their applications on. All of the vendors I spoke with have compelling solutions that will make your life as a developer better. I always personally reach for platforms like Heroku or Vercel first since they're quick and easy to get started with, but it's clear that AWS has taken note of that and is trying to close that gap. So really, there's not a bad choice if these are your options. I hope I've explained them well enough so you can choose which one suits your project the best!...
Mar 17, 2021
8 mins

Image Text/Face recognition with AWS Rekognition👀
AWS Rekognition What is AWS Rekognition? Rekognition is a AWS service that provides deep learning visual analysis for your images. Rekognition is very easy to integrate into your application by providing an image or video to the AWS Rekognition API. The service will identify some following: objects, people, text, scenes, and activities. "Amazon Rekognition also provides highly accurate facial analysis and facial recognition. You can detect, analyze, and compare faces for a wide variety of use cases, including user verification, cataloging, people counting, and public safety." - *AWS Official Docs* Now let's start using AWS Rekognition Let's start with trying some of their demos to see how AWS Recognition works. 1) Go to the following link and play with the demos. Time to get our hands dirty Warning🚨 : 1) You need to have an AWS Management Console account. 2) It will ask you for your credit card info, but YOU won't be charged for what you use in this tutorial since it's part of the FREE TIER. Setting up our S3 Bucket 1) Go to Find services and look for S3 2) Click on CREATE A BUCKET 3) Enter the bucket name as thisdot-rk-YOUR_NAME 4) Click on NEXT twice 5) Uncheck all the boxes to grant public access to the bucket. Click NEXT *Note: I'm making this bucket public, because for the purpose of this tutorial, I'm not worried about security.* 6) Click on CREATE BUCKET. 7) Time to upload some images to S3. Click on the bucket you just created. 8) Download this image and save it as thisdot.png. https://thisdot-rk-pato.s3.amazonaws.com/thisdot.png 9) Click on the dropdown from Mange Permissions, and click on Grant public read access to this object(s). 10) Click NEXT 11) On the Storage Class, select Standard, and click NEXT 12) Click UPLOAD Setting up our Lambda Function 1) Go to Find services, and look for Lambda 2) Click on CREATE FUNCTION 3) For Lambda function name, enter thisdot-rk-YOUR_NAME 4) Under Runtime, click on the dropdown, and select Python 3.7. 5) Click on CREATE FUNCTION 6)Scroll down to where it says Function code. You should see something like this: 8)Erase everything you see in the editor, and paste the following code in there: *Note: Change the name of the bucket to the bucket name you created thisdot-rk-YOUR_NAME.* The following code is going to help us finding the text inside of the images. Using the *.detect_text* method. ` *Note: To Learn more about other AWS Boto Rekognition functions, visit this website.* 9) Scroll down to change the BASIC SETTINGS< of the lambda. 10) Change Memory to 512MB, and Timeout to 2min 30sec. This is to ensure your lambda doesn't timeout when processing images. 11) Scroll all the way to the top. In the upper right corner, you should see the SAVE button. Click on it. Setting up our Security Roles Using IAM 1) Search for the IAM Service (Services IAM) 2) On the left navigation bar, click on ROLES. 3) You can select any lambda you have created to give it a specific role. In this tutorial, we will select the following to give it access to AWS Rekognition. 4) Then click on ATTACH POLICIES 5) Search for rekognition 6) Select AmazonRekognitionFUllAccess 7) Click on ATTACH POLICY *Note: You can have multiple policies attached* Time to Test 1) Go back to your lambda function. 2) In the top right corner, select the dropdown that says "Select a test event" 3) Then select "Configure test events" 4) Give a name to your event 5) Then enter the following JSON object ` Where "thisdot.png" is the name of your image inside of your S3 bucket. 6) Click CREATE 7) On Your top right corner, you will see the TEST button. Click on it. 8) You should see a green box. Click on expand details. 9) Take a look at the response object. As you can see, it has found our text inside of the image. Awesome!!!, right? Now, let's jump to compare faces. Imagine you want to see if one person appears in the same picture. Rekognition can do this. Imagine all the possibilities! 1) Download these 2 images. Source Image https://thepracticaldev.s3.amazonaws.com/i/ktpt1lx1ubzt3ilupph7.jpg Target Image https://thepracticaldev.s3.amazonaws.com/i/p5j8z6hiey8z8rkspms6.jpg 2) Upload them to S3, following the steps previously mentioned. 3) Go back to your lambda, and create a new test, or edit the existing test. Your test will look like this: ` 4) Then, we are going to modify our lambda code to be able to compare faces ` 5) Look at the Execution results, and analyze the data. Tell me what you think about this tutorial on twitter or comment below!...
Oct 31, 2019
6 mins
Let's innovate together!
We're ready to be your trusted technical partners in your digital innovation journey.
Whether it's modernization or custom software solutions, our team of experts can guide you through best practices and how to build scalable, performant software that lasts.