Deploy a Vue Static Front-End to AWS
The Amazon Web Services (AWS) ecosystem is a massive field of over 200 services, capable of getting your projects up into the cloud in no time. To help introduce you to such a massive field, I want to show just how quickly you can deploy a static front-end using AWS.
Today, we will scaffold out a Vue project, and deploy it to AWS with a custom domain name, secured with SSL/TLS (HTTPS), and pushed to a content delivery network (CDN). This knowledge will help you start tinkering with the many of the services AWS has to offer.
Dependencies
To follow this guide, you will need:
- NodeJS and npm installed
- An AWS account
- A domain name
Why deploy to AWS?
Right off the bat, I want to say that deploying a static front-end to AWS is NOT the easiest way to deploy a static website! Here are a few tools that can get the job done a LOT more easily than how we will be doing it today.
- Vercel
- Netlify
- GitHub Pages
- Surge
- txti
- Many many more...
Even AWS has a solution to compete with the growing array of front-end deployment tools: AWS Amplify, which they describe as being the, "Fastest, easiest way to build mobile and web apps that scale".
We won't be using Amplify, or any of those other tools though. The goal of manually deploying to AWS is to give us a better understanding of the underlying AWS services.
ViteJS, our build tool
We can deploy any static front-end, so in this article, we will use ViteJS as our front-end tooling to generate a Vue front-end.
Scaffolding out a Vue application with Vite is as simple as running a single command, and following the prompts:
For npm: npm init @vitejs/app
For yarn: yarn create @vitejs/app
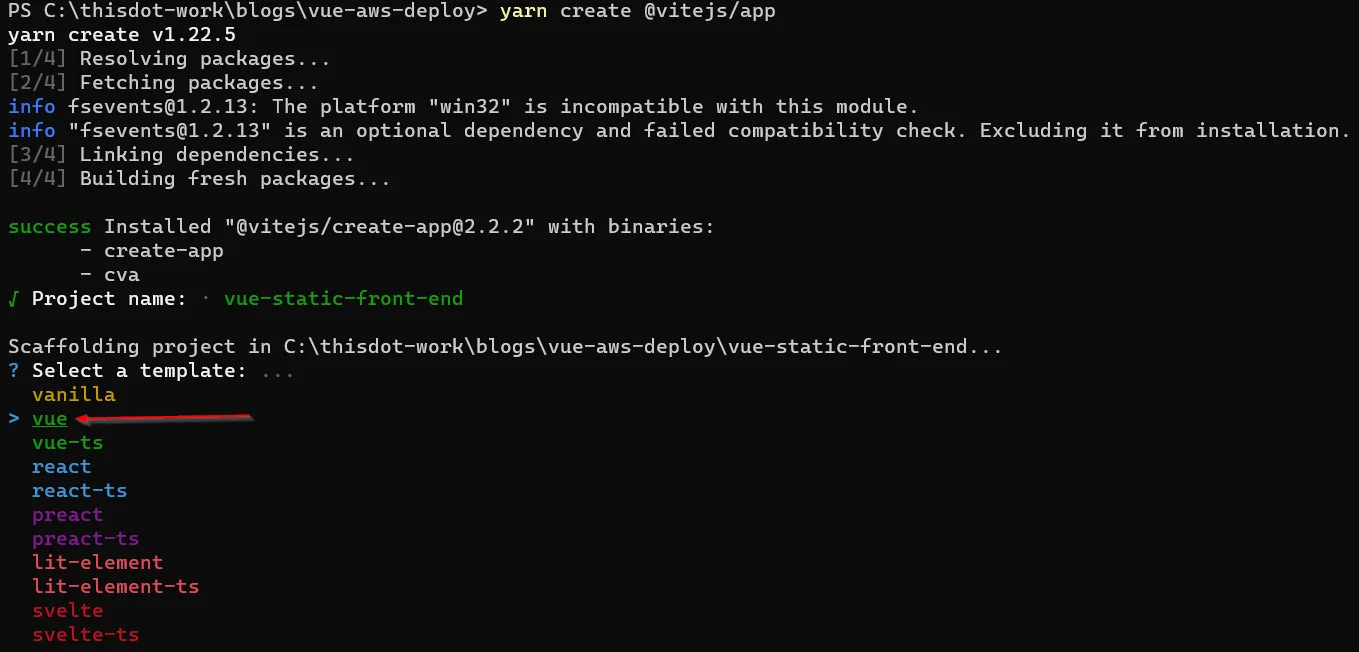
While Vite offers us the option to use many different front-ends, we will choose Vue.
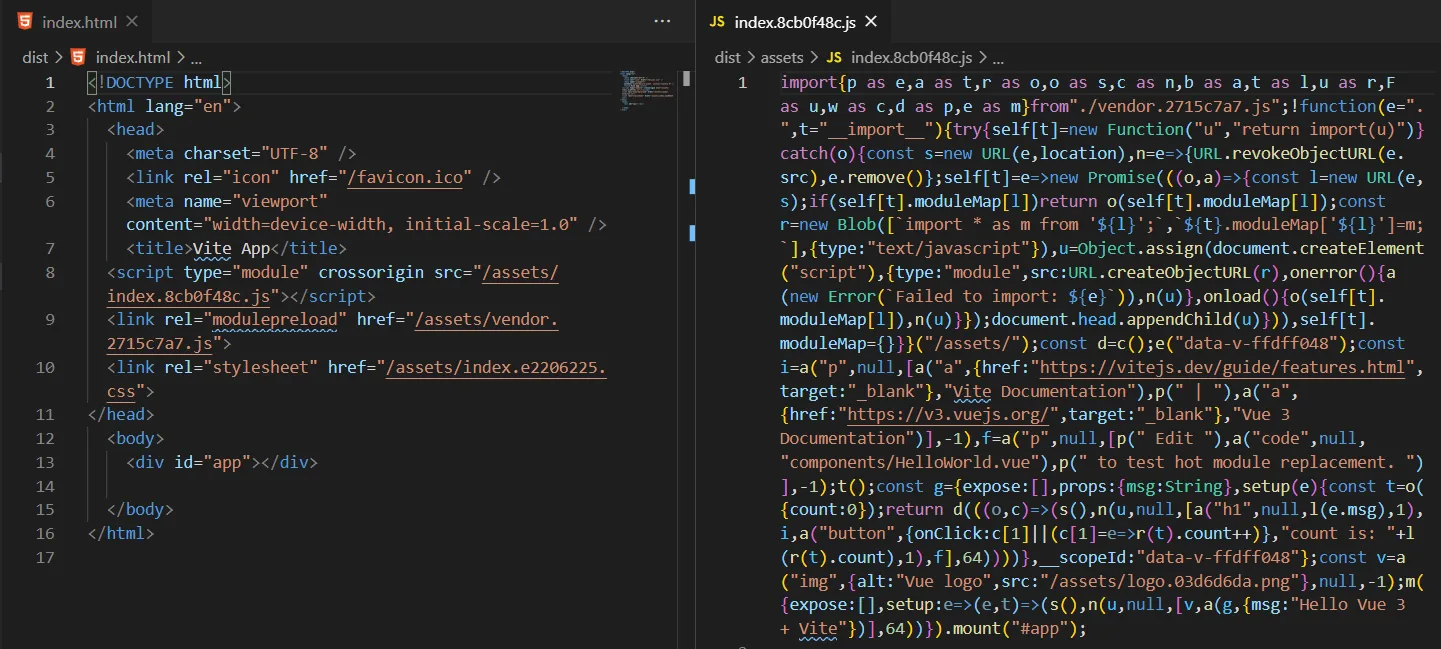
After running yarn create, cd into the created directory, and run yarn to install all of the dependencies, and then run yarn build.
After doing this, we will have a production static deployment bundle that we can deploy using AWS.
AWS Services
There are 4 AWS services that we will use to deploy our static build:
- Simple Storage Service (S3)
- CloudFront
- Amazon Certificate Manager
- Route 53
Each of these services will work in some way with each other to provide the full solution we need to deploy our static web app.
Simple Storage Service (S3)
Amazon S3 will be the workhorse of our deployment setup. Amazon describes their services as, "Object storage built to store and retrieve any amount of data from anywhere." We will be using S3 to store our deployment bundle in a cheap and scalable manner.
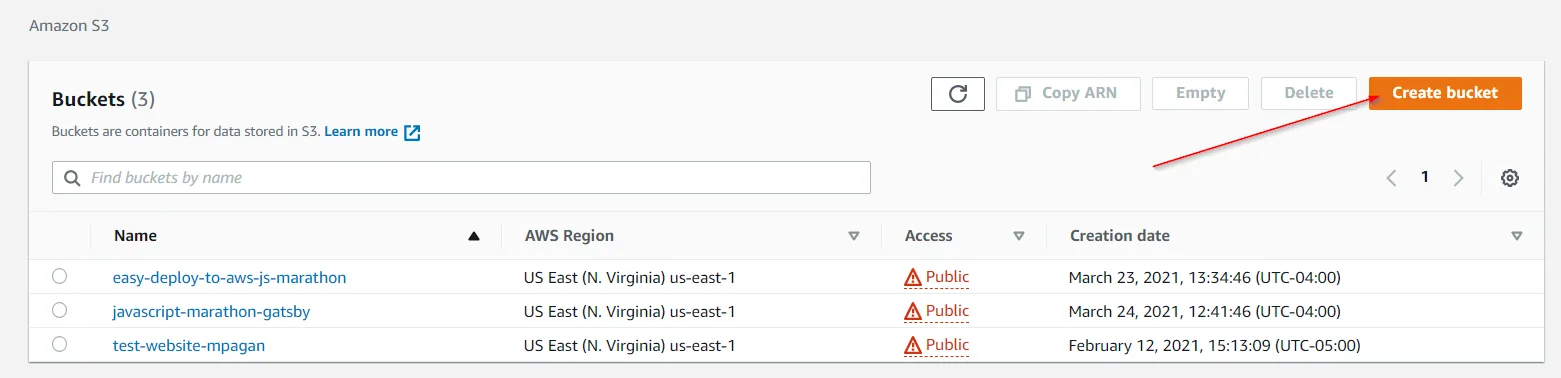
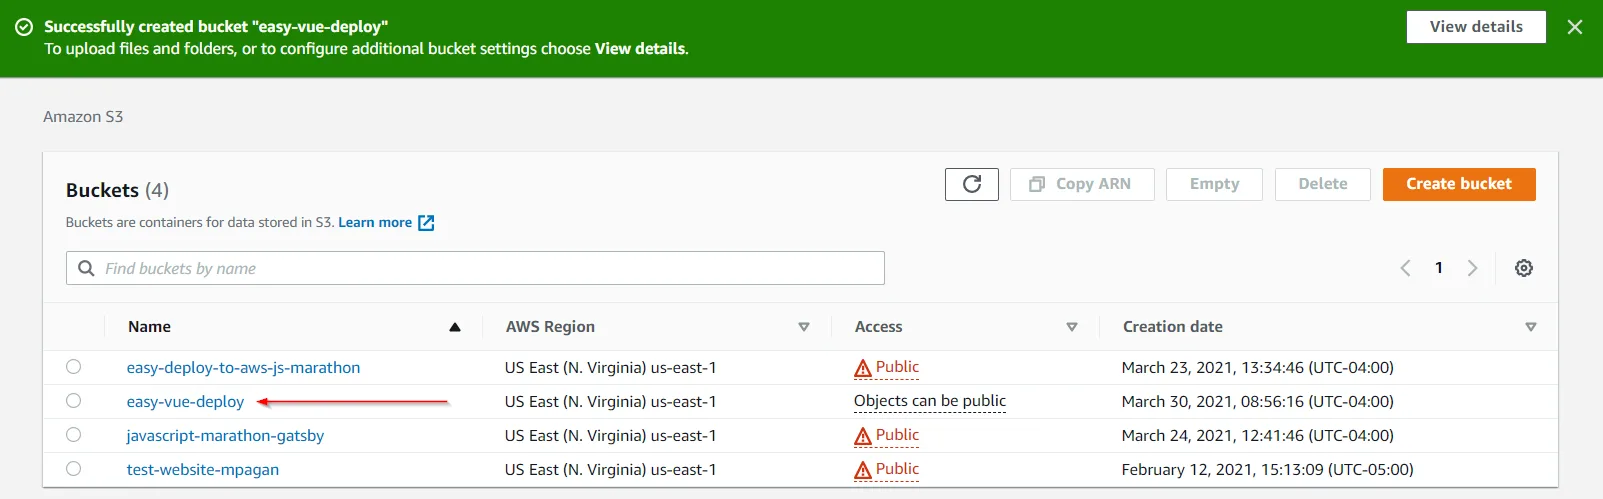
To deploy our bundle to S3, go to your AWS console, and load up the S3 service. From there, click on 'Create Bucket'.
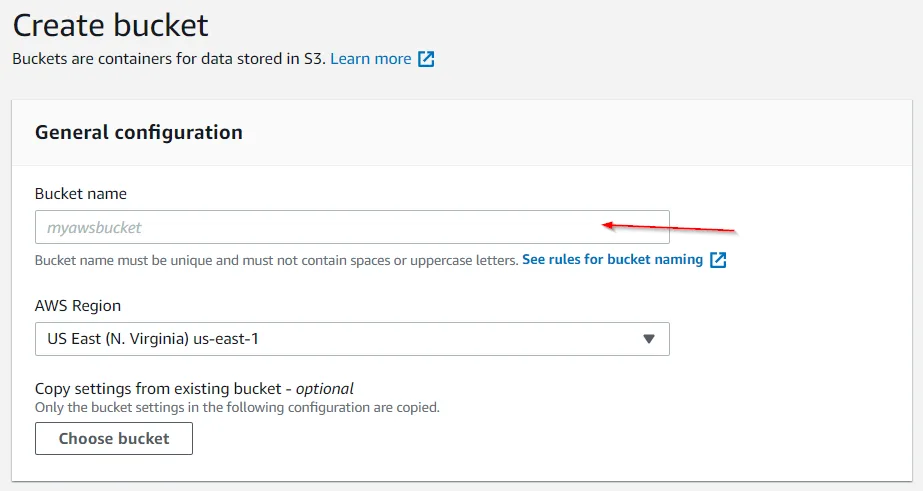
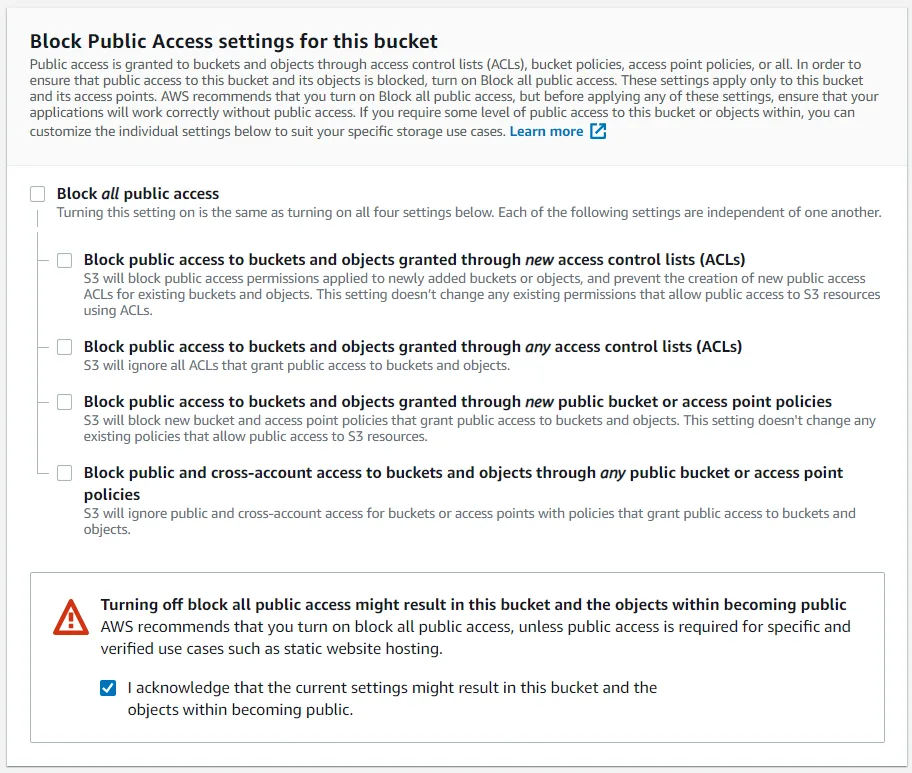
After that, give your bucket a name and assign it a region, ensure to unblock all public access to this bucket (we want the anyone on the web to be able to see our site), and then create the new bucket.
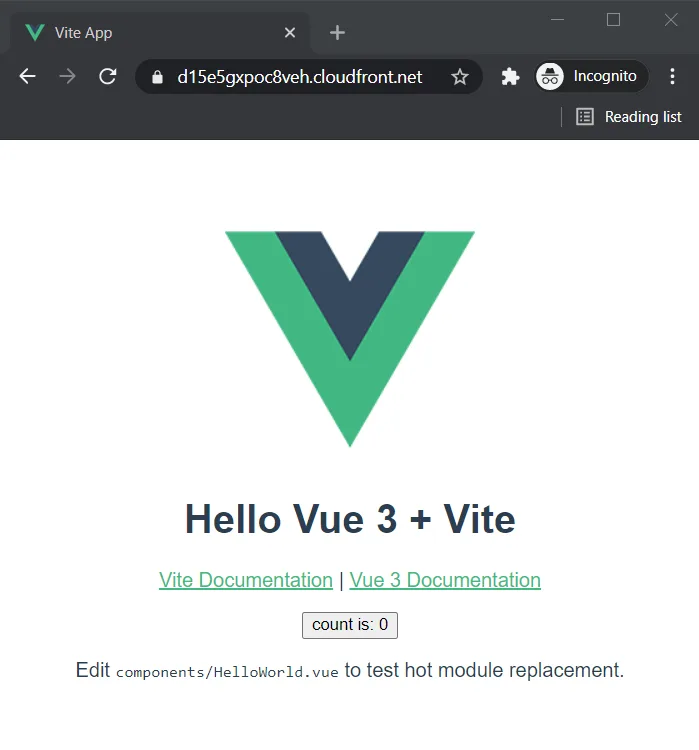
You will now have a new, empty bucket! Let's fill it with the production bundle ViteJS created for us earlier.
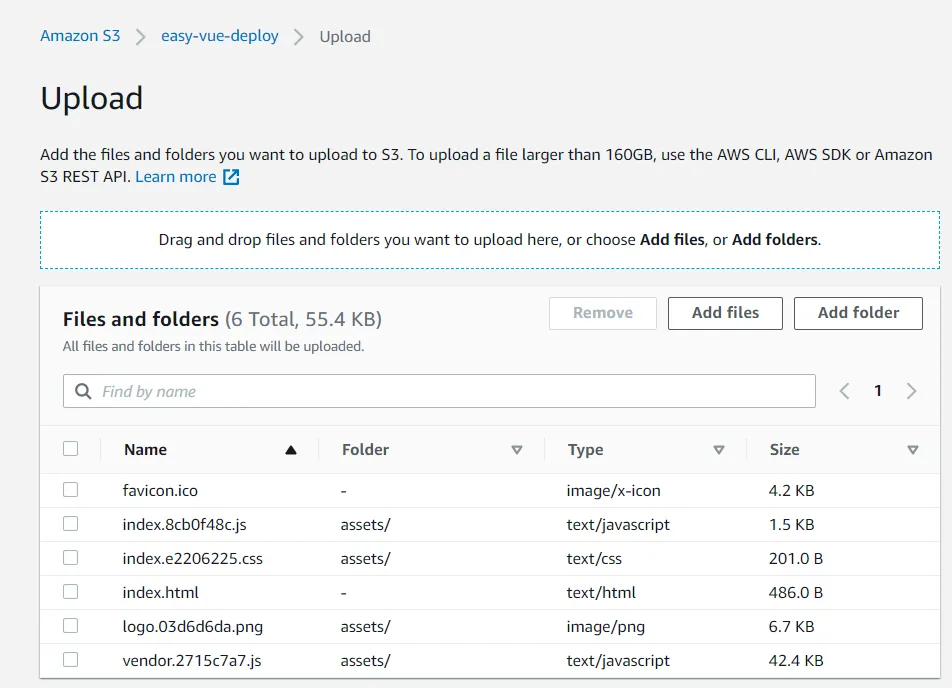
Select your bucket, click 'Upload', drag and drop all of the bundled files in the dist directory that ViteJS generated for us, and then upload all of them.
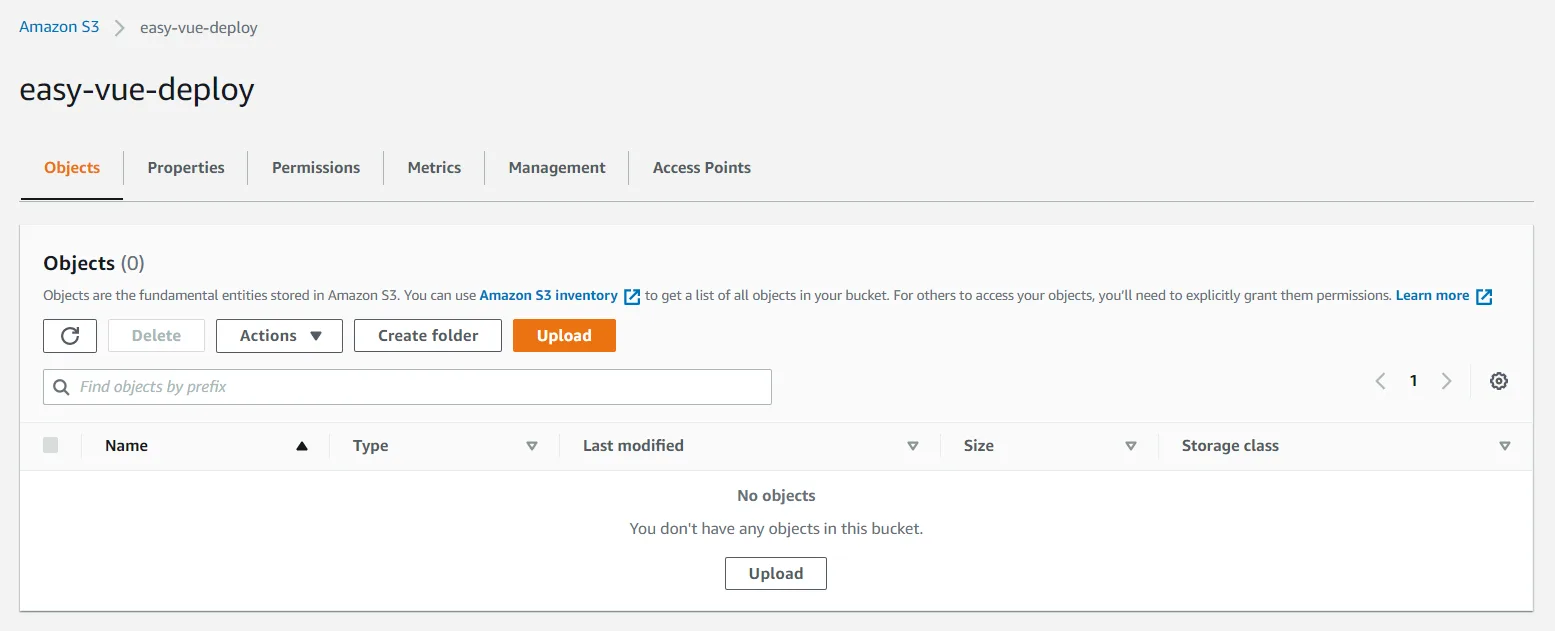
We now have content in our bucket. In order to allow the public to see this content, we need to enable static web hosting, and add a bucket policy to allow anyone to retrieve objects from our bucket.
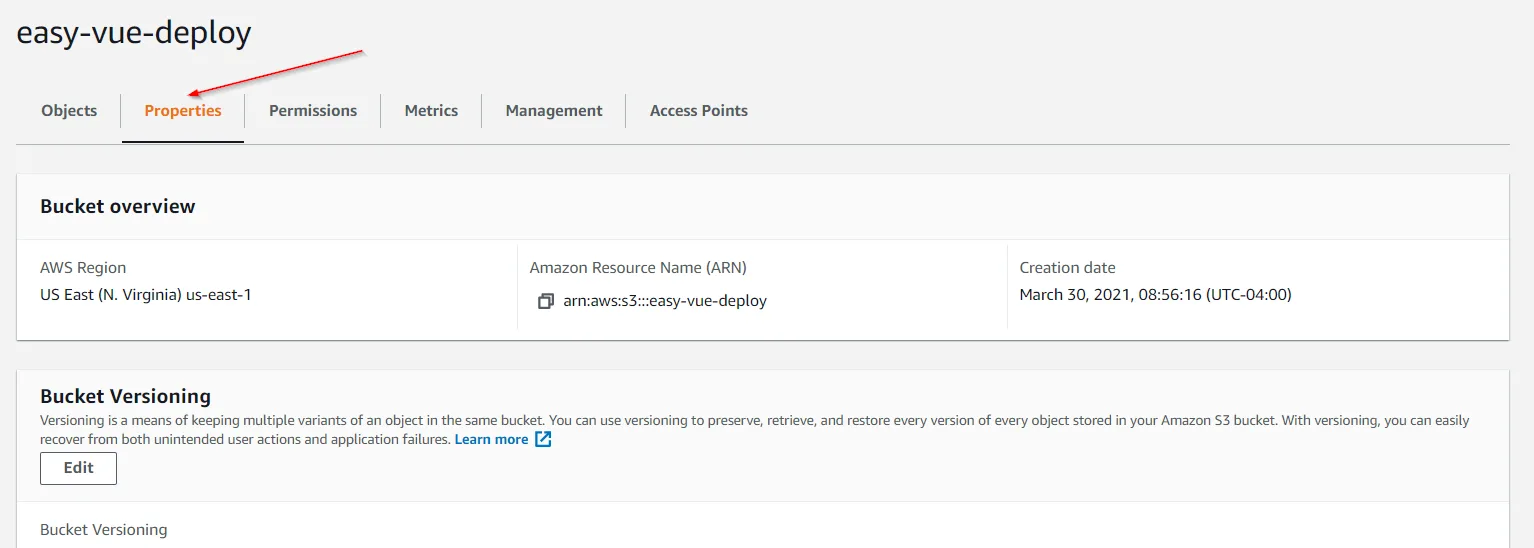
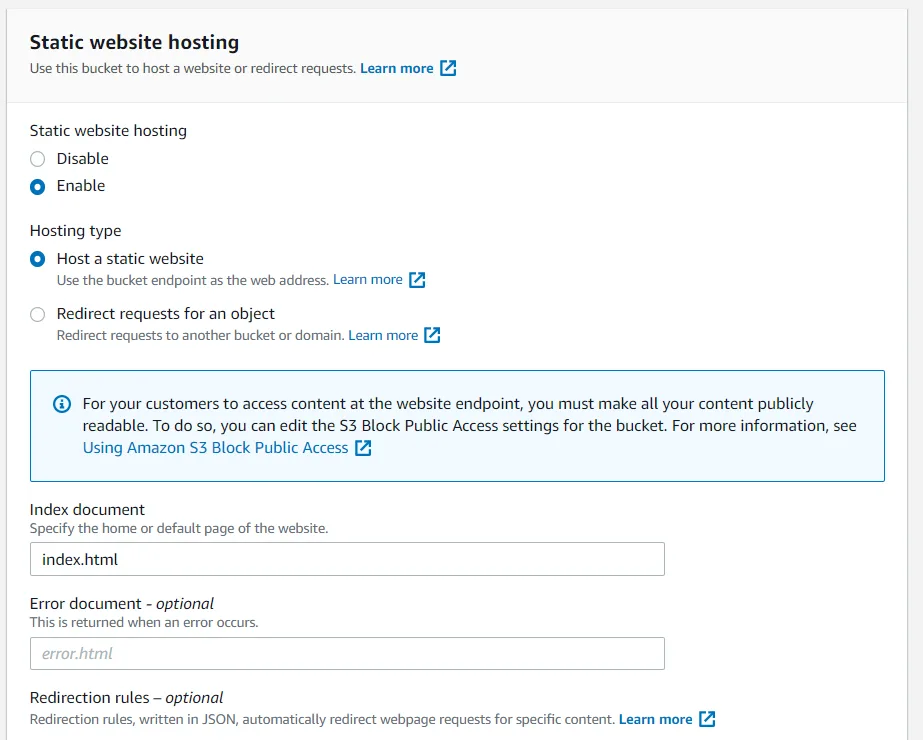
To enable static web hosting, go to your bucket's properties, and scroll all the way down to see the static hosting settings. Edit the settings and enable hosting, along with setting the index document to index.html.
To add the needed bucket policy, go to your bucket's permissions (instead of properties), and edit the bucket policy to include the following:
{
  "Id": "Policy1617109982386",
  "Version": "2012-10-17",
  "Statement": [
    {
      "Sid": "Stmt1617109981105",
      "Action": [
        "s3:GetObject"
      ],
      "Effect": "Allow",
      "Resource": "arn:aws:s3:::easy-vue-deploy/*",
      "Principal": "*"
    }
  ]
}
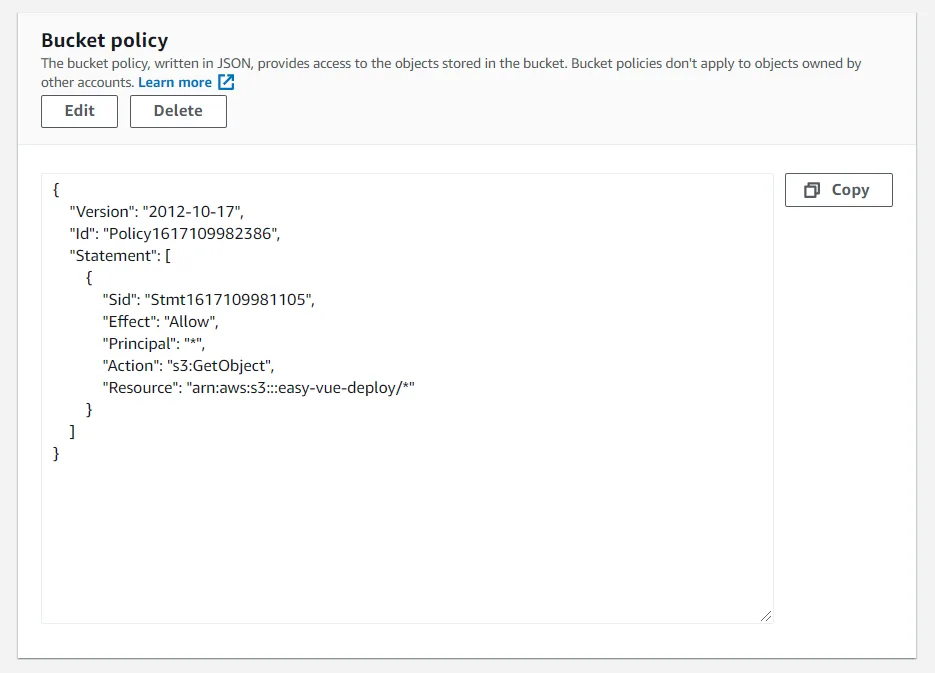
You'll need to edit the "Resource" line to use your bucket name. This example uses the bucket name of easy-vue-deploy.
After all of this is done, you will see an endpoint that you can click on to test your deployment. Just go to your bucket properties, and scroll down.
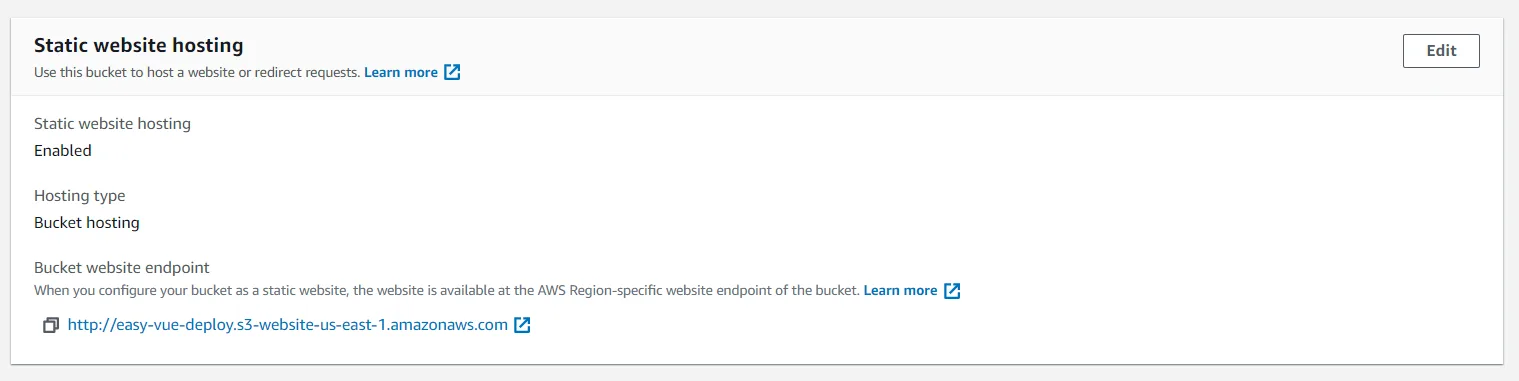

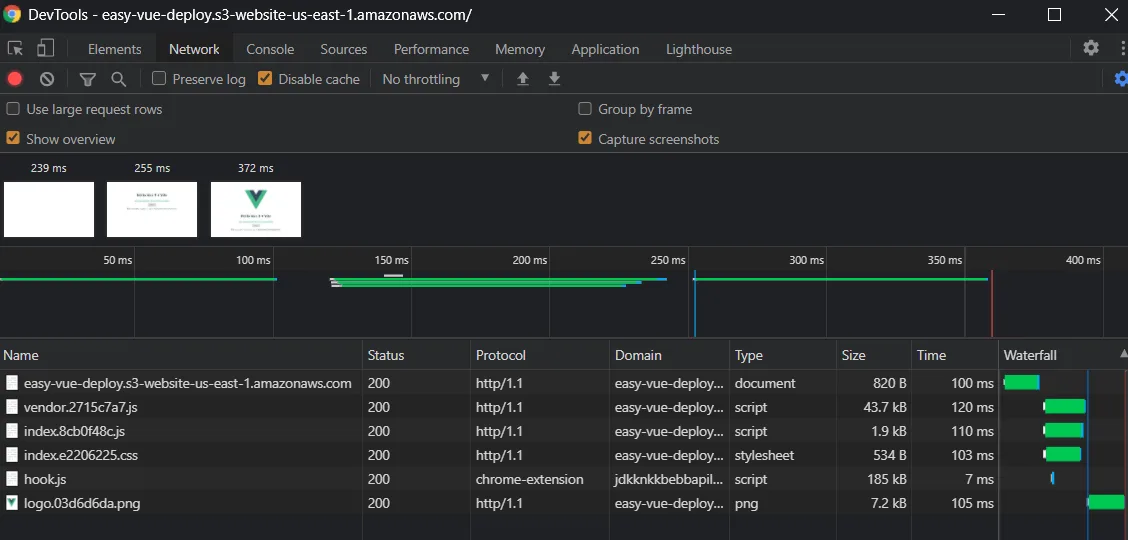
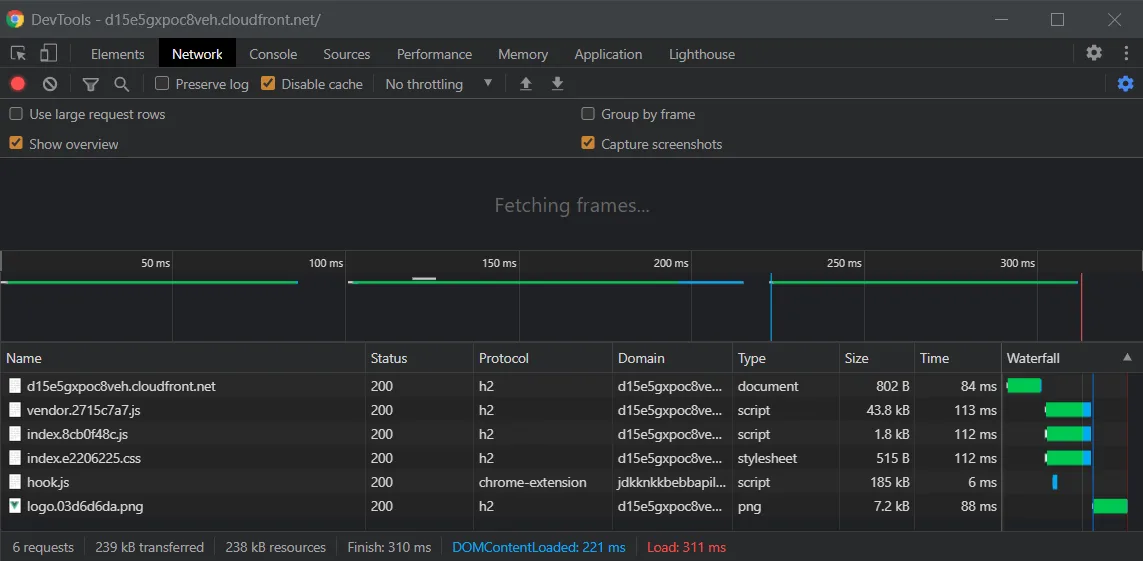
We have now successfully deployed a ViteJS bundled to the web! You'll notice that this endpoint isn't protected via HTTPS, nor is it as fast as we want it to be. If you peek at the DevTools, you'll see that we are using http/1.1 as our protocol, and we are having a load time of around 360ms on average.
We are going to fix these things by serving our content through a CDN.
CloudFront
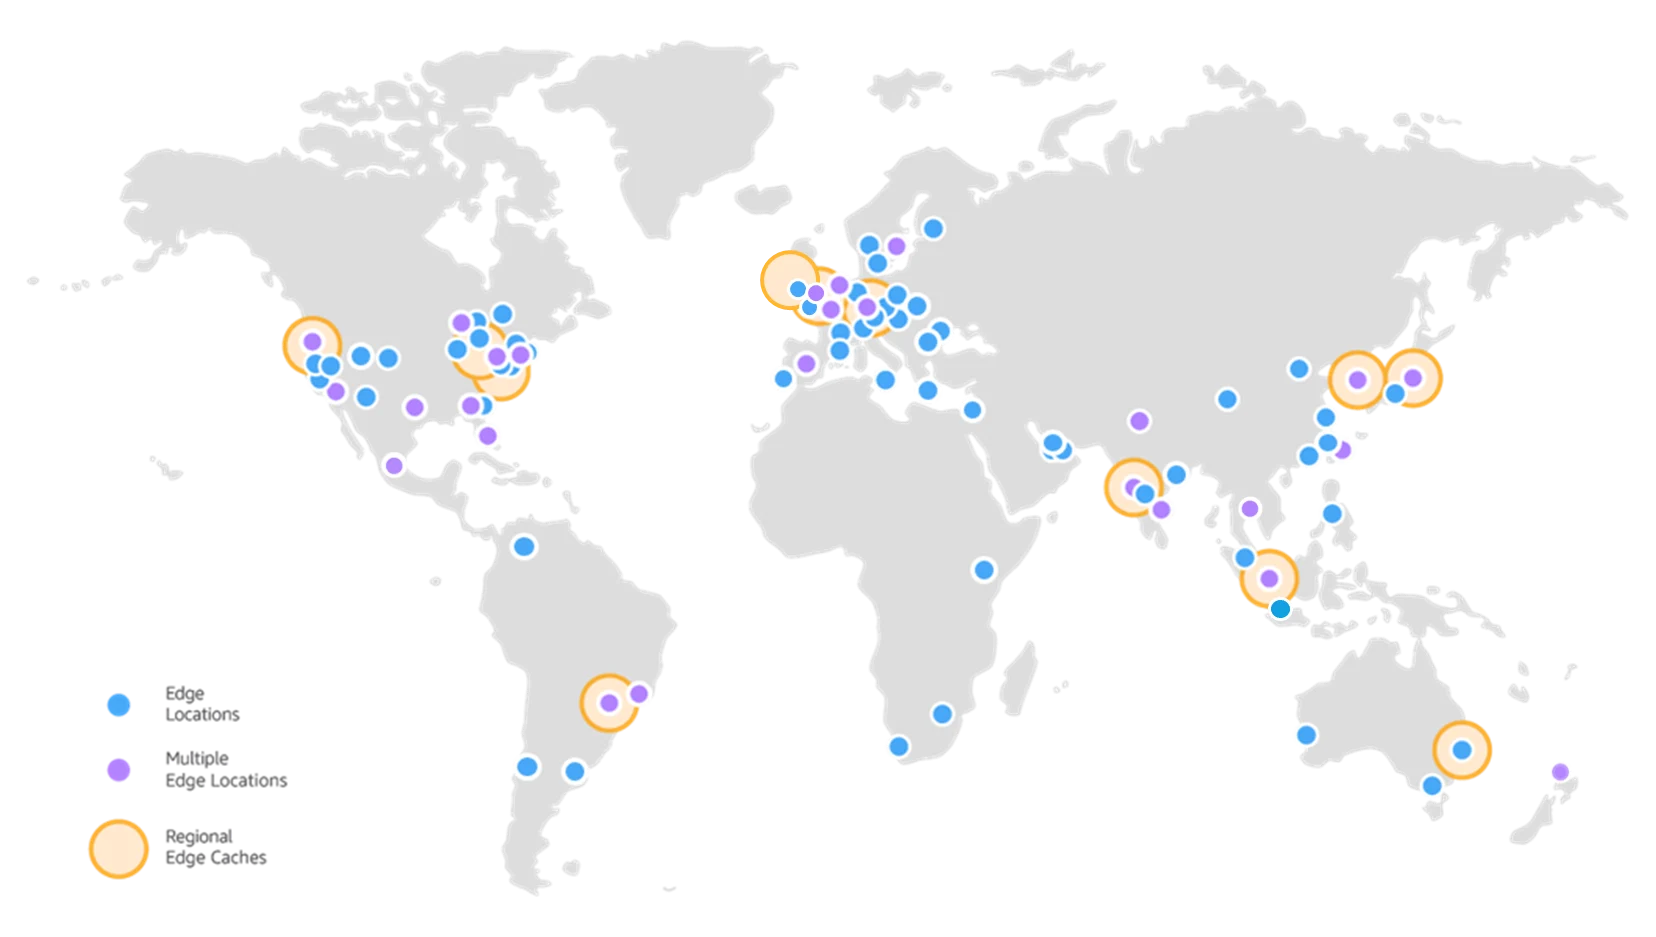
CloudFront is AWS's global content delivery network. It can work seamlessly with any AWS origin (like our S3 bucket we made earlier) to cache content in over 225+ Points of Presence, enabling a SUPER fast user experience. Let's enable this for our deployment.
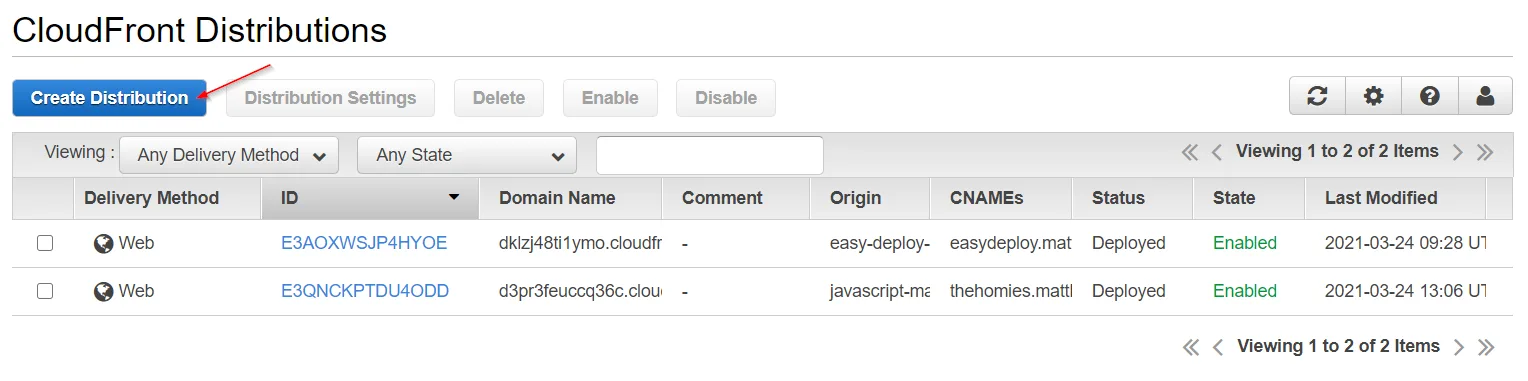
Go to the CloudFront service, and get started by creating a distribution.
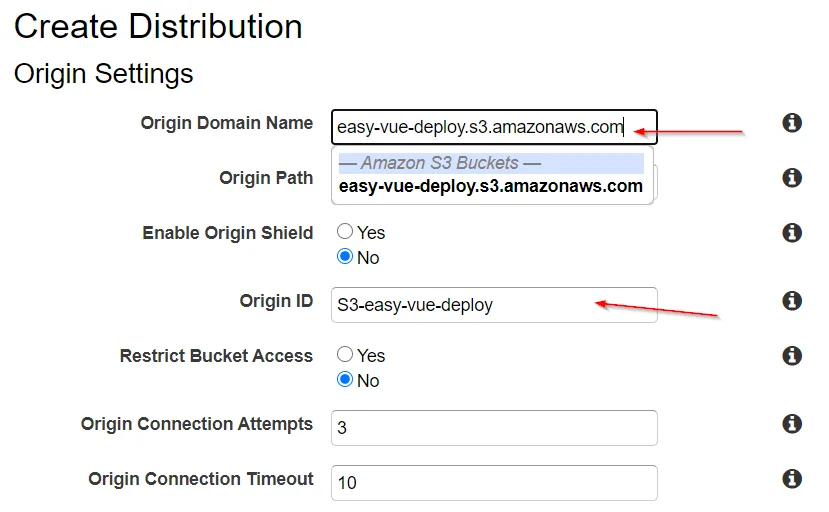
We are going to populate X things:
- Origin Domain Name
- Origin ID
- Viewer Protocol Policy
- Default Root Object
Selecting the Origin Domain Name should display a dropdown list of available AWS origins, one of them being the S3 bucket we made. Select that.
Selecting our Origin Domain Name will auto-populate the Origin ID.
Change the Viewer Protocol Policy to redirect HTTP to HTTPS.

Finally, set the Default Root Object to be index.html, and create the distribution. This process takes a few minutes to complete as I imagine AWS is populating its edge locations with our site's content.
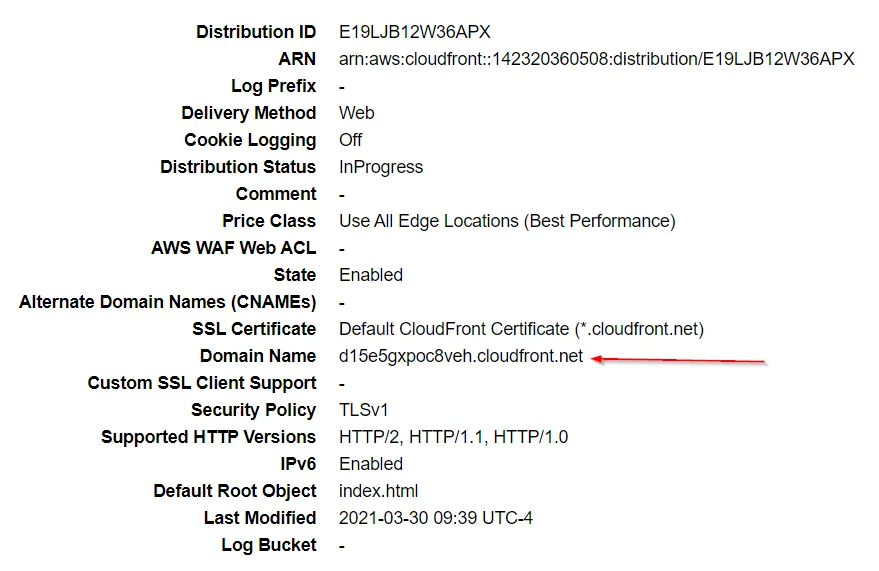
After the distribution is created, we can test out the deployment by selecting our distribution and going to the CloudFront domain name it generated for us.
We can see that the site is protected by HTTPS, and even see a boost to our site's performance in the DevTools with the site loading about 50ms faster for me, along with using the http/2 protocol.
Now, in order to grant our site a custom domain, we will need 2 more services: Amazon Certificate Manager, and Route 53.
Amazon Certificate Manager (ACM)
If you're familiar with working on Linux servers and using Certbot, then ACM is going to be a breeze. This service is what we will use to provision an SSL/TLS certificate for our custom domain name.
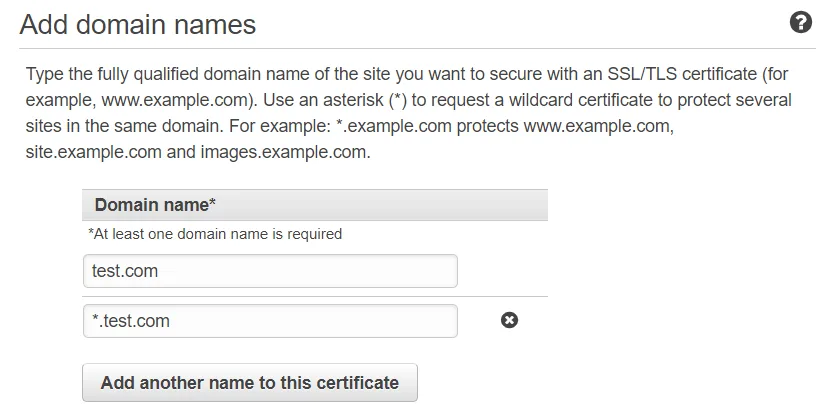
Go to the ACM service, request a public certificate, and add the domain names to the request. If you want to create a certificate valid for all subdomains, add another domain name to the certificate, and prefix your domain with an asterisk *.
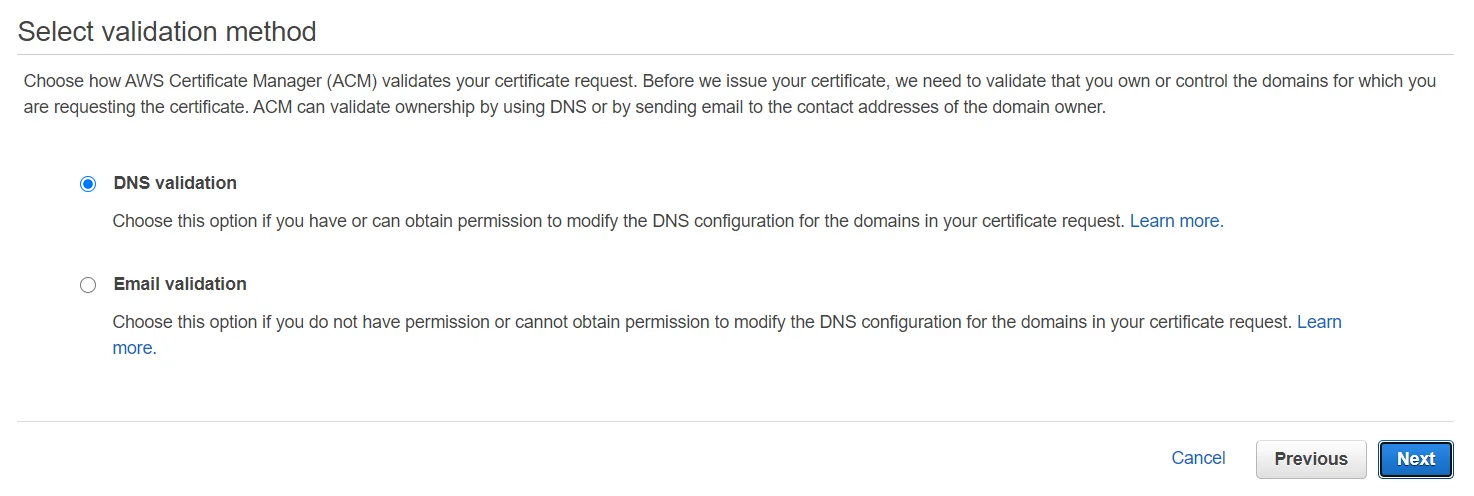
After this, we'll need to validate that we own the domain we're requesting a certificate for. We can choose DNS or Email validation. For this example, let's use DNS validation.
After that, skip adding tags for now (tags can help you organize AWS resources when you have a lot of them), and finish the request for the certificate to set the request in progress. You'll be greeted with a screen asking you to add a CNAME record in the DNS configuration of your domain.
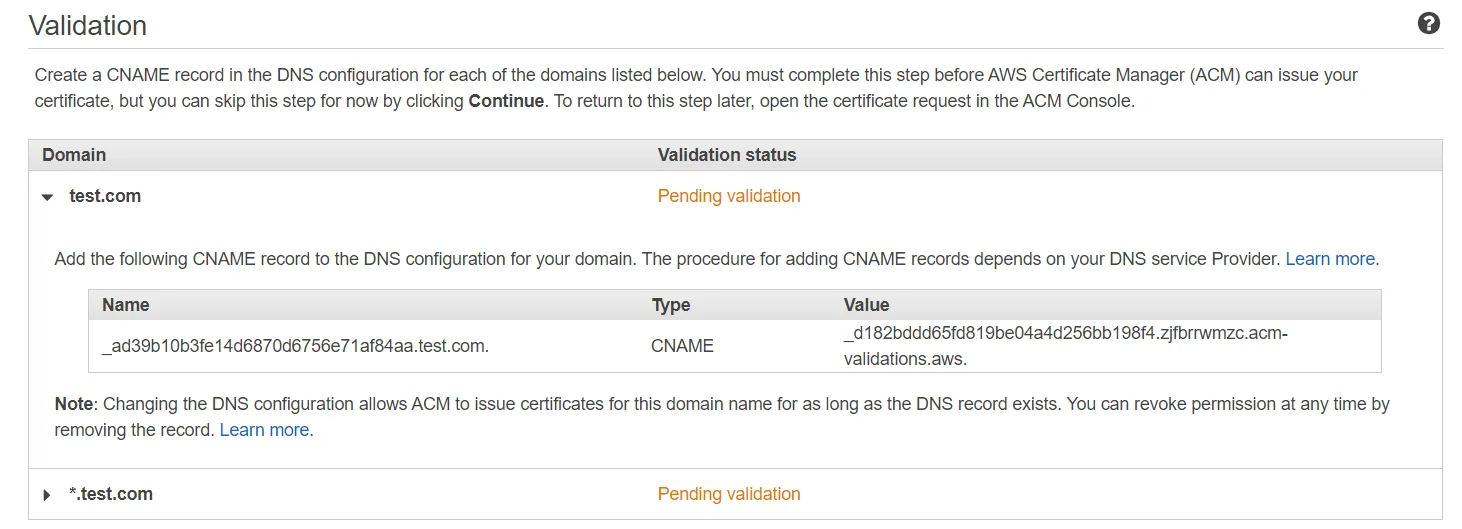
We can add our CNAME records in Route 53.
Route 53
AWS describes Route 53 as, "a reliable and cost-effective way to route end users to Internet applications." What we'll do in Route 53 depends on where you bought your domain name.
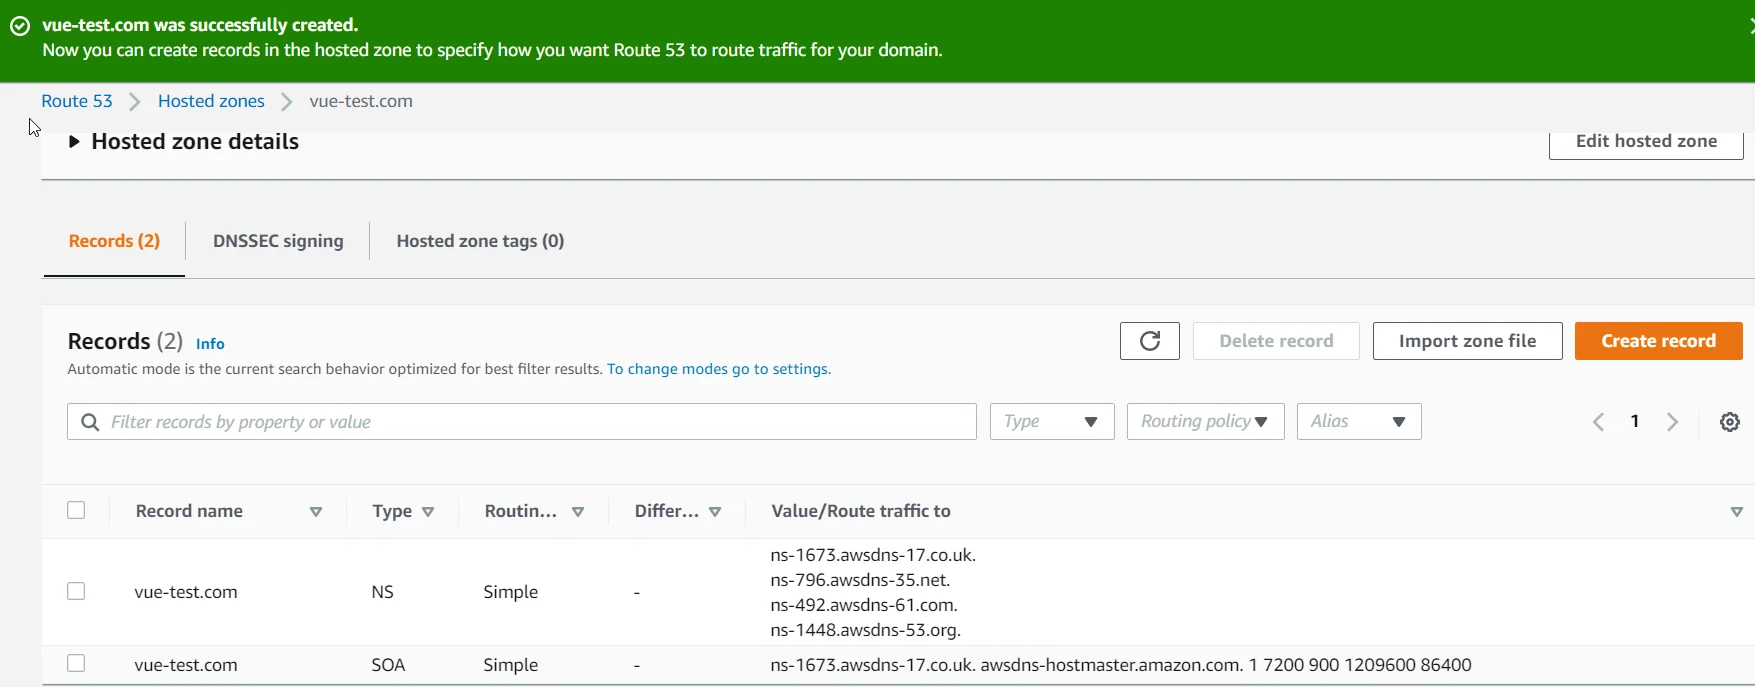
If you bought your domain name from outside of Route 53, you'll need to create a hosted zone in Route 53 to create nameservers you can point your domain to. I bought my domain, matthewpagan.com, from GoDaddy for example, so I needed to create a hosted zone, and then edit my GoDaddy nameservers to point to the nameservers generated by Route 53.
If you need to create a hosted zone, go to the Route 53 service, create a hosted zone (the only information you'll need is your domain name), take note of the nameservers generated, and switch your nameservers at your domain registrar.
After you've either created your hosted zone, or bought your domain name through Route 53, you can then create a CNAME record with the information provided by Amazon Certificate Manager (ACM) to verify that you control your domain. This takes a few minutes after you create the CNAME record.
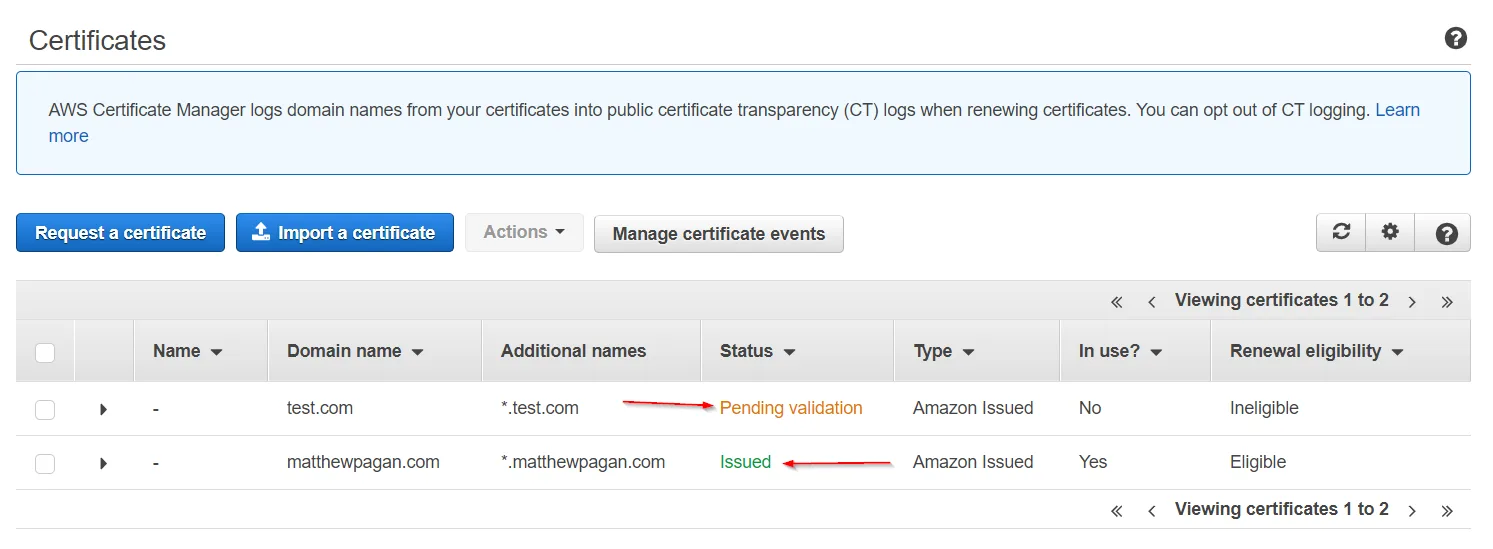
To check the status of the validation, go to ACM, and look at the status of your certificate.
When the certificate is successfully issued, the status of your certificate should change from 'Pending Validation' to 'Issued'
Add domain to CloudFront distribution
Once we have a valid certificate for our domain name, we are going to apply that domain/sub-domain to CloudFront. Go to the service, select your distribution, and edit the settings.
Set the Alternate Domain Names to your desired domain/sub-domain that you recently acquired the valid SSL/TLS certificate for, select 'Custom SSL Certificate' instead of the default CloudFront certificate, select your certificate from the generated dropdown, and save these changes.

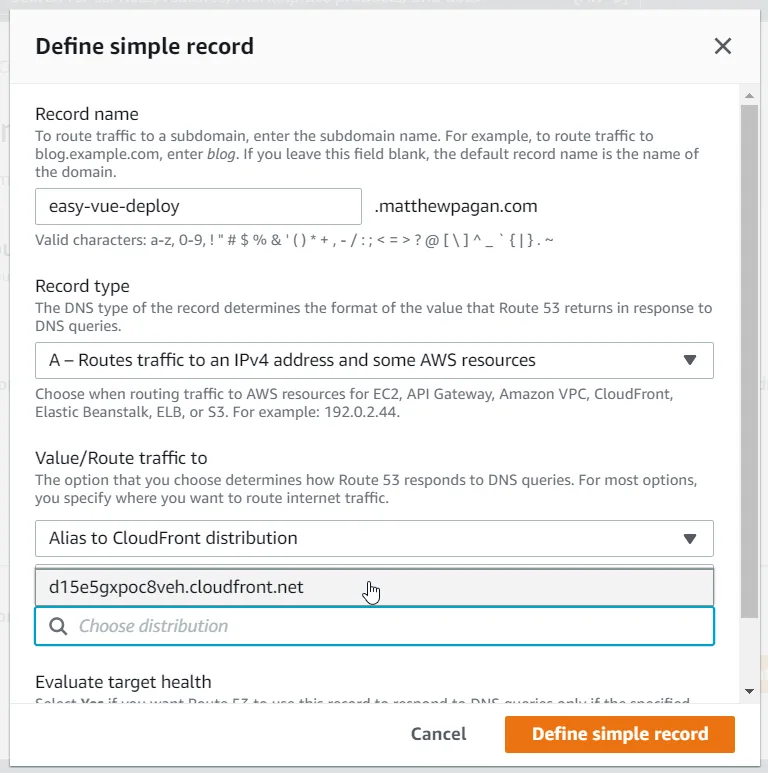
Create A record in CloudFront pointing to CloudFront CNAME
Now, we can point to that CloudFront distribution in Route 53. Create an A record in Route 53 for your domain/sub-domain, and point it to the CloudFront distribution. You'll know things are working because your distribution should display itself when you go to select a distribution to point to.
Conclusion
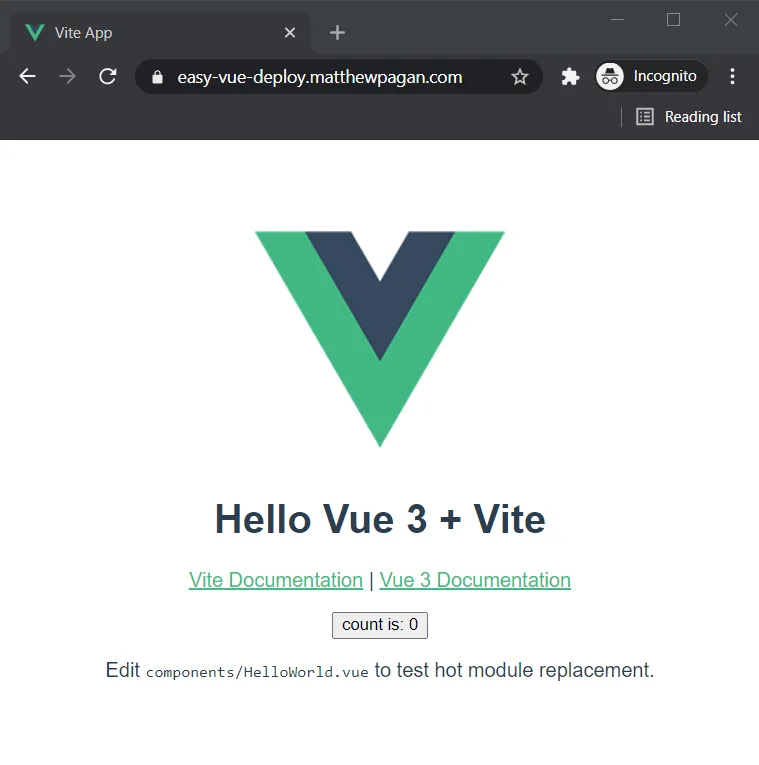
After following the above steps, we now have a deployed Vue static front-end, protected by SSL/TLS, using a custom domain name, backed by a CDN, and hosted by AWS!
While there certainly are easier ways to deploy static content online, by going through and manually setting up AWS services yourself, you should have a deeper understanding of the moving parts. You may even be able to move into the deep end, and try deploying some back-end solutions for your front-end to consume!