State Machines using XState and Svelte (Part 1)
In this blog post, we'll learn about state machines, and how to implement them in Svelte with XState.
What's a State Machine
- A state machine is a representation- an abstraction of the behavior of a system.
- A Finite State Machine (FSM) is a State machine that can have only one state at a given time, and has a finite number of states.
- Other properties for FSMs are having an initial state, and a finite number of events.
- Given a state and an event, a transition function will determine what the next state is.
What's XState
XState is a library that will allow us to create and interpret FSMs and statecharts. Its core is framework agnostic, and there are utilities for many of them.
Our first state machine with Svelte
We'll start from a basic component, add features to it, and then we'll create a state machine that will have the same behavior. Let's create a new project.
npm init vite@latest

✔ Project name: · xstate-svelte
✔ Select a framework: · svelte
✔ Select a variant: · svelte-ts

cd xstate-svelte
npm install //use the package manager you prefer
npm run dev
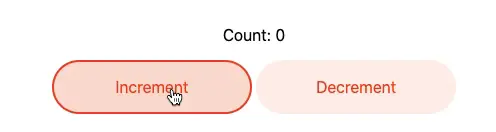
Our project contains a Counter component that looks like the one below. We'll start from here to model our state machine later.
<!-- Counter.svelte -->
<script lang="ts">
  let count: number = 0
  const increment = () => {
    count += 1
  }
</script>

<button on:click={increment}>
  Clicks: {count}
</button>

<style>
  button {
    font-family: inherit;
    font-size: inherit;
    padding: 1em 2em;
    color: #ff3e00;
    background-color: rgba(255, 62, 0, 0.1);
    border-radius: 2em;
    border: 2px solid rgba(255, 62, 0, 0);
    outline: none;
    width: 200px;
    font-variant-numeric: tabular-nums;
    cursor: pointer;
  }

  button:focus {
    border: 2px solid #ff3e00;
  }

  button:active {
    background-color: rgba(255, 62, 0, 0.2);
  }
</style>
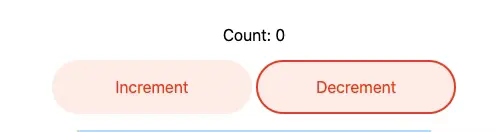
Our component is a button that can increment a count when clicking it. Let's add some functionality to it like adding the possibility to decrement the count as well.
<!-- Counter.svelte -->
<script lang="ts">
  let count: number = 0
  const increment = () => {
    count += 1
  }
  const decrement = () => {
    count -= 1
  }
</script>

<p>Count: {count}</p>
<button on:click={increment}>
  Increment
</button>
<button on:click={decrement}>
  Decrement
</button>

<!-- ... -->
Our component is working, but let's say we would like to avoid reaching a count below 0 or above 10, we would have to add a guard to avoid calling the increment or decrement functions when the minimum or maximum values are reached.
<!-- Counter.svelte -->
<!-- ... -->
<button
  on:click={() => {
    if (count < 10) {
      increment();
    }
  }}
>
  Increment
</button>
<button
  on:click={() => {
    if (count > 0) {
      decrement();
    }
  }}
>

<!-- ... -->
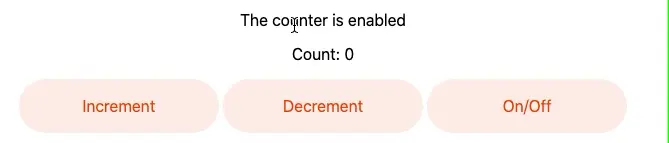
Finally, let's add a button to turn the counter on and off, and enable or disable changing the count.
<!-- Counter.svelte -->
<script lang="ts">
  let count: number = 0;
  let active: boolean = true
  const increment = () => {
    count += 1;
  };
  const decrement = () => {
    count -= 1;
  };
  const toggleActive = () => {
    active = !active
  };
</script>
<p>The counter is {active ? "enabled": "disabled"}</p>
<p>Count: {count}</p>
<button
  on:click={() => {
    if (active && count < 10) {
      increment();
    }
  }}
>
  Increment
</button>
<button
  on:click={() => {
    if (active && count > 0) {
      decrement();
    }
  }}
>
  Decrement
</button>

<button
  on:click={toggleActive}
>
  On/Off
</button>

<!-- ... -->
Now, it's finally time to recreate this same component but using XState.
First, we'll need to install the required dependencies.
npm i xstate @xstate/svelte --save
Before we dive into the code, let's think about our state machine. If we could define the properties of it, it would look something like this.
- possible states: enabled - disabled
- possible events: increment-decrement - enable/disable
- initial state: enabled
- guards: max value, min value
- context: in this case, the count value
If we start expressing this as an object, we could do something like:
{
	// initial state,
	initial: enabled
	// possible states (StateNodes)
	states:{
		enabled: {
		},
		disabled: {
		}
	},
}
Each key inside our states object will represent a StateNode with its configuration.
To add the events, we will use an object too, and they can be declared inside of a specific state, or at the root of the configuration object if it's global.
In our example:
{
	initial: enabled
	states:{
		enabled: {
			on: {
				increment: { // do something },
				decrement: { // do something },
				toggle: { // do something },
			}
		},
		disabled: {
			toggle: { // do something },
		}
	},
}
XState initializes a state machine with an object similar to this. We will change our Counter component to implement it. Starting from the original component to the final result.
<!-- Counter.svelte -->
<script lang="ts">
  import { createMachine, assign } from 'xstate';
  import { useMachine } from '@xstate/svelte';

  const enum States {
    Enabled = 'Enabled',
  }

  const enum Events {
    Increment = 'Increment',
  }

  const increment = (ctx) => ctx.count + 1;

  const counterMachine = createMachine({
    initial: States.Enabled,
    context: {
      count: 0,
    },
    states: {
      [States.Enabled]: {
        on: {
          [Events.Increment]: {
            actions: assign({ count: increment }),
          },
        },
      },
    },
  });

  const { state, send } = useMachine(counterMachine);
</script>

<button on:click={() => send(Events.Increment)}>
  Clicks: {$state.context.count}
</button>
First, we define the states, and events that our state machines will have and respond to:
Our initial counter had only one state, and one possible event.
Then, we define a function that will respond to that event, taking the state machine context, and adding 1 to the context count.
Next, we use the @xstate/svelte method useMachine that will return the state of the machine, and a method to send events to it.
Note that state is a Svelte store that you can subscribe to, to get the current state of the machine using the $ prefix.
In this example, $state.context.count is updated each time Events.Increment is sent.
To add the decrement functionality, we just need to add a new event and the corresponding handler.
<!-- Counter.svelte -->
<script lang="ts">
  // ...

 const enum Events {
    Increment = 'Increment',
    Decrement = 'Decrement',
  }

  const increment = (ctx) => ctx.count + 1;
  const decrement = (ctx) => ctx.count - 1;

  const counterMachine = createMachine({
    initial: States.Enabled,
    context: {
      count: 0,
    },
    states: {
      [States.Enabled]: {
        on: {
          [Events.Increment]: {
            actions: assign({ count: increment }),
          },
          [Events.Decrement]: {
            actions: assign({ count: decrement }),
          },
        },
      },
    },
  });

  const { state, send } = useMachine(counterMachine);
</script>

<p>Count: {$state.context.count}</p>
<button on:click={() => send(Events.Increment)}>
  Increment
</button>
<button on:click={() => send(Events.Decrement)}>
  Decrement
</button>
To add guards to our events, we will need to set the cond property of the event handlers. If the conditions are met, then the actions are triggered.
<!-- Counter.svelte -->
<script lang="ts">
  // ...

  const counterMachine = createMachine({
    initial: States.Enabled,
    context: {
      count: 0,
    },
    states: {
      [States.Enabled]: {
        on: {
          [Events.Increment]: {
            actions: assign({ count: increment }),
            cond: (ctx) => ctx.count < 10,
          },
          [Events.Decrement]: {
            actions: assign({ count: decrement }),
            cond: (ctx) => ctx.count > 0,
          },
        },
      },
    },
  });

  const { state, send } = useMachine(counterMachine);
</script>

<!-- ... -->
One last part, and we are done. We are missing the enable/disable button. In this case, we will add an event and a new state.
<!-- Counter.svelte -->
<script lang="ts">
  // ...

  const enum States {
    Enabled = 'Enabled',
    Disabled = 'Disabled',
  }

  const enum Events {
    Increment = 'Increment',
    Decrement = 'Decrement',
    ToggleEnabled = 'ToggleEnabled',
  }

  const increment = (ctx) => ctx.count + 1;
  const decrement = (ctx) => ctx.count - 1;

  // Set state machine
  const counterMachine = createMachine({
    initial: States.Enabled,
    context: {
      count: 0,
    },
    states: {
      [States.Enabled]: {
        on: {
          [Events.Increment]: {
            actions: assign({ count: increment }),
            cond: (ctx) => ctx.count < 10,
          },
          [Events.Decrement]: {
            actions: assign({ count: decrement }),
            cond: (ctx) => ctx.count > 0,
          },
          [Events.ToggleEnabled]: States.Disabled
        },
      },
      [States.Disabled]: {
        on: {
          [Events.ToggleEnabled]: States.Enabled
        },
      },
    },
  });

  const { state, send } = useMachine(counterMachine);
</script>

<p>The counter is {$state.value === States.Enabled ? "enabled": "disabled"}</p>
<p>Count: {$state.context.count}</p>
<button on:click={() => send(Events.Increment)}> Increment </button>
<button on:click={() => send(Events.Decrement)}> Decrement </button>
<button on:click={() =

<!-- ... -->
We are now defining a new state Disabled that will only handle the toggle event that will change the state to Enabled. We do the opposite when the counter is on.
Let's focus on this line of the previous example
[Events.ToggleEnabled]: States.Enabled
The response to this event looks a lot different than the previous ones. In the example above, we're using the shorthand value when you only need to transition from one state to another.
It's equivalent to:
[Events.ToggleEnabled]: {
  target: States.Enabled,
}
The transition configuration object has the following signature:
interface TransitionConfig<TContext', TEvent'> {
cond?: Condition<TContext', TEvent'> // define a guard to this transition
actions?: Actions<TContext', TEvent'> // what actions to perform
in?: StateValue
internal?: boolean
target?: TransitionTarget<TContext', TEvent'> // the next State
meta?: Record<string, any>
description?: string
}
Statecharts
Statecharts are a visual representation of the states of a process.
The best part is that we don't need to change our code to see it in action.
Go to https://stately.ai/viz, and paste this part of the code.
import { createMachine, assign } from 'xstate';

const enum States {
    Enabled = 'Enabled',
    Disabled = 'Disabled',
  }

  const enum Events {
    Increment = 'Increment',
    Decrement = 'Decrement',
    ToggleEnabled = 'ToggleEnabled',
  }

  const increment = (ctx) => ctx.count + 1;
  const decrement = (ctx) => ctx.count - 1;

  // Set state machine
  const counterMachine = createMachine({
    initial: States.Enabled,
    context: {
      count: 0,
    },
    states: {
      [States.Enabled]: {
        on: {
          [Events.Increment]: {
            actions: assign({ count: increment }),
            cond: (ctx) => ctx.count < 10,
          },
          [Events.Decrement]: {
            actions: assign({ count: decrement }),
            cond: (ctx) => ctx.count > 0,
          },
          [Events.ToggleEnabled]: States.Disabled
        },
      },
      [States.Disabled]: {
        on: {
          [Events.ToggleEnabled]: States.Enabled
        },
      },
    },
  });
Next, click the Visualize button, and enjoy your statechart.
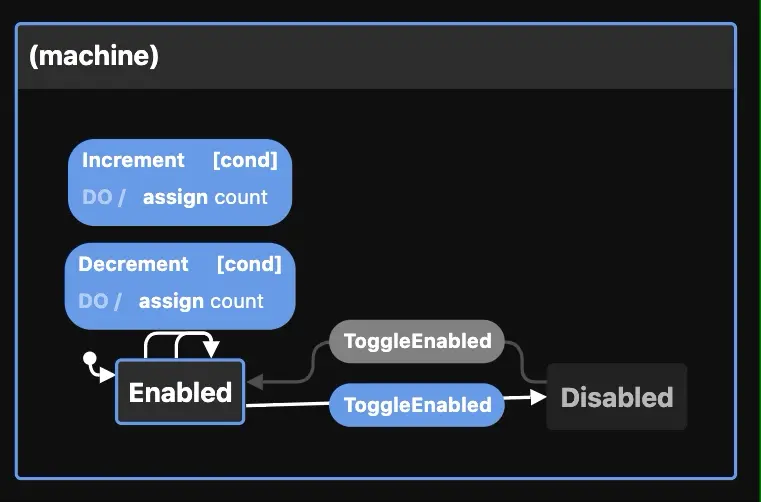
We can see that the toggleEnabled event changes from enabled to disabled and vice-versa. At the same time, the other events are available or not, depending on the current state (represented in light blue when available).
This is a nice way of visualizing our state machine, you could even start from here, and then move to your favorite framework. It may help spot issues and challenges early.
What's Next
In this intro to XState and Svelte, we learned how to transform a simple component to use state machines. In the next part of this series, we'll create a more complex app, and we'll explore the API in depth.
You can find the code from this tutorial in this repo.