Nowadays, nginx is probably the most popular web server used for web apps. It's lightweight, fast, and easy to configure. It's not always necessarily used as a web server though. Given that many frameworks today come with a built-in web server, nginx is sometimes used in front as a reverse proxy and/or a load balancer. In this blog post, we will show you how to deploy nginx as a reverse proxy on Heroku.
What Is a Reverse Proxy?
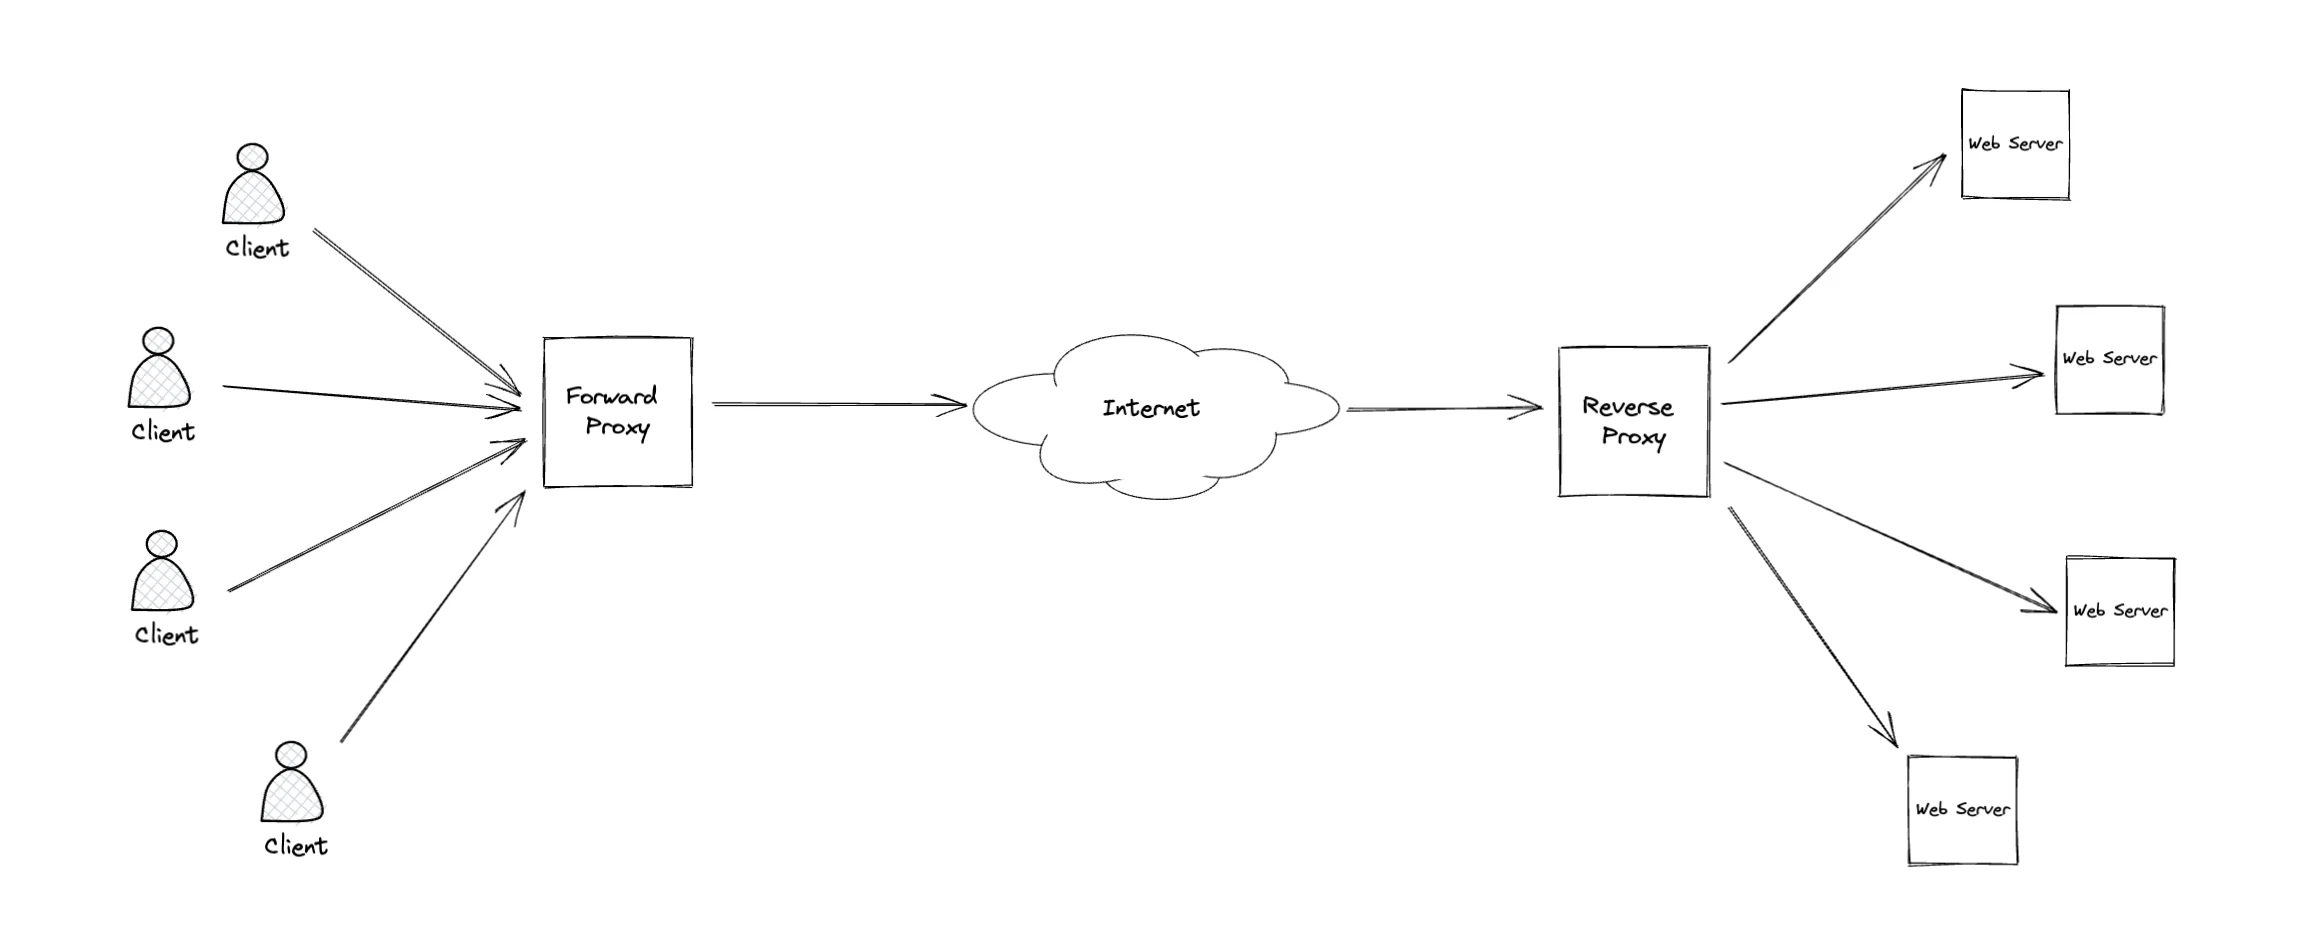
While a forward proxy, often called simply a proxy, sits in front of a group of clients and has the purpose of "hiding" those clients from the rest of the Internet, a reverse proxy sits in front of web servers and "hides" them from clients accessing them. From a client's perspective, the client is unaware that they are accessing a backend web server - they are only aware of the reverse proxy.
The below image shows both types of proxies and where they are placed:
Implementing a Reverse Proxy in Heroku
When it comes to setting up a reverse proxy in Heroku, the recommended way is to set it up using nginx. You might want to do this, for example, if you want to short-circuit an app and forward to somewhere else, or if you are not happy with the capabilities of the app's web server and want something more advanced. In either case, nginx is an excellent choice.
There are two options for setting up an nginx-based reverse proxy in Heroku- both of which we'll cover as part of this blog post. Picking the one to use depends on the type of the stack allocated to your Heroku app. Heroku supports either Ubuntu-based stacks (non-container), which allow you to use buildpacks to customize the build of your app, or container-based stacks, where you are responsible for building and deploying your app via Docker. Buildpacks execute before the app is started, and are typically used to install the required dependencies (such as Ruby or Node).
Let's start with the option that is more suitable for container stacks:
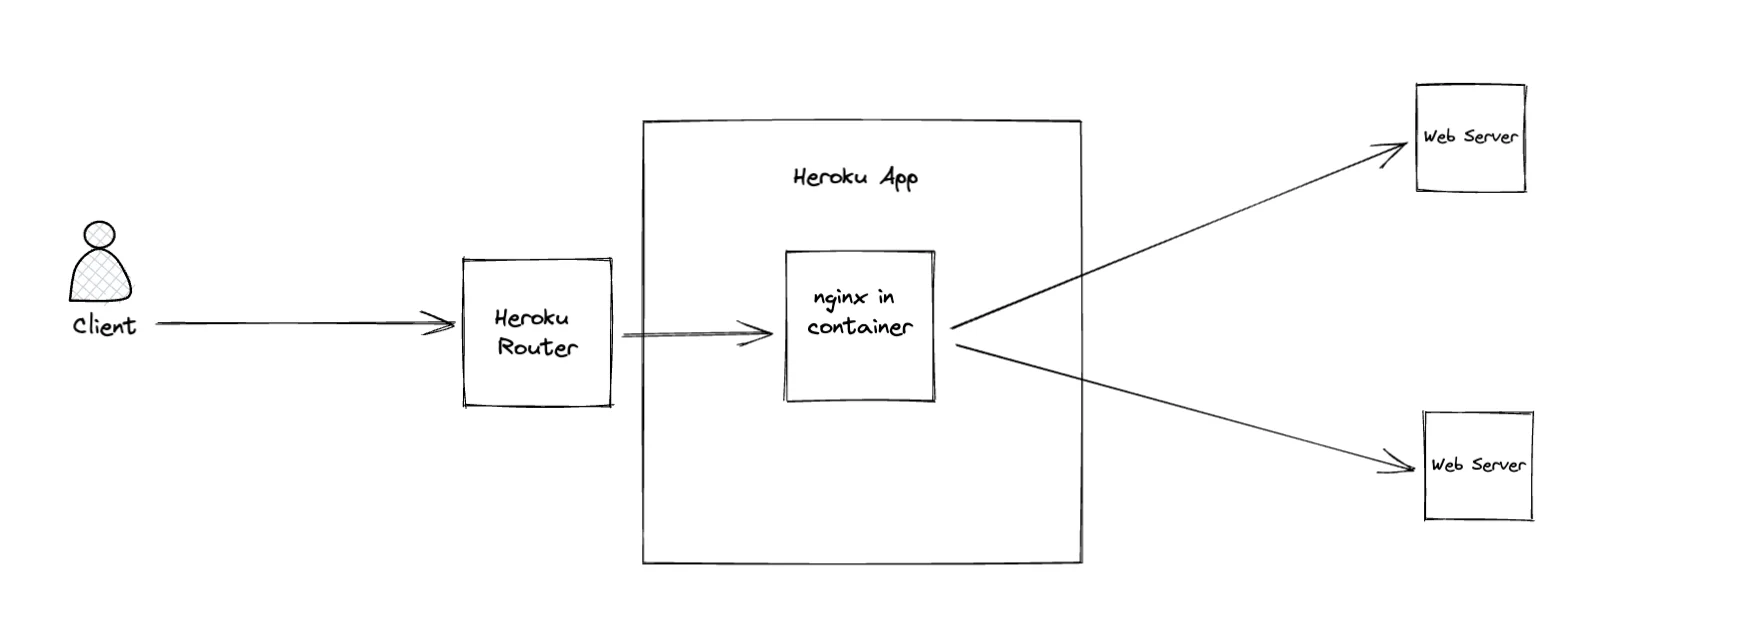
Dockerized nginx
In this solution, a Docker container is responsible for running nginx. You build the Docker image locally, and then push it to Heroku's Docker registry after which it can be used in the app.
To show you how to set it up, let's first create a Heroku app from scratch:
heroku apps:create heroku-nginx-reverse-proxy
Create the nginx config template file and name it nginx.conf.template:
server {
    # https://github.com/docker-library/docs/tree/master/nginx#using-environment-variables-in-nginx-configuration-new-in-119
    listen ${PORT};

    error_log stderr;
    access_log /dev/stdout;

    location / {
        proxy_pass https://www.google.com/;
    }
}
The reason why the configuration is suffixed with .template is that this is actually a template configuration that will be parsed by a function inside the Docker image. This is a special feature of the Docker image that has been added recently, and allows you to inject values of environment variables into your templates. This is absolutely necessary in Heroku because any web server running in Heroku must listen on the port provided by the PORT environment variable. This means the port nginx is listening on must be determined in runtime, not hardcoded in the configuration.
Next, create the Dockerfile with the following contents:
FROM nginx
COPY nginx.conf.template /etc/nginx/templates/default.conf.template
Build the Docker image using the following command:
heroku container:push web
Then push it up it so that it is used by the app:
heroku container:release web
That's it. If you now run heroku open you should see your Heroku app reverse-proxying to Google.
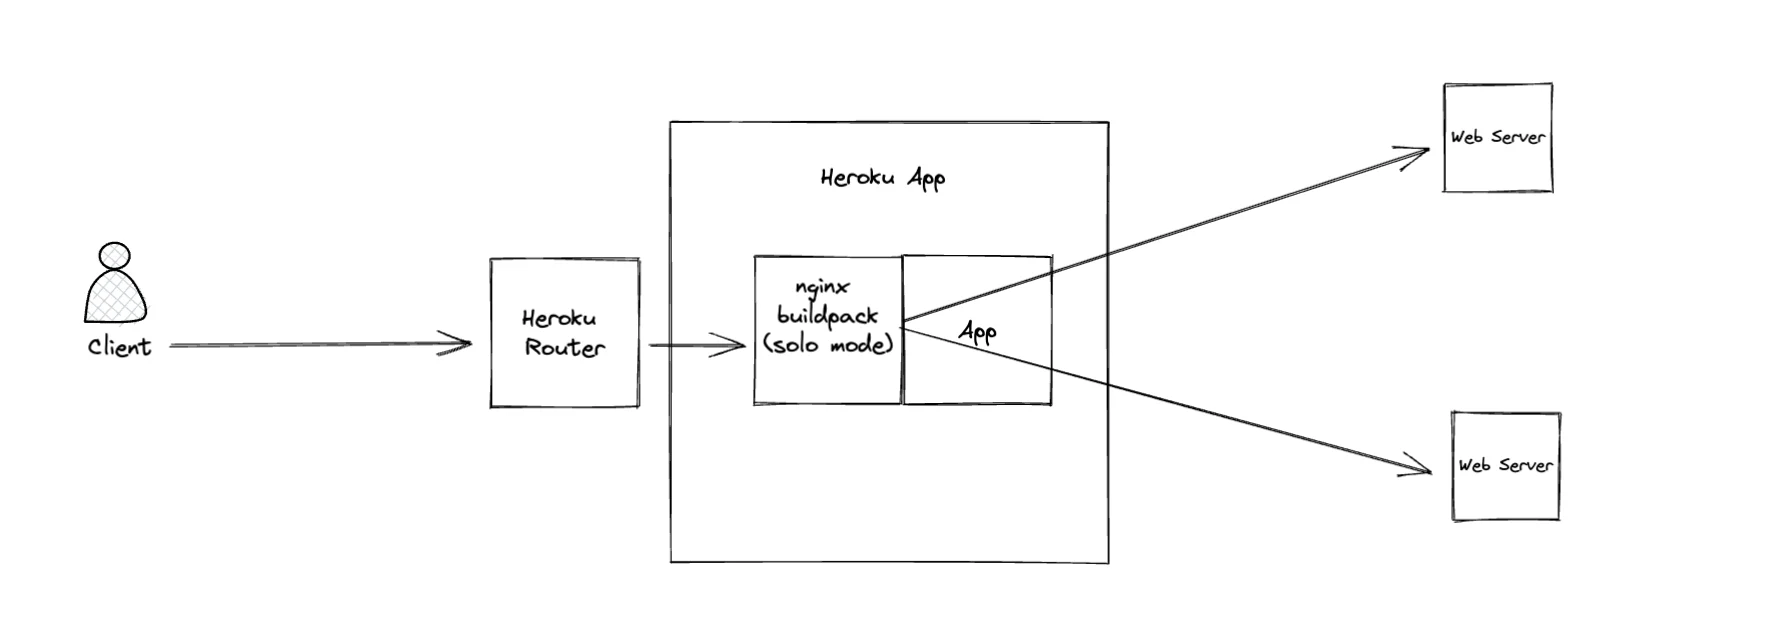
nginx Buildpack
This solution is the best fit for non-container apps. Normally, buildpacks are used to install the dependencies of your app. But in this case, the nginx buildpack allows overriding your app's web server. In the nginx buildpack, you can run nginx either in solo mode (if you want to run only nginx, without the web server) or in a non-solo mode where nginx runs alongside your web server.
In our example, we are running it in solo mode, effectively short-circuiting our app.
In an existing Heroku app, under the Settings page, add a new buildpack using the following URL:
https://github.com/heroku/heroku-buildpack-nginx.git

In your repository, create a new Procfile with the following URL:
web: bin/start-nginx-solo
The nginx buildpack expects the nginx config to be in config/nginx.conf.erb. This is a template file in the Dockerized nginx option, but this time Ruby syntax is used (ERB stands for Embedded RuBy). Create that file and insert the following content:
daemon off;
# Heroku dynos have at least 4 cores.
worker_processes <%= ENV['NGINX_WORKERS'] || 4 %>;

events {
    use epoll;
    accept_mutex on;
    worker_connections <%= ENV['NGINX_WORKER_CONNECTIONS'] || 1024 %>;
}

http {
    log_format l2met 'measure#nginx.service=$request_time request_id=$http_x_request_id';
    access_log <%= ENV['NGINX_ACCESS_LOG_PATH'] || 'logs/nginx/access.log' %> l2met;
    error_log <%= ENV['NGINX_ERROR_LOG_PATH'] || 'logs/nginx/error.log' %>;

    server {
        listen <%= ENV["PORT"] %>;

	    location / {
	        proxy_pass https://www.google.com/;
	    }
    }
}
As you can see, again we need to pass in at least the PORT environment variable which is provided to the app on runtime. Other environment variables are optional and they default to sane values if they are not provided.
Now Git push to Heroku's remote and the buildpack will be in effect. You can verify this by typing heroku open in the shell.
Conclusion
Reverse proxies can be very useful in scenarios where you want a fast, non-blocking web server such as nginx doing the heavy lifting of communicating with the clients. Heroku is very flexible in deploying nginx as we've seen in this blog post. You have two very good options for deployment, depending on your requirements and the needs of your app.
As always, you can find the source code of our examples in our GitHub repository.