Skip to content

Deploying Nx workspace based Angular and NestJS apps to Heroku

This article was written over 18 months ago and may contain information that is out of date. Some content may be relevant but please refer to the relevant official documentation or available resources for the latest information.

Deploying Angular and NestJS apps to Heroku in an Nx workspace

In previous articles, I've shown you how to create an Nx Workspace with Angular and NestJS applications in it. After the applications are ready, we need to host them somewhere. Heroku is one of the services that lets us deploy applications easily. In this article, I'll demonstrate how to deploy the Angular and NestJS applications that are developed using an Nx monorepo. You can find the example code with the aforementioned applications in my GitHub repository. To follow this article, please fork this repo, clone it locally and checkout nxDeployHeroku_entryPoint.

git clone git@github.com:<your_username>/nx-photos.git

# Or using Https
git clone https://github.com/<your_username>/nx-photos.git

cd nx-photos

git checkout nxDeployHeroku_entryPoint

Install Heroku CLI

To follow this article, you need to have the Heroku CLI installed. Please follow the official installation instruction on the Heroku documentation page here. After you install the CLI, type the following command to log in to Heroku:

heroku login

Deploying NestJS app

We're going to start with deploying the NestJS application. The first thing we need to do is creating a Heroku application. Because you need to come up with a unique application name in all the examples, I'll be using ktrz- prefix for the app names. Please replace it with your own prefix so that the application names don't collide with each other.

To create a Heroku application we can use the following command:

heroku create -a ktrz-nx-photos-api

Now we need to configure the application to use Node for building the application. This is what buildpacks are for. To add a buildpack, the heroku buildpacks:add command can be used:

heroku buildpacks:add -a ktrz-nx-photos-api heroku/nodejs

Heroku uses a Procfile file to specify the commands that are executed on application startup. The default configuration allows for only one Procfile and it has to be in the repository root. For it to work with the monorepo with multiple applications, we need a way to configure multiple Procfiles in the repository. For this purpose, a multi-procfile buildpack can be used. We can add it using a similar command to the previous one:

heroku buildpacks:add -a ktrz-nx-photos-api heroku-community/multi-procfile

Now we can create a Procfile and place it in the directory that makes sense for the monorepo. Let's create the following file:

web: node dist/apps/photo/api/main.js

apps/photo/api/Procfile

To let the buildpack know about the location of the Procfile, we need to set PROCFILE env variable for the Heroku application. We can do it using the following command:

heroku config:set -a ktrz-nx-photos-api PROCFILE=apps/photo/api/Procfile

By default, Heroku uses the build script from the package.json file to build the application. We need a more customizable way of building an application so we can configure which application in a monorepo to build. By defining a heroku-postbuild script, we tell Heroku to not use a default build one and use our custom script instead. Let's create the following script:

scripts: {
  "heroku-postbuild": "nx build $PROJECT_NAME --prod"
}

package.json

As you can see, the PROJECT_NAME env variable is used to determine which application to build. It needs to be configured on the Heroku environment:

heroku config:set -a ktrz-nx-photos-api PROJECT_NAME=photo-api

What is left to do is push the changes to a branch and configure Heroku app to use the repository as a source for deployment:

git checkout -b nx-photo-deploy

git push -u origin photo-api-deploy

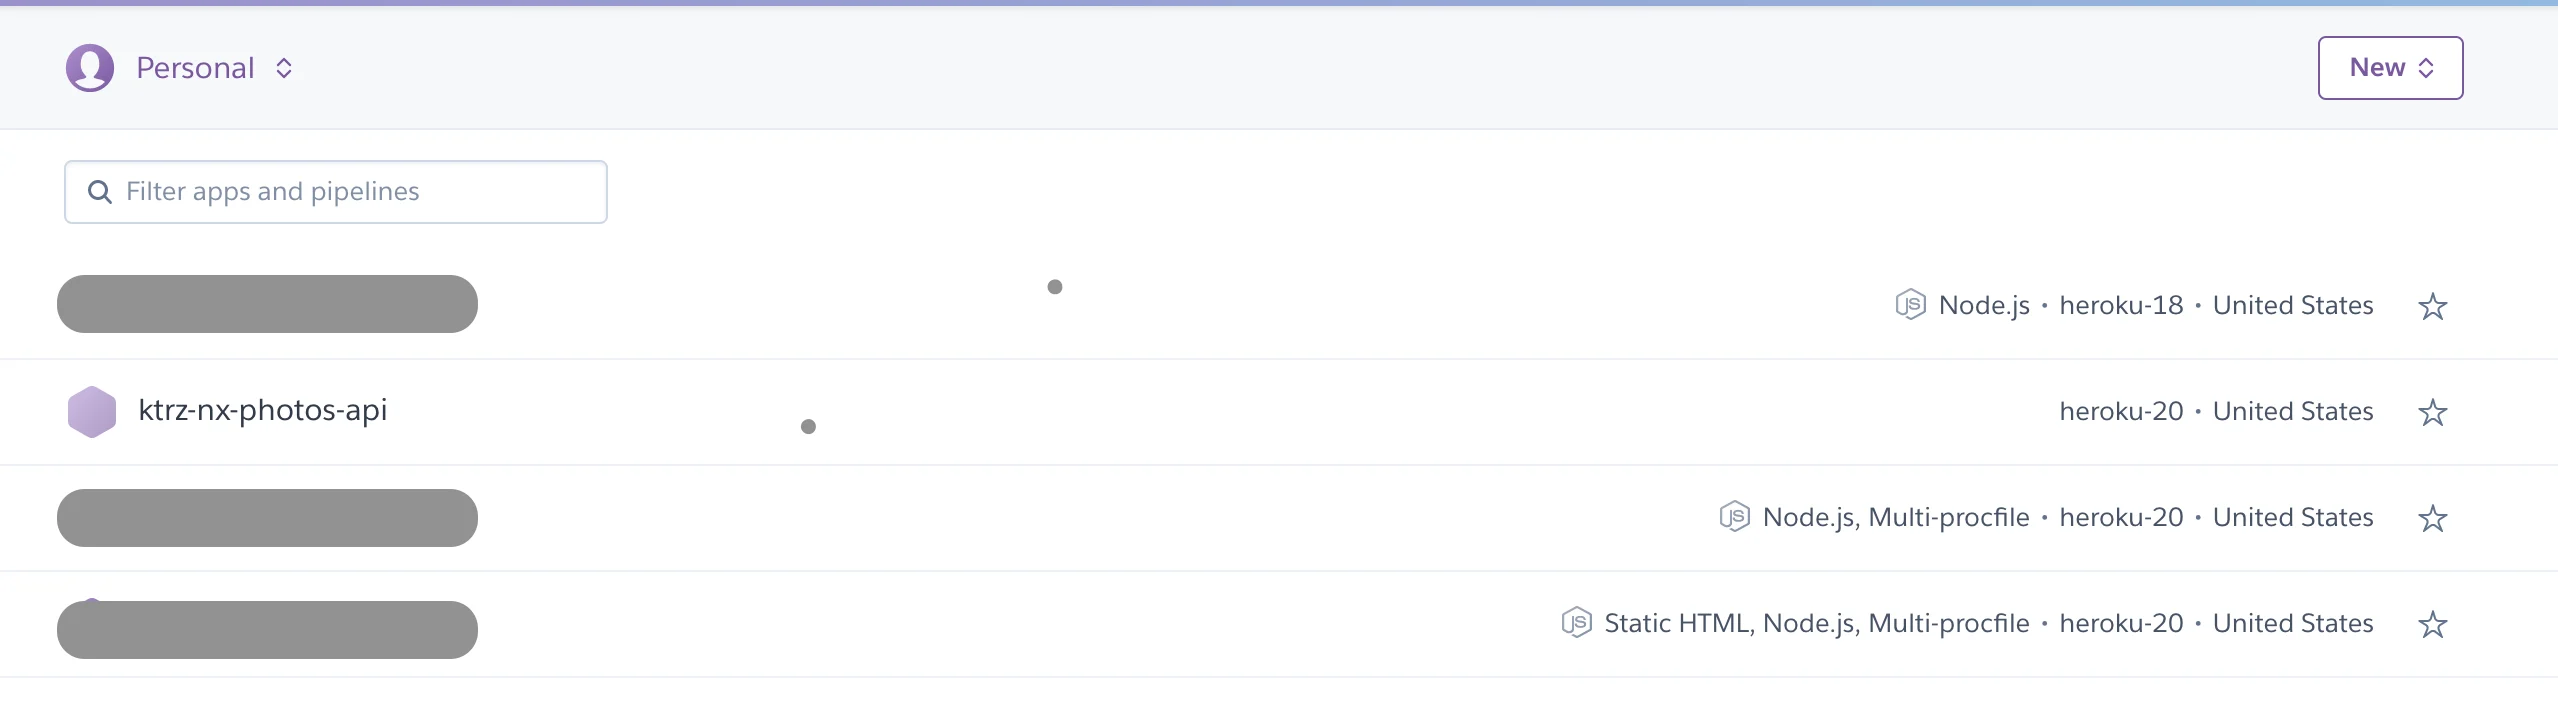
To configure the Heroku app, go to the dashboard and choose the application that you've created before:

Heroku Dashboard

Next, navigate to the Deploy tab, choose the GitHub method, search for your repository, and click Connect:

Heroku d

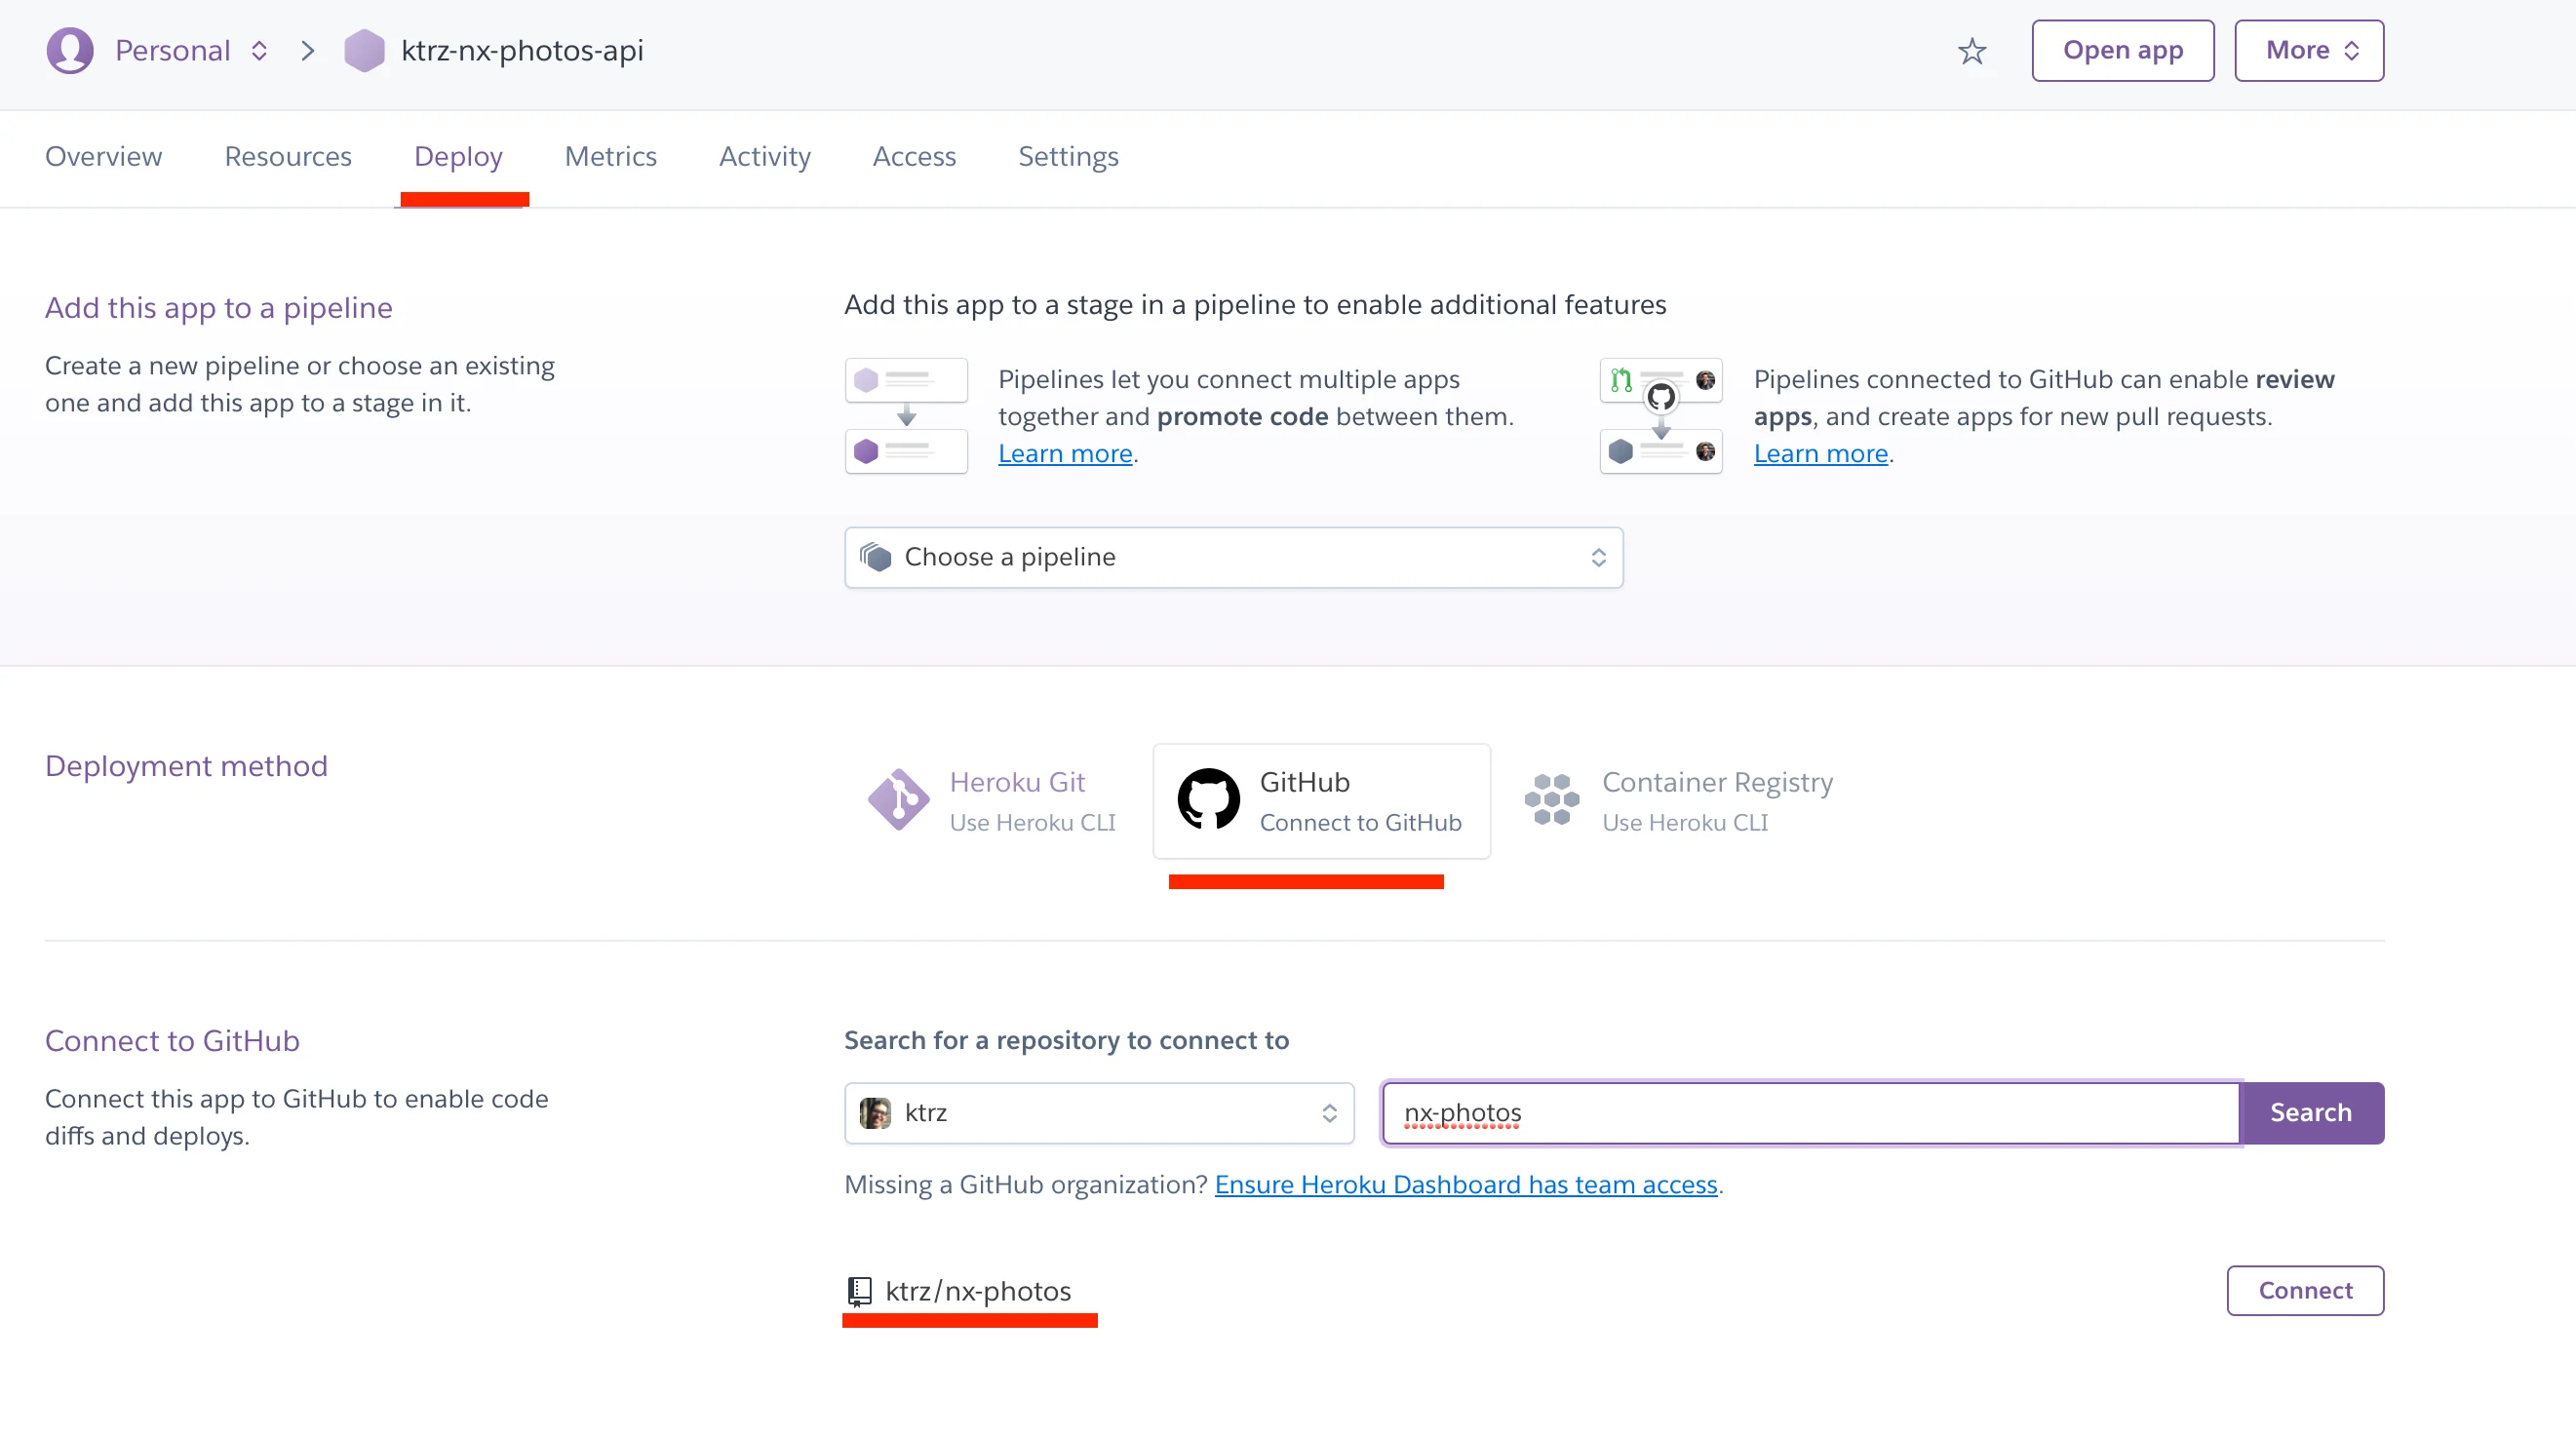
Finally, on the bottom, you can choose to deploy manually from the branch that you've created a moment ago:

Heroku Manual Deploy
  • in package.json add script:
scripts: {
  "heroku-postbuild": "nx build $PROJECT_NAME --prod"
}

package.json

heroku create -a ktrz-nx-photos-api
heroku config:set -a ktrz-nx-photos-api PROJECT_NAME=photo-api

heroku buildpacks:add -a ktrz-nx-photos-api heroku/nodejs
heroku buildpacks:add -a ktrz-nx-photos-api heroku-community/multi-procfile

# create `apps/photo/api/Procfile` file
heroku config:set -a ktrz-nx-photos-api PROCFILE=apps/photo/api/Procfile

To learn more about heroku-buildpack-nodejs and heroku-buildpack-multi-procfile configuration, please visit the official documentation:

Deploying Angular app

Deploying an Angular app has a lot of similar steps.

# create another Heroku app
heroku create -a ktrz-nx-photos-fe

# add same buildpacks
heroku buildpacks:add -a ktrz-nx-photos-fe heroku/nodejs
heroku buildpacks:add -a ktrz-nx-photos-fe heroku-community/multi-procfile

# configure Procfile
heroku config:set -a ktrz-nx-photos-fe PROCFILE=apps/photo/fe/Procfile

# set PROJECT_NAME env variable
heroku config:set -a ktrz-nx-photos-fe PROJECT_NAME=photo-fe

The Angular application can be served as just static files with routing configured to always point to the root index.html and let Angular handle the rest. We can use another buildpack to accomplish that.

heroku buildpacks:add -a ktrz-nx-photos-fe heroku-community/static

heroku-buildpack-static is configured via static.json file. We can do a basic configuration like so:

{
  "root": "dist/apps/photo/fe/",
  "routes": {
    "/**/*.html": "index.html"
  }
}

static.json

The example Angular application is configured to use /api proxy for the backend. This also can be configured within static.json file:

{
  "proxies": {
    "/api/": {
      "origin": "https://ktrz-nx-photos-api.herokuapp.com/api/"
    }
  }
}

static.json

The last thing to do is configure Heroku to use the static buildpack via the Procfile:

web: bin/boot

apps/photo/fe/Procfile

To learn more about heroku-buildpack-static configuration, please visit the oficial documentation here.

Let's commit the changes and configure the second app to use the same GitHub repository:

  • Go to dashboard and choose the frontend application that you've created before.
  • Next, navigate to the Deploy tab, choose GitHub method, search for your repository, and click Connect.
  • Finally, on the bottom you can choose to deploy manually from the branch that you've pushed to a moment ago.

After all those steps, you can navigate to your deployed app:

Open app

Summary

If you want to see the result code, you can find it on my GitHub repository.

In case you have any questions, you can always tweet or DM me @ktrz. I'm always happy to help!

This Dot is a consultancy dedicated to guiding companies through their modernization and digital transformation journeys. Specializing in replatforming, modernizing, and launching new initiatives, we stand out by taking true ownership of your engineering projects.

We love helping teams with projects that have missed their deadlines or helping keep your strategic digital initiatives on course. Check out our case studies and our clients that trust us with their engineering.

You might also like

How to set up local cloud environment with LocalStack cover image

How to set up local cloud environment with LocalStack

How to set up local cloud environment with LocalStack Developers enjoy building applications with AWS due to the richness of their solutions to problems. However, testing an AWS application during development without a dedicated AWS account can be challenging. This can slow the development process and potentially lead to unnecessary costs if the AWS account isn't properly managed. This article will examine LocalStack, a development framework for developing and testing AWS applications, how it works, and how to set it up. Assumptions This article assumes you have a basic understanding of: - AWS: Familiarity with S3, CloudFormation, and SQS. - Command Line Interface (CLI): Comfortable running commands in a terminal or command prompt. - JavaScript and Node.js: Basic knowledge of JavaScript and Node.js, as we will write some code to interact with AWS services. - Docker Concepts: Understanding of Docker basics, such as images and containers, since LocalStack runs within a Docker container. What is LocalStack? LocalStack is a cloud service emulator that runs in a single container on your laptop or in your CI environment. With LocalStack, you can run your AWS applications or Lambdas entirely on your local machine without connecting to a remote cloud provider! Whether you are testing complex CDK applications or Terraform configurations or just beginning to learn about AWS, LocalStack simplifies your testing and development workflow, relieving you from the complexity of testing AWS applications. Prerequisite Before setting up LocalStack, ensure you have the following: 1. Docker Installed: LocalStack runs in a Docker container, so you need Docker installed on your machine. You can download and install Docker from here. 2. Node.js and npm: Ensure you have Node.js and npm installed, as we will use a simple Node.js application to test AWS services. You can download Node.js from here. 3. Python: Python is required for installing certain CLI tools that interact with LocalStack. Ensure you have Python 3 installed on your machine. You can download Python from here. Installation In this article, we will use the LocalStack CLI, which is the quickest way to get started with LocalStack. It allows you to start LocalStack from your command line. Localstack spins up a Docker instance, Alternative methods of managing the LocalStack container exist, and you can find them here. To install LocalStack CLI, you can use homebrew by running the following command: ` If you do not use a macOS or you don’t have Brew installed, you can install the CLI using Python: ` To confirm your installation was successful, run the following: ` That should output the installed version of LocalStack. Now you can start LocalStack by running the following command: ` This command will start LocalStack in docker mode, and since it is your first installation, try to pull the LocalStack image. You should see the below on your terminal After the image is downloaded successfully, the docker instance is spun up, and LocalStack is running on your machine on port 4566. Testing AWS Services with LocalStack LocalStack lets you easily test AWS services during development. It supports many AWS products but has some limitations, and not all features are free. Community Version: Free access to core AWS products like S3, SQS, DynamoDB, and Lambda. Pro Version: Access to more AWS products and enhanced features. Check the supported community and pro version resources for more details. We're using the community edition, and the screenshot below shows its supported products. To see the current products supported in the community edition, visit http://localhost:4566/_localstack/health. This article will test AWS CloudFormation and SQS. Before we can start testing, we need to create a simple Node.js app. On your terminal, navigate to the desired folder and run the following command: ` This command will create a package.json file at the root of the directory. Now we need to install aws-sdk. Run the following command: ` With that installed, we can now start testing various services. AWS CloudFormation AWS CloudFormation is a service that allows users to create, update, and delete resources in an AWS account. This service can also automate the process of provisioning and configuring resources. We are going to be using LocalStack to test creating a CloudFormation template. In the root of the folder, create a file called cloud-formation.js. This file will be used to create a CloudFormation stack that will be used to create an S3 bucket. Add the following code to the file: ` In the above code, we import the aws-sdk package, which provides the necessary tools to interact with AWS services. Then, an instance of the AWS.CloudFormation class is created. This instance is configured with: region: The AWS region where the requests are sent. In this case, us-east-1 is the default region for LocalStack. endpoint: The URI to send requests to is set to http://localhost:4566 for LocalStack. You should configure this with environment variables to switch between LocalStack for development and the actual AWS endpoint for production, ensuring the same code can be used in both environments. credentials: The AWS credentials to sign requests with. We are passing new AWS.Credentials("test", "test") The params object defines the parameters needed to create the CloudFormation stack: StackName: The name of the stack. Here, we are using 'test-local-stack'. TemplateBody: A JSON string representing the CloudFormation template. In this example, it defines a single resource, an S3 bucket named TestBucket. The createStack method is called on the CloudFormation client with the params object. This method attempts to create the stack. If there is an error, we log it to the console else, we log the successful data to the console. Now, let’s test the code by running the following command: ` If we run the above command, we should see the JSON response on the terminal. ` AWS SQS The process for testing SQS with LocalStack using the aws-sdk follows the same pattern as above, except that we will introduce another CLI package, awslocal. awslocal is a thin wrapper and a substitute for the standard aws command, enabling you to run AWS CLI commands within the LocalStack environment without specifying the --endpoint-url parameter or a profile. To install awslocal, run the following command on your terminal: ` Next, let’s create an SQS queue using the following command: ` This will create a queue name test-queue and return queueUrl like below: ` Now, in our directory, let’s create a sqs.js file, and inside of it, let’s paste the following code: ` In the above code, an instance of the AWS.SQS class is created. The instance is configured with the same parameters as when creating the CloudFormation. We also created a params object which had the required properties needed to send a SQS message: QueueUrl: The URL of the Amazon SQS queue to which a message is sent. In our case, it will be the URL we got when we created a local SQS. Make sure to manage this in environment variables to switch between LocalStack for development and the actual AWS queue URL for production, ensuring the same code can be used in both environments. MessageBody: The message to send. We call the sendMessage method, passing the params object and a callback that handles error and data, respectively. Let’s run the code using the following command: ` We should get a JSON object in the terminal like the following: ` To test if we can receive the SQS message sent, let’s create a sqs-receive.js. Inside the file, we can copy over the AWS.SQS instance that was created earlier into the file and add the following code: ` Run the code using the following command: ` We should receive a JSON object and should be able to see the previous message we sent ` When you are done with testing, you can shut down LocalStack by running the following command: ` Conclusion In this article, we looked at how to set up a local cloud environment using LocalStack, a powerful tool for developing and testing AWS applications locally. We walked through the installation process of LocalStack and demonstrated how to test AWS services using the AWS SDK, including CloudFormation and SQS. Setting up LocalStack allows you to simulate various AWS services on your local machine, which helps streamline development workflows and improve productivity. Whether you are testing simple configurations or complex deployments, LocalStack provides the environment to ensure your applications work as expected before moving to a production environment. Using LocalStack, you can confidently develop and test your AWS applications without an active AWS account, making it an invaluable tool for developers looking to optimize their development process....

Exploring Angular Forms: A New Alternative with Signals cover image

Exploring Angular Forms: A New Alternative with Signals

Exploring Angular Forms: A New Alternative with Signals In the world of Angular, forms are essential for user interaction, whether you're crafting a simple login page or a more complex user profile interface. Angular traditionally offers two primary approaches: template-driven forms and reactive forms. In my previous series on Angular Reactive Forms, I explored how to harness reactive forms' power to manage complex logic, create dynamic forms, and build custom form controls. A new tool for managing reactivity - signals - has been introduced in version 16 of Angular and has been the focus of Angular maintainers ever since, becoming stable with version 17. Signals allow you to handle state changes declaratively, offering an exciting alternative that combines the simplicity of template-driven forms with the robust reactivity of reactive forms. This article will examine how signals can add reactivity to both simple and complex forms in Angular. Recap: Angular Forms Approaches Before diving into the topic of enhancing template-driven forms with signals, let’s quickly recap Angular's traditional forms approaches: 1. Template-Driven Forms: Defined directly in the HTML template using directives like ngModel, these forms are easy to set up and are ideal for simple forms. However, they may not provide the fine-grained control required for more complex scenarios. Here's a minimal example of a template-driven form: ` ` 2. Reactive Forms: Managed programmatically in the component class using Angular's FormGroup, FormControl, and FormArray classes; reactive forms offer granular control over form state and validation. This approach is well-suited for complex forms, as my previous articles on Angular Reactive Forms discussed. And here's a minimal example of a reactive form: ` ` Introducing Signals as a New Way to Handle Form Reactivity With the release of Angular 16, signals have emerged as a new way to manage reactivity. Signals provide a declarative approach to state management, making your code more predictable and easier to understand. When applied to forms, signals can enhance the simplicity of template-driven forms while offering the reactivity and control typically associated with reactive forms. Let’s explore how signals can be used in both simple and complex form scenarios. Example 1: A Simple Template-Driven Form with Signals Consider a basic login form. Typically, this would be implemented using template-driven forms like this: ` ` This approach works well for simple forms, but by introducing signals, we can keep the simplicity while adding reactive capabilities: ` ` In this example, the form fields are defined as signals, allowing for reactive updates whenever the form state changes. The formValue signal provides a computed value that reflects the current state of the form. This approach offers a more declarative way to manage form state and reactivity, combining the simplicity of template-driven forms with the power of signals. You may be tempted to define the form directly as an object inside a signal. While such an approach may seem more concise, typing into the individual fields does not dispatch reactivity updates, which is usually a deal breaker. Here’s an example StackBlitz with a component suffering from such an issue: Therefore, if you'd like to react to changes in the form fields, it's better to define each field as a separate signal. By defining each form field as a separate signal, you ensure that changes to individual fields trigger reactivity updates correctly. Example 2: A Complex Form with Signals You may see little benefit in using signals for simple forms like the login form above, but they truly shine when handling more complex forms. Let's explore a more intricate scenario - a user profile form that includes fields like firstName, lastName, email, phoneNumbers, and address. The phoneNumbers field is dynamic, allowing users to add or remove phone numbers as needed. Here's how this form might be defined using signals: ` > Notice that the phoneNumbers field is defined as a signal of an array of signals. This structure allows us to track changes to individual phone numbers and update the form state reactively. The addPhoneNumber and removePhoneNumber methods update the phoneNumbers signal array, triggering reactivity updates in the form. ` > In the template, we use the phoneNumbers signal array to dynamically render the phone number input fields. The addPhoneNumber and removePhoneNumber methods allow users to reactively add or remove phone numbers, updating the form state. Notice the usage of the track function, which is necessary to ensure that the ngFor directive tracks changes to the phoneNumbers array correctly. Here's a StackBlitz demo of the complex form example for you to play around with: Validating Forms with Signals Validation is critical to any form, ensuring that user input meets the required criteria before submission. With signals, validation can be handled in a reactive and declarative manner. In the complex form example above, we've implemented a computed signal called formValid, which checks whether all fields meet specific validation criteria. The validation logic can easily be customized to accommodate different rules, such as checking for valid email formats or ensuring that all required fields are filled out. Using signals for validation allows you to create more maintainable and testable code, as the validation rules are clearly defined and react automatically to changes in form fields. It can even be abstracted into a separate utility to make it reusable across different forms. In the complex form example, the formValid signal ensures that all required fields are filled and validates the email and phone numbers format. This approach to validation is a bit simple and needs to be better connected to the actual form fields. While it will work for many use cases, in some cases, you might want to wait until explicit "signal forms" support is added to Angular. Tim Deschryver started implementing some abstractions around signal forms, including validation and wrote an article about it. Let's see if something like this will be added to Angular in the future. Why Use Signals in Angular Forms? The adoption of signals in Angular provides a powerful new way to manage form state and reactivity. Signals offer a flexible, declarative approach that can simplify complex form handling by combining the strengths of template-driven forms and reactive forms. Here are some key benefits of using signals in Angular forms: 1. Declarative State Management: Signals allow you to define form fields and computed values declaratively, making your code more predictable and easier to understand. 2. Reactivity: Signals provide reactive updates to form fields, ensuring that changes to the form state trigger reactivity updates automatically. 3. Granular Control: Signals allow you to define form fields at a granular level, enabling fine-grained control over form state and validation. 4. Dynamic Forms: Signals can be used to create dynamic forms with fields that can be added or removed dynamically, providing a flexible way to handle complex form scenarios. 5. Simplicity: Signals can offer a simpler, more concise way to manage form states than traditional reactive forms, making building and maintaining complex forms easier. Conclusion In my previous articles, we explored the powerful features of Angular reactive forms, from dynamic form construction to custom form controls. With the introduction of signals, Angular developers have a new tool that merges the simplicity of template-driven forms with the reactivity of reactive forms. While many use cases warrant Reactive Forms, signals provide a fresh, powerful alternative for managing form state in Angular applications requiring a more straightforward, declarative approach. As Angular continues to evolve, experimenting with these new features will help you build more maintainable, performant applications. Happy coding!...

Introduction to Directives Composition API in Angular cover image

Introduction to Directives Composition API in Angular

In version 15, Angular introduced a new directives composition API that allows developers to compose existing directives into new more complex directives or components. This allows us to encapsulate behaviors into smaller directives and reuse them across the application more easily. In this article, we will explore the new API, and see how we can use it in our own components. All the examples from this article (and more) can be found on Stackblitz here. Starting point In the article, I will use two simple directives as an example * HighlightDirective - a directive borrowed from Angular's Getting started guide. This directive will change an element's background color whenever the element hovers. ` Fig. 1 * BorderDirective - a similar directive that will apply a border of a specified color to the element whenever it hovers ` Fig. 2 We can now easily apply our directives to any element we want ie. a paragraph: ` Fig. 3 However, if we wanted to apply both highlighting and border on hover we would need to add both directives explicitly: ` Fig. 4 With the new directives composition API, we can easily create another directive that composes behaviors of our 2 directives. Host Directives Angular 15 added a new property to the @Directive and @Component decorators. In this property, we can specify an array of different directives that we want our new component or directive to apply on a host element. We can do it as follows: ` As you can see in the above example, by just defining the hostDirectives property containing our highlight and border directives, we created a new directive that composes both behaviors into one directive. We can now achieve the same result as in Fig. 4 by using just a single directive: ` Fig. 5 Passing inputs and outputs Our newly composed directive works nicely already, but there is a problem. How do we pass properties to the directives that are defined in the hostDirectives array? They are not passed by default, but we can configure them to do so pretty easily by using an extended syntax: ` Fig. 6 This syntax takes exposes the "inner" directives\ color input from the HighlightAndBorderDirective`, and passes them down to both highlight and border directives. ` Fig. 7 This works, but we ended up with a border and highlight color both being blue. Luckily Angular's API allows us to easily redefine the properties' names using the : syntax. So let's remap out properties to highlightColor and borderColor so that the names don't collide with each other: ` Fig. 8 Now we can control both colors individually: ` Fig. 9 We could apply the same approach to mapping directive's outputs eg. ` Fig. 10 or ` Fig. 11 Adding host directives to a component Similarly to composing a directive out of other directives, we can apply the same approach to adding behavior to components using hostDirectives API. This way, we could, for example, create a more specialized component or just apply the behavior of the directive to a whole host element: ` Fig. 12 This component will render the paragraph, and apply both directives' behavior to the host element: ` Fig. 13 Just like we did for the directive, we can also expose and remap the directives inputs using the extended syntax. But if we would like to access and modify the directives inputs from within our component, we can also do that. This is where Angular's dependency injection comes in handy. We can inject the host directives via a constructor just like we would do for a service. After we have the directives instances available, we can modify them ie. in the ngOnInit lifecycle hook: ` Fig. 14 With this change, the code from Fig. 13 will use lightcoral as a background color and red as a border color. Performance Note While this API gives us a powerful tool-set for reusing behaviors across different components, it can impact the performance of our application if used excessively. For each instance of a given composed component Angular will create objects of the component class itself as well as an instance of each directive that it is composed of. If the component appears only a couple of times in the application. then it won't make a significant difference. However, if we create, for example, a composed checkbox component that appears hundreds of times in the app, this may have a noticeable performance impact. Please make sure you use this pattern with caution, and profile your application in order to find the right composition pattern for your application. Summary As I have shown in the above examples, the directives composition API can be a quite useful but easy-to-use tool for extracting behaviors into smaller directives and combining them into more complex behaviors. In case you have any questions, you can always tweet or DM me at @ktrz. I'm always happy to help!...

Next.js Rendering Strategies and how they affect core web vitals cover image

Next.js Rendering Strategies and how they affect core web vitals

When it comes to building fast and scalable web apps with Next.js, it’s important to understand how rendering works, especially with the App Router. Next.js organizes rendering around two main environments: the server and the client. On the server side, you’ll encounter three key strategies: Static Rendering, Dynamic Rendering, and Streaming. Each one comes with its own set of trade-offs and performance benefits, so knowing when to use which is crucial for delivering a great user experience. In this post, we'll break down each strategy, what it's good for, and how it impacts your site's performance, especially Core Web Vitals. We'll also explore hybrid approaches and provide practical guidance on choosing the right strategy for your use case. What Are Core Web Vitals? Core Web Vitals are a set of metrics defined by Google that measure real-world user experience on websites. These metrics play a major role in search engine rankings and directly affect how users perceive the speed and smoothness of your site. * Largest Contentful Paint (LCP): This measures loading performance. It calculates the time taken for the largest visible content element to render. A good LCP is 2.5 seconds or less. * Interaction to Next Paint (INP): This measures responsiveness to user input. A good INP is 200 milliseconds or less. * Cumulative Layout Shift (CLS): This measures the visual stability of the page. It quantifies layout instability during load. A good CLS is 0.1 or less. If you want to dive deeper into Core Web Vitals and understand more about their impact on your website's performance, I recommend reading this detailed guide on New Core Web Vitals and How They Work. Next.js Rendering Strategies and Core Web Vitals Let's explore each rendering strategy in detail: 1. Static Rendering (Server Rendering Strategy) Static Rendering is the default for Server Components in Next.js. With this approach, components are rendered at build time (or during revalidation), and the resulting HTML is reused for each request. This pre-rendering happens on the server, not in the user's browser. Static rendering is ideal for routes where the data is not personalized to the user, and this makes it suitable for: * Content-focused websites: Blogs, documentation, marketing pages * E-commerce product listings: When product details don't change frequently * SEO-critical pages: When search engine visibility is a priority * High-traffic pages: When you want to minimize server load How Static Rendering Affects Core Web Vitals * Largest Contentful Paint (LCP): Static rendering typically leads to excellent LCP scores (typically &lt; 1s). The Pre-rendered HTML can be cached and delivered instantly from CDNs, resulting in very fast delivery of the initial content, including the largest element. Also, there is no waiting for data fetching or rendering on the client. * Interaction to Next Paint (INP): Static rendering provides a good foundation for INP, but doesn't guarantee optimal performance (typically ranges from 50-150 ms depending on implementation). While Server Components don't require hydration, any Client Components within the page still need JavaScript to become interactive. To achieve a very good INP score, you will need to make sure the Client Components within the page is minimal. * Cumulative Layout Shift (CLS): While static rendering delivers the complete page structure upfront which can be very beneficial for CLS, achieving excellent CLS requires additional optimization strategies: * Static HTML alone doesn't prevent layout shifts if resources load asynchronously * Image dimensions must be properly specified to reserve space before the image loads * Web fonts can cause text to reflow if not handled properly with font display strategies * Dynamically injected content (ads, embeds, lazy-loaded elements) can disrupt layout stability * CSS implementation significantly impacts CLS—immediate availability of styling information helps maintain visual stability Code Examples: 1. Basic static rendering: ` 2. Static rendering with revalidation (ISR): ` 3. Static path generation: ` 2. Dynamic Rendering (Server Rendering Strategy) Dynamic Rendering generates HTML on the server for each request at request time. Unlike static rendering, the content is not pre-rendered or cached but freshly generated for each user. This kind of rendering works best for: * Personalized content: User dashboards, account pages * Real-time data: Stock prices, live sports scores * Request-specific information: Pages that use cookies, headers, or search parameters * Frequently changing data: Content that needs to be up-to-date on every request How Dynamic Rendering Affects Core Web Vitals * Largest Contentful Paint (LCP): With dynamic rendering, the server needs to generate HTML for each request, and that can't be fully cached at the CDN level. It is still faster than client-side rendering as HTML is generated on the server. * Interaction to Next Paint (INP): The performance is similar to static rendering once the page is loaded. However, it can become slower if the dynamic content includes many Client Components. * Cumulative Layout Shift (CLS): Dynamic rendering can potentially introduce CLS if the data fetched at request time significantly alters the layout of the page compared to a static structure. However, if the layout is stable and the dynamic content size fits within predefined areas, the CLS can be managed effectively. Code Examples: 1. Explicit dynamic rendering: ` 2. Simplicit dynamic rendering with cookies: ` 3. Dynamic routes: ` 3. Streaming (Server Rendering Strategy) Streaming allows you to progressively render UI from the server. Instead of waiting for all the data to be ready before sending any HTML, the server sends chunks of HTML as they become available. This is implemented using React's Suspense boundary. React Suspense works by creating boundaries in your component tree that can "suspend" rendering while waiting for asynchronous operations. When a component inside a Suspense boundary throws a promise (which happens automatically with data fetching in React Server Components), React pauses rendering of that component and its children, renders the fallback UI specified in the Suspense component, continues rendering other parts of the page outside this boundary, and eventually resumes and replaces the fallback with the actual component once the promise resolves. When streaming, this mechanism allows the server to send the initial HTML with fallbacks for suspended components while continuing to process suspended components in the background. The server then streams additional HTML chunks as each suspended component resolves, including instructions for the browser to seamlessly replace fallbacks with final content. It works well for: * Pages with mixed data requirements: Some fast, some slow data sources * Improving perceived performance: Show users something quickly while slower parts load * Complex dashboards: Different widgets have different loading times * Handling slow APIs: Prevent slow third-party services from blocking the entire page How Streaming Affects Core Web Vitals * Largest Contentful Paint (LCP): Streaming can improve the perceived LCP. By sending the initial HTML content quickly, including potentially the largest element, the browser can render it sooner. Even if other parts of the page are still loading, the user sees the main content faster. * Interaction to Next Paint (INP): Streaming can contribute to a better INP. When used with React's &lt;Suspense />, interactive elements in the faster-loading parts of the page can become interactive earlier, even while other components are still being streamed in. This allows users to engage with the page sooner. * Cumulative Layout Shift (CLS): Streaming can cause layout shifts as new content streams in. However, when implemented carefully, streaming should not negatively impact CLS. The initially streamed content should establish the main layout, and subsequent streamed chunks should ideally fit within this structure without causing significant reflows or layout shifts. Using placeholders and ensuring dimensions are known can help prevent CLS. Code Examples: 1. Basic Streaming with Suspense: ` 2. Nested Suspense boundaries for more granular control: ` 3. Using Next.js loading.js convention: ` 4. Client Components and Client-Side Rendering Client Components are defined using the React 'use client' directive. They are pre-rendered on the server but then hydrated on the client, enabling interactivity. This is different from pure client-side rendering (CSR), where rendering happens entirely in the browser. In the traditional sense of CSR (where the initial HTML is minimal, and all rendering happens in the browser), Next.js has moved away from this as a default approach but it can still be achievable by using dynamic imports and setting ssr: false. ` Despite the shift toward server rendering, there are valid use cases for CSR: 1. Private dashboards: Where SEO doesn't matter, and you want to reduce server load 2. Heavy interactive applications: Like data visualization tools or complex editors 3. Browser-only APIs: When you need access to browser-specific features like localStorage or WebGL 4. Third-party integrations: Some third-party widgets or libraries that only work in the browser While these are valid use cases, using Client Components is generally preferable to pure CSR in Next.js. Client Components give you the best of both worlds: server-rendered HTML for the initial load (improving SEO and LCP) with client-side interactivity after hydration. Pure CSR should be reserved for specific scenarios where server rendering is impossible or counterproductive. Client components are good for: * Interactive UI elements: Forms, dropdowns, modals, tabs * State-dependent UI: Components that change based on client state * Browser API access: Components that need localStorage, geolocation, etc. * Event-driven interactions: Click handlers, form submissions, animations * Real-time updates: Chat interfaces, live notifications How Client Components Affect Core Web Vitals * Largest Contentful Paint (LCP): Initial HTML includes the server-rendered version of Client Components, so LCP is reasonably fast. Hydration can delay interactivity but doesn't necessarily affect LCP. * Interaction to Next Paint (INP): For Client Components, hydration can cause input delay during page load, and when the page is hydrated, performance depends on the efficiency of event handlers. Also, complex state management can impact responsiveness. * Cumulative Layout Shift (CLS): Client-side data fetching can cause layout shifts as new data arrives. Also, state changes might alter the layout unexpectedly. Using Client Components will require careful implementation to prevent shifts. Code Examples: 1. Basic Client Component: ` 2. Client Component with server data: ` Hybrid Approaches and Composition Patterns In real-world applications, you'll often use a combination of rendering strategies to achieve the best performance. Next.js makes it easy to compose Server and Client Components together. Server Components with Islands of Interactivity One of the most effective patterns is to use Server Components for the majority of your UI and add Client Components only where interactivity is needed. This approach: 1. Minimizes JavaScript sent to the client 2. Provides excellent initial load performance 3. Maintains good interactivity where needed ` Partial Prerendering (Next.js 15) Next.js 15 introduced Partial Prerendering, a new hybrid rendering strategy that combines static and dynamic content in a single route. This allows you to: 1. Statically generate a shell of the page 2. Stream in dynamic, personalized content 3. Get the best of both static and dynamic rendering Note: At the time of this writing, Partial Prerendering is experimental and is not ready for production use. Read more ` Measuring Core Web Vitals in Next.js Understanding the impact of your rendering strategy choices requires measuring Core Web Vitals in real-world conditions. Here are some approaches: 1. Vercel Analytics If you deploy on Vercel, you can use Vercel Analytics to automatically track Core Web Vitals for your production site: ` 2. Web Vitals API You can manually track Core Web Vitals using the web-vitals library: ` 3. Lighthouse and PageSpeed Insights For development and testing, use: * Chrome DevTools Lighthouse tab * PageSpeed Insights * Chrome User Experience Report Making Practical Decisions: Which Rendering Strategy to Choose? Choosing the right rendering strategy depends on your specific requirements. Here's a decision framework: Choose Static Rendering when * Content is the same for all users * Data can be determined at build time * Page doesn't need frequent updates * SEO is critical * You want the best possible performance Choose Dynamic Rendering when * Content is personalized for each user * Data must be fresh on every request * You need access to request-time information * Content changes frequently Choose Streaming when * Page has a mix of fast and slow data requirements * You want to improve perceived performance * Some parts of the page depend on slow APIs * You want to prioritize showing critical UI first Choose Client Components when * UI needs to be interactive * Component relies on browser APIs * UI changes frequently based on user input * You need real-time updates Conclusion Next.js provides a powerful set of rendering strategies that allow you to optimize for both performance and user experience. By understanding how each strategy affects Core Web Vitals, you can make informed decisions about how to build your application. Remember that the best approach is often a hybrid one, combining different rendering strategies based on the specific requirements of each part of your application. Start with Server Components as your default, use Static Rendering where possible, and add Client Components only where interactivity is needed. By following these principles and measuring your Core Web Vitals, you can create Next.js applications that are fast, responsive, and provide an excellent user experience....

Let's innovate together!

We're ready to be your trusted technical partners in your digital innovation journey.

Whether it's modernization or custom software solutions, our team of experts can guide you through best practices and how to build scalable, performant software that lasts.

Prefer email? hi@thisdot.co