
Modern web apps have come a long way from their early days, and as a result, users have come to expect certain features. One such feature is being able to authenticate in the web app using external accounts owned by providers such as Facebook, Google, or GitHub. Not only is this way of authenticating more secure, but there is less effort required by the user. With only a few clicks, they can sign in to your web app.
Such authentication is done using the OAuth protocol. It's a powerful and very commonly used protocol that allows users to authenticate with third-party applications using their existing login credentials. These days, it has become an essential part of modern web applications.
In this blog post, we will explore how to implement OAuth authentication in a Next.js application.
Why OAuth?
Implementing authentication using OAuth is useful for a number of reasons. First of all, it allows users to sign in to your web app using their existing credentials from a trusted provider, such as Facebook and Google. This eliminates the need to go through a tedious registration process, and most importantly, it eliminates the need to come up with a password for the web app.
This has many benefits for both the web app owner and the user. Neither need to store the password anywhere, as the password is handled by the trusted OAuth provider. This means that even if the web app gets hacked for some reason, the attacker will not gain access to the user password. For exactly that reason, you'll often hear experienced developers advise to "never roll your own authentication".
OAuth in Next.js
Next.js is the most popular React metaframework, and this gives you plenty of options and libraries for implementing authentication in your app. The most popular one, by far, is definitely Auth.js, formerly named NextAuth.js. With this library, you can get OAuth running in only a few simple steps, as we'll show in this blog post. We'll show you how to utilize the latest features in both Next.js and Auth.js to set up an OAuth integration using Facebook.
Implementing OAuth in Next.js 13 Using Auth.js
Creating Facebook App
Before starting with the project, let's create an app on Facebook. This is a prerequisite to using Facebook as an OAuth provider. To do this, you'll need to go to Meta for Developers and create an account there by clicking on "Get Started". Once this is done, you can view the apps dashboard and click "Create App" to create your app. Since this is an app that will be used solely for Facebook login, we can choose "Consumer" as the type of the app, and you can pick any name for it. In our case, we used "Next.js OAuth Demo".
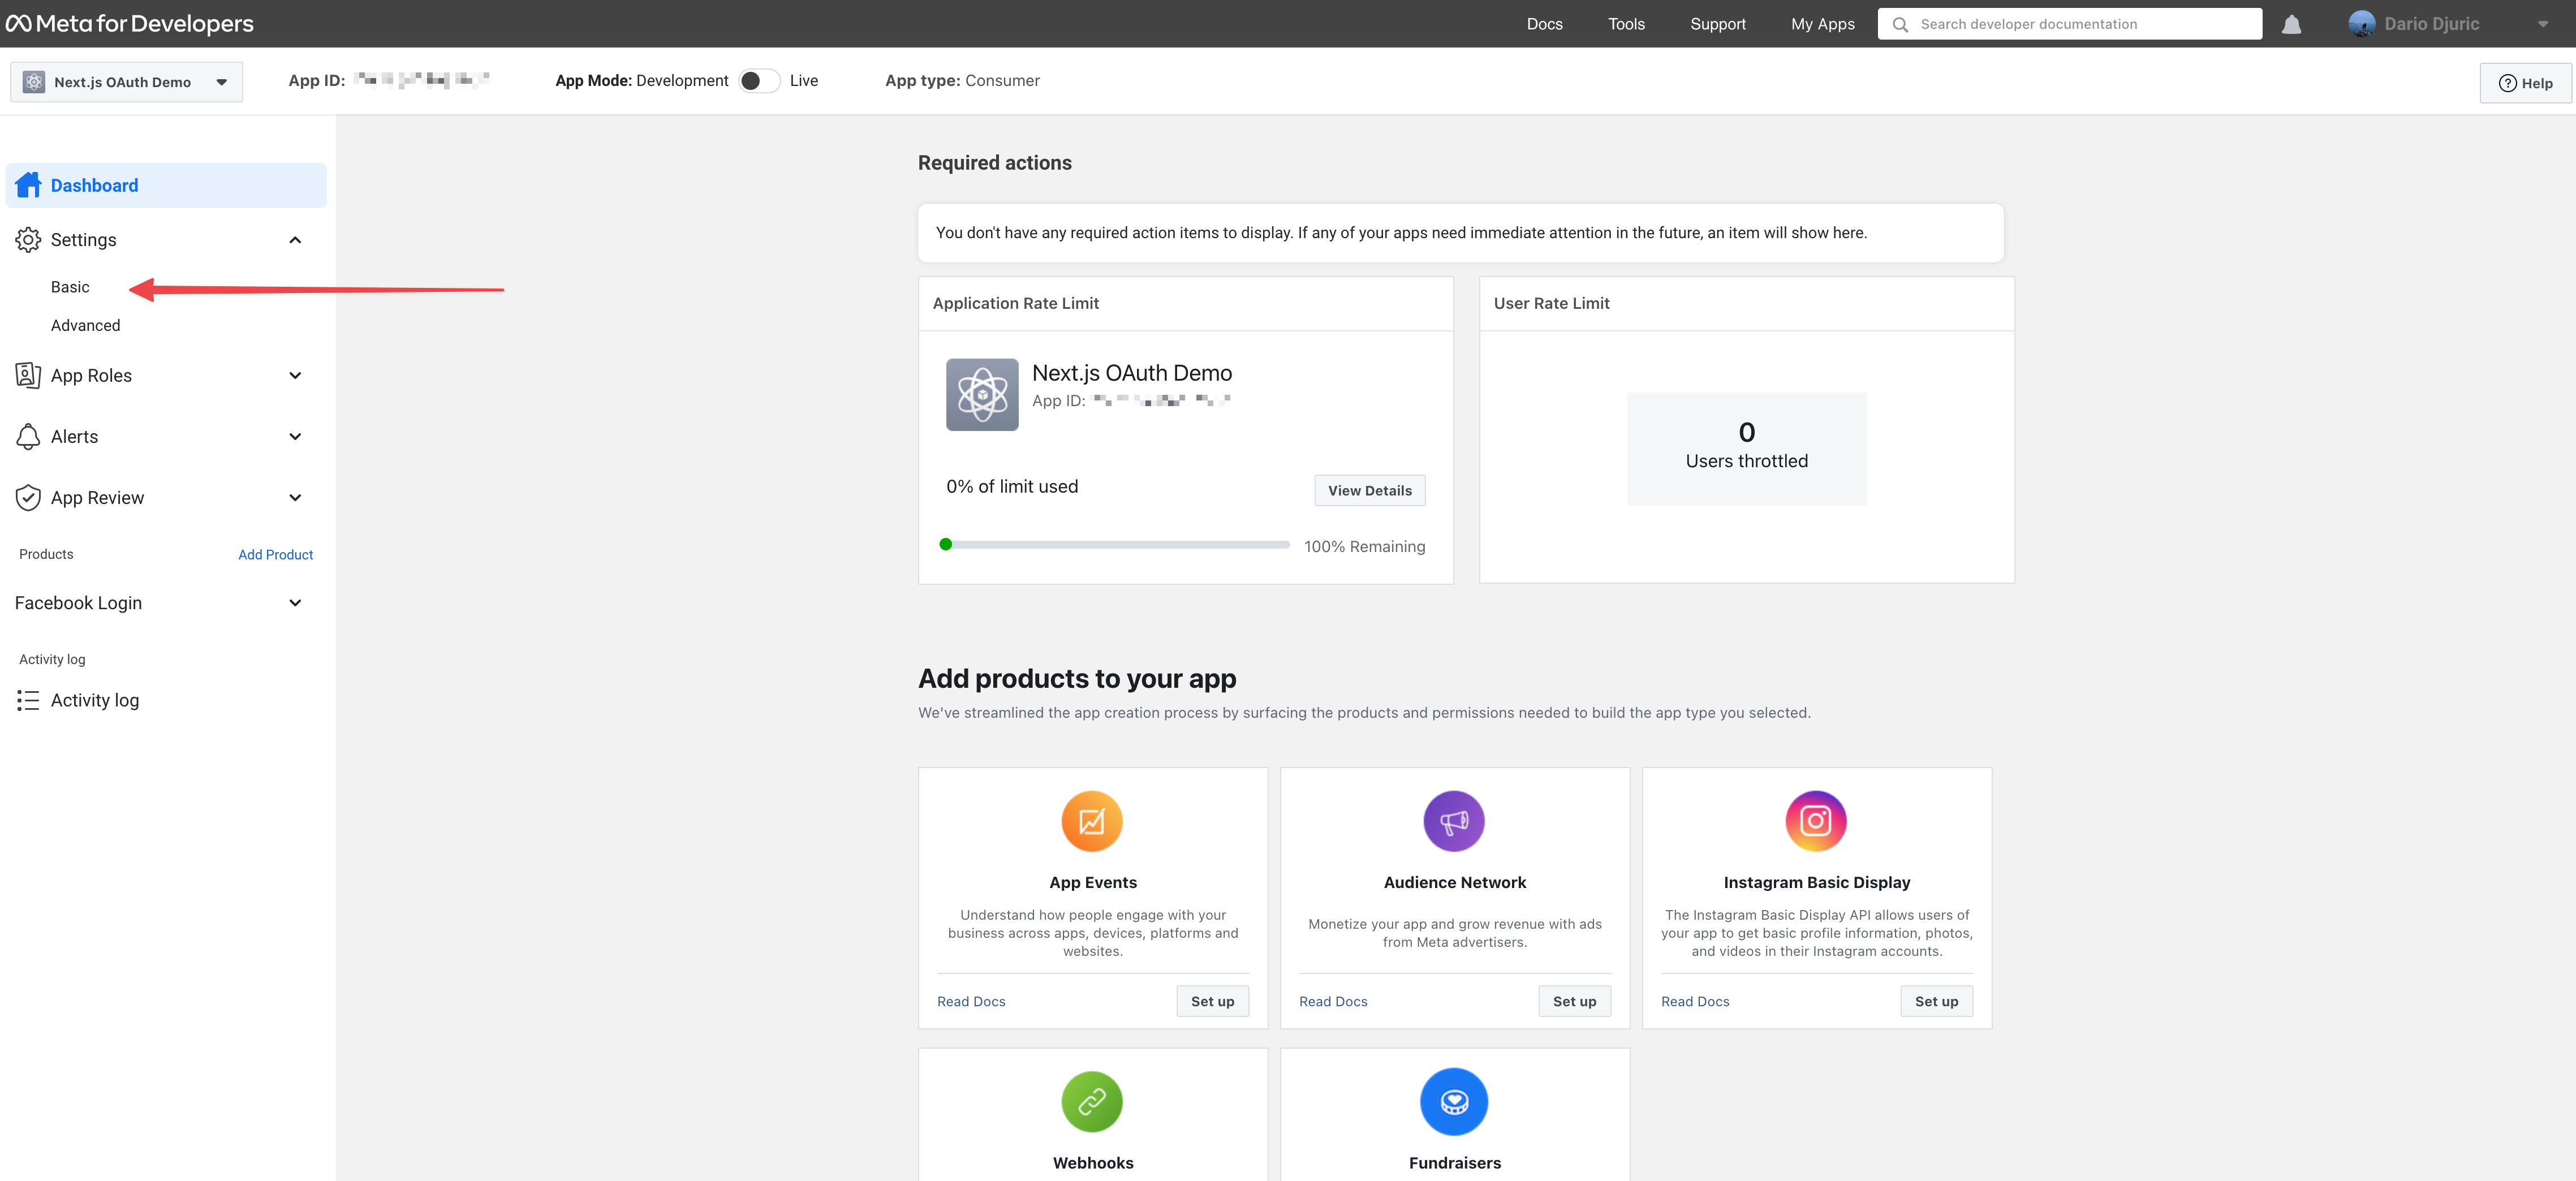
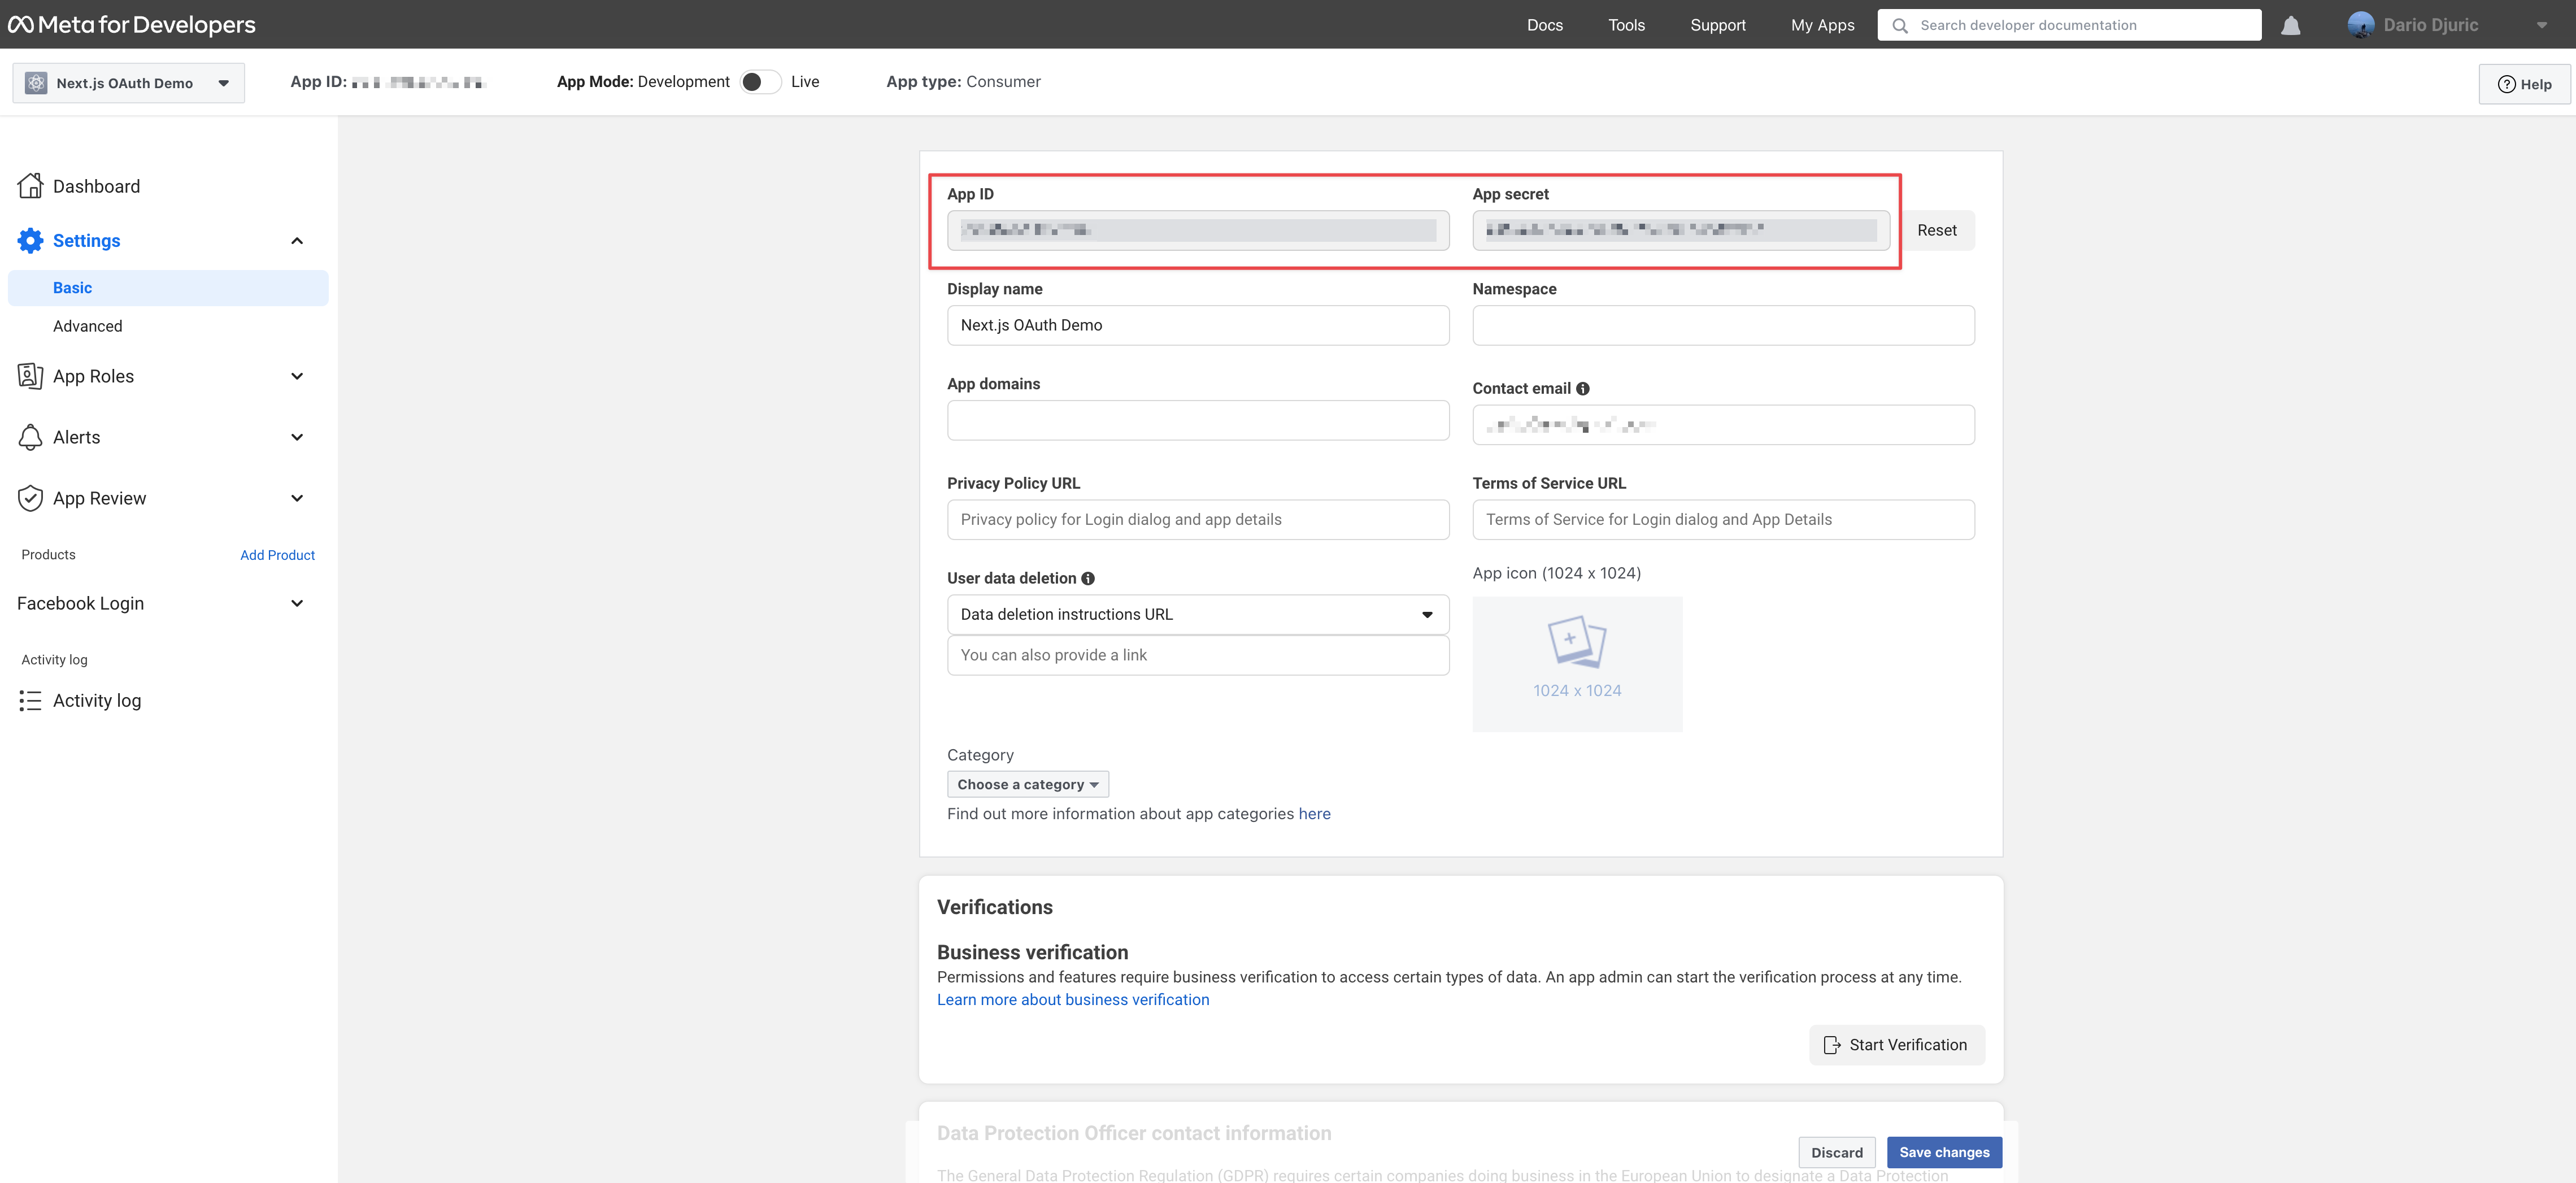
After the app is created, it's immediately visible on the dashboard. Click the app, and then click Settings / Basic on the left menu to show both the app ID and the app secret - this will be used by our Next.js app.
Setting Up Next.js
For the purpose of this blog post, we'll create a new Next.js project from scratch so you can have a good reference project with minimum features and dependencies. In the shell, execute the npx create-next-app@latest --typescript command and follow the prompts:
✔ What is your project named? … nextjs-with-facebook-oauth
✔ Would you like to use ESLint with this project? … Yes
✔ Would you like to use `src/` directory with this project? … No
✔ Would you like to use experimental `app/` directory with this project? … Yes
✔ What import alias would you like configured? … @/*
Creating a new Next.js app in /Users/dario/Projects/nextjs-with-facebook-oauth.
As you can see, we've also used this opportunity to play with the experimental app directory which is still in beta, but is the way Next.js apps will be built in the future.
In our project, we've also set up Tailwind just to design the login page more quickly.
Next, install the Auth.js library:
npm install @auth/core next-auth
Now we need to create a catch-all API route under /api/auth that will be handled by the Auth.js library. We'll do this by creating the following file:
// pages/api/auth/[...nextauth].ts
import NextAuth, { NextAuthOptions } from "next-auth";
import FacebookProvider from "next-auth/providers/facebook";

export const authOptions: NextAuthOptions = {
  providers: [
    FacebookProvider({
      clientId: process.env.FACEBOOK_APP_ID as string,
      clientSecret: process.env.FACEBOOK_APP_SECRET as string,
    }),
  ],
};

export default NextAuth(authOptions);
Note that even though we will be utilizing Next.js 13's app directory, we need to place this route in the pages directory, as Auth.js doesn't yet support placing its API handler in the app directory. This is the only case where we will be using pages, though.
In your project root, create a .env.local file with the following contents:
FACEBOOK_APP_ID=[app ID from the Facebook apps dashboard]
FACEBOOK_APP_SECRET=[app secret from the Facebook apps dashboard]
NEXTAUTH_SECRET=[generate this value by going to https://generate-secret.vercel.app/32]
NEXTAUTH_URL=http://localhost:3000
All the above environment variables except NEXTAUTH_URL are considered secret, and you should avoid committing them in the repository.
Now, moving on to the React components, we'll need to have a few components that will perform the following functionality:
- Display the sign-in button if the user is not authenticated
- Otherwise, display user name and a sign-out button
The Home component that was auto-generated by Next.js is a server component and we can use getServerSession() from Auth.js to get the user's session. Based on that, we'll show either the sign-in component or the logged-in user information. authOptions provided to getServerSession() is the object that is defined in the API route.
// /app/page.tsx
import "./globals.css";
import { getServerSession } from "next-auth/next";
import { authOptions } from "pages/api/auth/[...nextauth]";
import { UserInformation } from "@/app/UserInformation";
import { SignIn } from "@/app/SignIn";

export default async function Home() {
  const session = await getServerSession(authOptions);

  return (
    <div>
      {session?.user?.name ? (
        <UserInformation username={session?.user.name} />
      ) : (
        <SignIn />
      )}
    </div>
  );
}
The SignIn component has the sign-in button. The sign-in button needs to open an URL on Facebook that will initiate the authentication process. Once the authentication process is completed, it will invoke a "callback"- a special URL on the app side that is handled by Auth.js.
// app/SignIn.tsx
const loginUrl = `https://www.facebook.com/v16.0/dialog/oauth?client_id=${
  process.env.FACEBOOK_APP_ID
}&redirect_uri=${encodeURI(
  `${process.env.NEXTAUTH_URL}/api/auth/callback/facebook`
)}`;

export function SignIn() {
  return (
    <div>
      <a href={loginUrl}>
        <span className="block w-max text-sm font-semibold tracking-wide text-gray-700 transition duration-300 group-hover:text-blue-600 sm:text-base">
          Continue with Facebook
        </span>
      </a>
    </div>
  );
}
The UserInformation, on the other hand, is displayed after the authentication process is completed. Unlike other components, this needs to be a client component to utilize the signOut method from Auth.js, which only works client-side.
// app/UserInformation.tsx
"use client";

import { signOut } from "next-auth/react";

export interface UserInformationProps {
  username: string;
}

export function UserInformation({ username }: UserInformationProps) {
  return (
    <p>
      You are logged in as <span className="font-semibold">{username}</span>.{" "}
      <a href="" onClick={() => signOut({ redirect: true })}>
        Sign out
      </a>
      .
    </p>
  );
}
And that's it! Now run the project using npm run dev and you should be able to authenticate to Facebook as shown below:
Conclusion
In conclusion, implementing OAuth-based authentication in Next.js is relatively straightforward thanks to Auth.js. This library not only comes with built-in Facebook support, but it also comes with 60+ other popular services, such as Google, Auth0, and more. We hope this blog post was useful, and you can always refer to the CodeSandbox project if you want to view the full source code. For other Next.js demo projects, be sure to check out starter.dev, where we already have a Next.js starter kit that can give you the best-practices in integrating Next.js with other libraries.
About the author