Skip to content

Leveraging Astro's Content Collections

This article was written over 18 months ago and may contain information that is out of date. Some content may be relevant but please refer to the relevant official documentation or available resources for the latest information.

Astro’s content-focused approach to building websites got a major improvement with their v2 release. If you’re not familiar with Astro, it is web framework geared towards helping developers create content-rich websites that are highly performant. They enable developers to use their favorite UI framework to build components leveraging an islands architecture, and provide the end-user with just the minimal download needed to interact with the site and progressively enhance the site as needed.

Astro is a fantastic tool for building technical documentation sites and blogs because it provides markdown and MDX support out of the box, which enables a rich writing experience when you need more than just your base-markdown. The React Docs leverage MDX help the documentation writers provide the amazing experience we’ve all been enjoying with the new docs.

In Astro v2, they launched Content Collections, which has significantly improved their already impressive developer experience (DX). In this post, we’re going to look into how Astro (and other frameworks) managed content before Content Collections, what Content Collections are, and some of the superpowers Content Collections give us in our websites.

How Content is Managed in Projects?

A little bit of history…

Content management for websites has always been an interesting challenge. The question is typically: where should I store my content and manage it? We have content management systems (CMS), like WordPress, that people have historically and currently use to quickly build out websites. We also have Headless CMS like Contentful and Sanity that enable writers to enter their content, and then bring on developers to build out the site utilizing modern web frameworks to display content. All these solutions have enabled us to manage our content in a meaningful way, especially when the content writers aren’t developers or technical content writers. However, these tools and techniques can be limiting for writers who want to use rich content objects. For example, in the React Docs, they use Sandpack to create interactive code samples. How can we achieve these same results in our projects?

The Power of MDX

This is where MDX comes in. We can create re-usable markdown components that allow writers to progressively enhance their blog posts with interactive elements without requiring them to write custom code into their article. In the example below, we can see the HeaderLink component that allows the writer to add a custom click handler on the link that executes a script.

While this is a simple example, we could expand this to create charts, graphs, and other interactive elements that we normally couldn’t with plain markdown. Most CMS systems haven’t been upgraded to handle MDX yet, so to provide this type of experience, we need to provide a good writing experience in our codebases.

The MDX Experience

Before Content Collections, we had two main approaches for structuring content in our projects.

The first was to write each new document as a markdown or MDX page in our pages directory, and allow the file system router to handling the routing and define pages for us. This makes it easy to map the blog post to a page quickly.

However, this leads to a challenge of clutter where, as our content grows, our directory will grow. This can make it harder to find files or articles unless a clear naming convention is utilized which can be hard to enforce and maintain. It also mixes our implementation details and content documents which can cause some organizational mess.

Screenshot 2023-04-18 200413

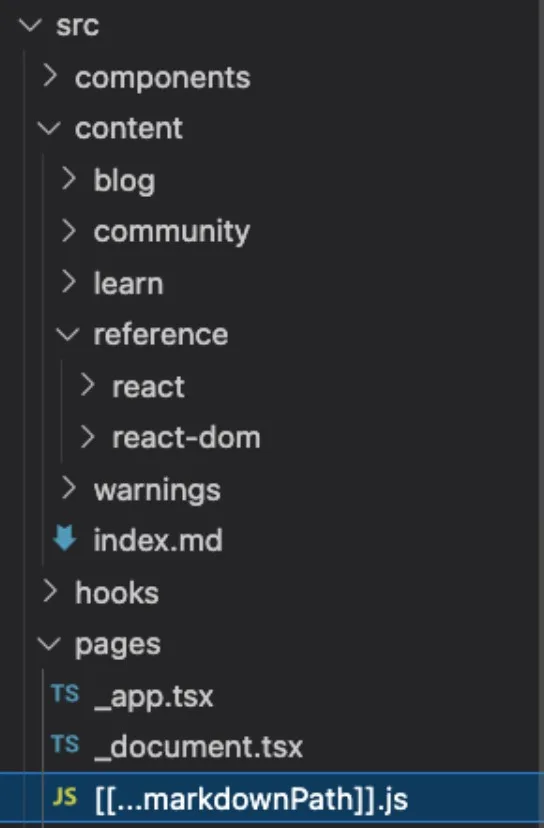
The second approach is to store our content in a separate directory, and then create a page to collect the data out of this directory and organize it. This is the approach the React Docs take. This model has the clear advantage that the content and implementation details are separated.

However, in these models, the page responsible for bringing the content together becomes a glue file trying to do file system operations, and joining data, in a logical way. This can be very brittle as any refactor could cause breakage in this model. Astro enables doing this using their Astro.glob API, but it has some limitations we’ll go over a little later.

Screenshot 2023-04-18 200643

So… What Are Content Collections?

Content Collections enable you to better manage content files in your project. They provide a standard for organizing content, validating aspects of the content, and providing some type-saftey features to your content. Content Collections took the best parts of the separate directory approach, similar to the React Docs, and did their best to eliminate all the cons of this approach.

You can leverage Content Collections by simply moving your content into the src/content directory of your project under a folder of the type of content it represents. Is it a blog post? Stick it in blog. Working with a newsletter? Toss it in newsletter. These folders are the “collections”. You can stick either .md or .mdx files in these folders, and those are your “content entries”. Once your content is in this structure, you can now use Astro’s new content APIs to query your data out in a structured way, and start using its superpowers.

Supercharging your Content!

Query Your Content like a Database

Astro’s content API provides two functions: getCollection() and getEntryBySlug() for querying your data. getCollection() has 2 arguments: the collection name and a filter function. This enables you to fetch all the content in a collection and filter to only specific files/entries based on parameters in the files frontmatter of your choosing. getEntryBySlug() takes in the collection name and file slug and returns the specific requested file. What’s particularly meaningful about these functions is that they return content with full TypeScript typings so you can validate your entries. You don’t need to write file system connecting logic and manage it yourself anymore.

Configuring Content Entry Types

Collection entries can be configured to meet specific requirements. In src/content/config.ts, you can define collections and their schemas using Zod and then registering those with the framework as demonstrated below. This is extremely powerful because now Astro can handle validating our markdown to ensure all the required fields are defined, AND it returns those entities in their target format through the content API.

When you used the Astro.glob API, you would get all frontmatter data as strings or numbers requiring you to parse your data for other standard primitives. With this change, you can now put dates into your frontmatter and get them out as date objects via the content API. You can now remove all your previous validation and remapping code and convert it all to Zod types in your collection config. But instead of having to run linters and tests to find the issues, the Astro runtime will let you know about your collection errors as you’re creating them through your IDE, or server runtime.

Content Collection Gotchas

Content collections can only be top-level folders in the src/content directory. This means you can’t nest collections. However, you can organize content within a collection using subdirectories, and use the filtering feature of the content API to create sub-selections. The main use case for this would be i18n translations for a collection. You can place the content collections in a directory for that language, and use the filter function to select those at runtime for display.

The other main "gotcha" is routing. Before, we were leveraging the file based router to handle rendering our pages. But now, there are no explicit routes defined for these pages. In order to get your pages to render properly, you’ll need to leverage Astro’s dynamic route features to generate pages from your entries. If you’re in static mode (the default), you need to define a getStaticPaths() function on your specified catch all route. If you’re in SSR mode, you’ll need to parse the route at runtime, and query for the expected data.

Some Notes on Migrating from File-Based Routing

If you had a project using Astro before v2, you probably want to upgrade to using content collections. Astro has a good guide on how to accomplish this in their docs. There’s two main gotchas to highlight for you.

The first is that layouts no longer need to be explicitly defined in the markdown files. Because you’re shifting content to use a specified layout, this property is unnecessary. However, if you leave it, it will cause the layout to be utilized on the page causing weird double layouting, so be sure to remove these properties from your frontmatter.

The second is that the content API shifts the frontmatter properties into a new data property on the return entries. Before, you might have had a line of code like post.frontmatter.pubDate. This now needs to be post.data.pubDate. Also, if this was a stringified date before, you now need to stringify the date to make it behave properly, e.g. post.data.pubDate.toDateString().

Finally, you can remove any custom types you made before, because now you can get those directly from your collection config.

In summary…

Astro Content Collections are a great way to manage your content and websites, especially if they’re content-focused and rich. I’ve put together some code demonstrating all the patterns and techniques described in this post that you can check out here. At This Dot, we love utilizing the right tool for the right job. Astro is increasingly becoming one of our favorites for content site projects. We use it for our open source projects - framework.dev and starter.dev- and are always considering it for additional projects.

This Dot is a consultancy dedicated to guiding companies through their modernization and digital transformation journeys. Specializing in replatforming, modernizing, and launching new initiatives, we stand out by taking true ownership of your engineering projects.

We love helping teams with projects that have missed their deadlines or helping keep your strategic digital initiatives on course. Check out our case studies and our clients that trust us with their engineering.

You might also like

Understanding Sourcemaps: From Development to Production cover image

Understanding Sourcemaps: From Development to Production

What Are Sourcemaps? Modern web development involves transforming your source code before deploying it. We minify JavaScript to reduce file sizes, bundle multiple files together, transpile TypeScript to JavaScript, and convert modern syntax into browser-compatible code. These optimizations are essential for performance, but they create a significant problem: the code running in production does not look like the original code you wrote. Here's a simple example. Your original code might look like this: ` After minification, it becomes something like this: ` Now imagine trying to debug an error in that minified code. Which line threw the exception? What was the value of variable d? This is where sourcemaps come in. A sourcemap is a JSON file that contains a mapping between your transformed code and your original source files. When you open browser DevTools, the browser reads these mappings and reconstructs your original code, allowing you to debug with variable names, comments, and proper formatting intact. How Sourcemaps Work When you build your application with tools like Webpack, Vite, or Rollup, they can generate sourcemap files alongside your production bundles. A minified file references its sourcemap using a special comment at the end: ` The sourcemap file itself contains a JSON structure with several key fields: ` The mappings field uses an encoding format called VLQ (Variable Length Quantity) to map each position in the minified code back to its original location. The browser's DevTools use this information to show you the original code while you're debugging. Types of Sourcemaps Build tools support several variations of sourcemaps, each with different trade-offs: Inline sourcemaps: The entire mapping is embedded directly in your JavaScript file as a base64 encoded data URL. This increases file size significantly but simplifies deployment during development. ` External sourcemaps: A separate .map file that's referenced by the JavaScript bundle. This is the most common approach, as it keeps your production bundles lean since sourcemaps are only downloaded when DevTools is open. Hidden sourcemaps: External sourcemap files without any reference in the JavaScript bundle. These are useful when you want sourcemaps available for error tracking services like Sentry, but don't want to expose them to end users. Why Sourcemaps During development, sourcemaps are absolutely critical. They will help avoid having to guess where errors occur, making debugging much easier. Most modern build tools enable sourcemaps by default in development mode. Sourcemaps in Production Should you ship sourcemaps to production? It depends. While security by making your code more difficult to read is not real security, there's a legitimate argument that exposing your source code makes it easier for attackers to understand your application's internals. Sourcemaps can reveal internal API endpoints and routing logic, business logic, and algorithmic implementations, code comments that might contain developer notes or TODO items. Anyone with basic developer tools can reconstruct your entire codebase when sourcemaps are publicly accessible. While the Apple leak contained no credentials or secrets, it did expose their component architecture and implementation patterns. Additionally, code comments can inadvertently contain internal URLs, developer names, or company-specific information that could potentially be exploited by attackers. But that’s not all of it. On the other hand, services like Sentry can provide much more actionable error reports when they have access to sourcemaps. So you can understand exactly where errors happened. If a customer reports an issue, being able to see the actual error with proper context makes diagnosis significantly faster. If your security depends on keeping your frontend code secret, you have bigger problems. Any determined attacker can reverse engineer minified JavaScript. It just takes more time. Sourcemaps are only downloaded when DevTools is open, so shipping them to production doesn't affect load times or performance for end users. How to manage sourcemaps in production You don't have to choose between no sourcemaps and publicly accessible ones. For example, you can restrict access to sourcemaps with server configuration. You can make .map accessible from specific IP addresses. Additionally, tools like Sentry allow you to upload sourcemaps during your build process without making them publicly accessible. Then configure your build to generate sourcemaps without the reference comment, or use hidden sourcemaps. Sentry gets the mapping information it needs, but end users can't access the files. Learning from Apple's Incident Apple's sourcemap incident is a valuable reminder that even the largest tech companies can make deployment oversights. But it also highlights something important: the presence of sourcemaps wasn't actually a security vulnerability. This can be achieved by following good security practices. Never include sensitive data in client code. Developers got an interesting look at how Apple structures its Svelte codebase. The lesson is that you must be intentional about your deployment configuration. If you're going to include sourcemaps in production, make that decision deliberately after considering the trade-offs. And if you decide against using public sourcemaps, verify that your build process actually removes them. In this case, the public repo was quickly removed after Apple filed a DMCA takedown. (https://github.com/github/dmca/blob/master/2025/11/2025-11-05-apple.md) Making the Right Choice So what should you do with sourcemaps in your projects? For development: Always enable them. Use fast options, such as eval-source-map in Webpack or the default configuration in Vite. The debugging benefits far outweigh any downsides. For production: Consider your specific situation. But most importantly, make sure your sourcemaps don't accidentally expose secrets. Review your build output, check for hardcoded credentials, and ensure sensitive configurations stay on the backend where they belong. Conclusion Sourcemaps are powerful development tools that bridge the gap between the optimized code your users download and the readable code you write. They're essential for debugging and make error tracking more effective. The question of whether to include them in production doesn't have a unique answer. Whatever you decide, make it a deliberate choice. Review your build configuration. Verify that sourcemaps are handled the way you expect. And remember that proper frontend security doesn't come from hiding your code. Useful Resources * Source map specification - https://tc39.es/ecma426/ * What are sourcemaps - https://web.dev/articles/source-maps * VLQ implementation - https://github.com/Rich-Harris/vlq * Sentry sourcemaps - https://docs.sentry.io/platforms/javascript/sourcemaps/ * Apple DMCA takedown - https://github.com/github/dmca/blob/master/2025/11/2025-11-05-apple.md...

Incremental Hydration in Angular cover image

Incremental Hydration in Angular

Incremental Hydration in Angular Some time ago, I wrote a post about SSR finally becoming a first-class citizen in Angular. It turns out that the Angular team really treats SSR as a priority, and they have been working tirelessly to make SSR even better. As the previous blog post mentioned, full-page hydration was launched in Angular 16 and made stable in Angular 17, providing a great way to improve your Core Web Vitals. Another feature aimed to help you improve your INP and other Core Web Vitals was introduced in Angular 17: deferrable views. Using the @defer blocks allows you to reduce the initial bundle size and defer the loading of heavy components based on certain triggers, such as the section entering the viewport. Then, in September 2024, the smart folks at Angular figured out that they could build upon those two features, allowing you to mark parts of your application to be server-rendered dehydrated and then hydrate them incrementally when needed - hence incremental hydration. I’m sure you know what hydration is. In short, the server sends fully formed HTML to the client, ensuring that the user sees meaningful content as quickly as possible and once JavaScript is loaded on the client side, the framework will reconcile the rendered DOM with component logic, event handlers, and state - effectively hydrating the server-rendered content. But what exactly does "dehydrated" mean, you might ask? Here's what will happen when you mark a part of your application to be incrementally hydrated: 1. Server-Side Rendering (SSR): The content marked for incremental hydration is rendered on the server. 2. Skipped During Client-Side Bootstrapping: The dehydrated content is not initially hydrated or bootstrapped on the client, reducing initial load time. 3. Dehydrated State: The code for the dehydrated components is excluded from the initial client-side bundle, optimizing performance. 4. Hydration Triggers: The application listens for specified hydration conditions (e.g., on interaction, on viewport), defined with a hydrate trigger in the @defer block. 5. On-Demand Hydration: Once the hydration conditions are met, Angular downloads the necessary code and hydrates the components, allowing them to become interactive without layout shifts. How to Use Incremental Hydration Thanks to Mark Thompson, who recently hosted a feature showcase on incremental hydration, we can show some code. The first step is to enable incremental hydration in your Angular application's appConfig using the provideClientHydration provider function: ` Then, you can mark the components you want to be incrementally hydrated using the @defer block with a hydrate trigger: ` And that's it! You now have a component that will be server-rendered dehydrated and hydrated incrementally when it becomes visible to the user. But what if you want to hydrate the component on interaction or some other trigger? Or maybe you don't want to hydrate the component at all? The same triggers already supported in @defer blocks are available for hydration: - idle: Hydrate once the browser reaches an idle state. - viewport: Hydrate once the component enters the viewport. - interaction: Hydrate once the user interacts with the component through click or keydown triggers. - hover: Hydrate once the user hovers over the component. - immediate: Hydrate immediately when the component is rendered. - timer: Hydrate after a specified time delay. - when: Hydrate when a provided conditional expression is met. And on top of that, there's a new trigger available for hydration: - never: When used, the component will remain static and not hydrated. The never trigger is handy when you want to exclude a component from hydration altogether, making it a completely static part of the page. Personally, I'm very excited about this feature and can't wait to try it out. How about you?...

Demystifying React Server Components cover image

Demystifying React Server Components

React Server Components (RSCs) are the latest addition to the React ecosystem, and they've caused a bit of a disruption to how we think about React. Dan Abramov recently wrote an article titled "The Two Reacts" that explores the paradigms of client component and server component mental models and leaves us with the thought on how we can cohesively combine these concepts in a meaningful way. It took me a while to finally give RSCs the proper exploration to truly understand the "new" model and grasp where React is heading. First off, the new model isn't really new so much as it introduces a few new concepts for us to consider when architecting our applications. Once I understood the pattern, I found an appreciation for the model and what it's trying to help us accomplish. In this post, I hope I can show you the progression of the React architecture in applications as I've experienced them and how I think RSCs help us improve this model and our apps. A "Brief" History of React Rendering and Data-Fetching Patterns One of the biggest challenges in React since its early days is "how do we server render pages?" Server-side rendering (SSR) is one of the techniques we can use to ensure users see data on initial load and helps with our site's SEO. Without SSR, users would see blank screens or loading spinners, and then a bunch of content would appear shortly after. An excellent graphic on Remix's website demonstrates this behavior from the end user's perspective and it's a problem we generally try to avoid as developers. This problem is so vast and difficult that we've been trying to solve it since 2015. Rick Hanlon from the React Core Team reminded us just how complicated this problem was recently. If you think react is complicated now, go back to 2015 when you had to configure babel and webpack yourself, you had to do SSR and routing yourself, you had to decide between flow and typescript, you had to learn flux and immutable.js, and you had to choose 1 of 100 boilerplates— Ricky (@rickhanlonii) January 28, 2024 But SSR has its issues too. Sometimes SSR is slow because we need to do a lot of data fetching for our page. Because of these large payloads, we'll defer their rendering using lazy loading patterns. All of a sudden we have spinners again! How we've managed these components has changed too. Over the years, we've seen a variety of patterns emerge for managing these problems. We had server-side pre-fetching where we had to hydrate our frontends application state. Then we tried controller-view patterned components for our lazily loaded client-side components. With the evolution of React, we were able to simplify the controller-view patterns to leverage hooks. Now, we're in a new era of multi-server entry points on a page with RSCs. The Benefits of React Server Components RSCs give us this new paradigm that allows us to have multiple entries into our server on a single page. Leveraging features like Next.js' streaming mode and caching, we can limit what our pages block on for SSR and optimize their performance. To illustrate this, let's look at this small block of PHP for something we might have done in the 2000s: index.php ` For simplicity, the blocks indicate server boundaries where we can execute PHP functionality. Once we exit that block, we can no longer leverage or communicate with the server. In this example, we're displaying a welcome message to a user and a list of posts. If we look at Next.js' page router leveraging getServerSideProps, we would maybe write this same page as follows: pages/posts.jsx ` In this case, we're having our server do a lot to fetch the data we need to render this page and all its components. This also makes the line between server and client much clearer as getServerSideProps runs before our client renders, and we're unable to go back to that function without an API route and client-side fetch. Now, let's look at Next.js' app router with server components. This same component could be rendered as follows: app/posts/page.tsx ` This moves us a bit closer back to our PHP version as we don't have to split our server and client functionality as explicitly. This example is relatively simple and only renders a few components that could be easily rendered as static content. This page also probably requires all the content to be rendered upfront. But, from this, we can see that we're able to simplify how server data fetching is done. If nothing else, we could use this pattern to make our SSR patterns better and client render the rest of our apps, but then we'd lose out on some of the additional benefits that we can get when we combine this with streaming. Let's look at a post page that probably has the content and a comments section. We don't need to render the comments immediately on page load or block on it because it's a secondary feature on the page. This is where we can pull in Suspense and make our page shine. Our code might look as follows: app/posts/[slug]/page.jsx ` Our PostComments are a server component that renders static content again, but we don't want its render to block our page from being served to the client. What we've done here is moved the fetch operation into the comments component and wrapped it in a Suspense boundary in our page to defer its render until its content has been fetched and then stream it onto the page into its render location. We could also add a fallback to our suspense boundary if we wanted to put a skeleton loader or other indication UI. With these changes, we're writing components similarly to how we've written them on the client historically but simplified our data fetch. What happens when we start to progressively enhance our features with client-side JavaScript? Client Components with RSCs All our examples focused on staying in the server context which is great for simple applications, but what happens when we want to add interactivity? If you were to put a useState, useEffect, onClick, or other client-side React feature into a server component, you'd find some error messages because you can't run client code from a server context. If we think back to our PHP example, that makes a lot of sense why this is the case, but how do we work around this? For me, this is where my first really mental challenge with RSCs started. Let's use our PostComments as an example to enhance by in-place sorting the section from the server. ` In this example, we're using a server component the same way as our previous example to do the initial data fetch and stream when ready. However, we're immediately passing the results to a client component that renders the elements and enhances our code with a list of sort options. When we select the sort we want, our code makes a request to the server at a predefined route and gets the new data that we re-render in the new order on screen. This is how we might have done things without RSCs before but without a useEffect for our initial rendering. If you're familiar with the old controller-view pattern, this is relatively similar to that pattern, but we have to relegate client re-fetching to the view (client) component, where we might have had all fetch and re-fetch patterns in the controller (server) component Another way to solve this same problem is leveraging server actions, but that would cause the page to re-render. Given the caching mechanisms in Next.js, this is probably fine, but it's not the user experience people are expecting. Server actions are a topic of their own, so I won't cover them in this post, but they're important for the holistic ecosystem experience in the new mindset. Interleaving Nested Server & Client Components These examples have shown a clean approach where we keep our server components at the top of our rendering tree and have a clear line where we move from server mode to client mode. But one of the advantages of RSCs is that we can interleave where our server component entry points may exist. Let's think about a product carousel on a storefront page for example. We may have built this as follows before: ` Here we're rendering carousels that render their cards and our tree goes server -> client -> server. This is not allowed in the new paradigm because the React compiler cannot detect that we moved back into a server component when we called ProductCards from a client component. Instead, we would need to refactor this to be: ` Here, we've changed ProductCarousel to accept children that are our ProductCards server component. This allows the compiler to detect the boundary and render it appropriately. I'd also recommend adding Suspense boundaries to these carousels but I omitted it for the sake of brevity in this example. Some Suggested Best Practices Our team has been using these new patterns for some time and have developed some patterns we've identified as best practices for us to help keep some of these boundaries clear that I thought worth sharing. 1. Be explicit with component types We've found that being explicit with component types is essential to expressing intent. Some components are strictly server, some are strictly client, and others can be used in both contexts. Our team likes using the server-only package to express this intent but we found we needed more. We've opted for the following naming conventions: Server only components: component-name.server.(jsx|tsx) Client only components: component-name.client.(jsx|tsx) Universal components: component-name.(jsx|tsx) This does not apply to special framework file names but we've found this helps us delineate where we are and to help with interleaving. 2. Defer Fetch when Cache is Available If we're trying to render a component that is a collection of other components, we've found deferring the fetch to the child allows our cache to do more for us in rendering in cases where the same element may exist in different locations. This is similar to how GraphQL's data loaders works and can ideally boost the performance of cached server components. So, in our product example above, we may only fetch the IDs of the products we need for the ProductCards and then fetch all the data per card. Yes, this is an extra fetch and causes an N+1, but if our cache is in play, end users will feel a performance gain. 3. Colocate loaders and queries If you're using GraphQL or need loading states for components for Suspense fallback, we recommend colocating those elements in the same file or directory. This makes it easier to modify and manage related elements for your components in a more meaningful way. 4. Use Suspense to defer non-essential content This will depend on your website and needs. Still, we recommend deferring as many non-essential elements to Suspense as possible. We define non-essential to be anything you could consider secondary to the page. On a blog post, this could be recommended posts or comments. On a product page, this could be reviews and related products. So long as the primary focus of your page is outside a Suspense boundary, your usage is probably acceptable. Conclusion RSCs represent a significant evolution in the React ecosystem, offering new paradigms and opportunities for improving the architecture of web applications. They enable multiple server entry points on a single page, optimizing server-side rendering, and simplifying data fetching. RSCs allow for a clearer separation between server and client functionality, enhancing both performance and maintainability. To make the most of RSCs, developers should consider best practices such as being explicit with component types, deferring fetch when caching is available, colocating loaders and queries, and using Suspense to defer non-essential content. Embracing these practices can help harness the potential of React Server Components and pave the way for more efficient and interactive web applications. We're excited about this development in the React ecosystem and the developments happening across teams and frameworks that are opting into using them. While Next.js offers a great solution, we're excited to see similar enhancements to Remix and RedwoodJS....

Vercel BotID: The Invisible Bot Protection You Needed cover image

Vercel BotID: The Invisible Bot Protection You Needed

Nowadays, bots do not act like “bots”. They can execute JavaScript, solve CAPTCHAs, and navigate as real users. Traditional defenses often fail to meet expectations or frustrate genuine users. That’s why Vercel created BotID, an invisible CAPTCHA that has real-time protections against sophisticated bots that help you protect your critical endpoints. In this blog post, we will explore why you should care about this new tool, how to set it up, its use cases, and some key considerations to take into account. We will be using Next.js for our examples, but please note that this tool is not tied to this framework alone; the only requirement is that your app is deployed and running on Vercel. Why Should You Care? Think about these scenarios: - Checkout flows are overwhelmed by scalpers - Signup forms inundated with fake registrations - API endpoints draining resources with malicious requests They all impact you and your users in a negative way. For example, when bots flood your checkout page, real customers are unable to complete their purchases, resulting in your business losing money and damaging customer trust. Fake signups clutter the app, slowing things down and making user data unreliable. When someone deliberately overloads your app’s API, it can crash or become unusable, making users angry and creating a significant issue for you, the owner. BotID automatically detects and filters bots attempting to perform any of the above actions without interfering with real users. How does it work? A lightweight first-party script quickly gathers a high set of browser & environment signals (this takes ~30ms, really fast so no worry about performance issues), packages them into an opaque token, and sends that token with protected requests via the rewritten challenge/proxy path + header; Vercel’s edge scores it, attaches a verdict, and checkBotId() function simply reads that verdict so your code can allow or block. We will see how this is implemented in a second! But first, let’s get started. Getting Started in Minutes 1. Install the SDK: ` 1. Configure redirects Wrap your next.config.ts with BotID’s helper. This sets up the right rewrites so BotID can do its job (and not get blocked by ad blockers, extensions, etc.): ` 2. Integrate the client on public-facing pages (where BotID runs checks): Declare which routes are protected so BotID can attach special headers when a real user triggers those routes. We need to create instrumentation-client.ts (place it in the root of your application or inside a src folder) and initialize BotID once: ` instrumentation-client.ts runs before the app hydrates, so it’s a perfect place for a global setup! If we have an inferior Next.js version than 15.3, then we would need to use a different approach. We need to render the React component inside the pages or layouts you want to protect, specifying the protected routes: ` 3. Verify requests on your server or API: ` - NOTE: checkBotId() will fail if the route wasn’t listed on the client, because the client is what attaches the special headers that let the edge classify the request! You’re all set - your routes are now protected! In development, checkBotId() function will always return isBot = false so you can build without friction. To disable this, you can override the options for development: ` What happens on a failed check? In our example above, if the check failed, we return a 403, but it is mostly up to you what to do in this case; the most common approaches for this scenario are: - Hard block with a 403 for obviously automated traffic (just what we did in the example above) - Soft fail (generic error/“try again”) when you want to be cautious. - Step-up (require login, email verification, or other business logic). Remember, although rare, false positives can occur, so it’s up to you to determine how you want to balance your fail strategy between security, UX, telemetry, and attacker behavior. checkBotId() So far, we have seen how to use the property isBot from checkBotId(), but there are a few more properties that you can leverage from it. There are: isHuman (boolean): true when BotID classifies the request as a real human session (i.e., a clear “pass”). BotID is designed to return an unambiguous yes/no, so you can gate actions easily. isBot (boolean): We already saw this one. It will be true when the request is classified as automated traffic. isVerifiedBot (boolean): Here comes a less obvious property. Vercel maintains and continuously updates a comprehensive directory of known legitimate bots from across the internet. This directory is regularly updated to include new legitimate services as they emerge. This could be helpful for allowlists or custom logic per bot. We will see an example in a sec. verifiedBotName? (string): The name for the specific verified bot (e.g., “claude-user”). verifiedBotCategory? (string): The type of the verified bot (e.g., “webhook”, “advertising”, “ai_assistant”). bypassed (boolean): it is true if the request skipped BotID check due to a configured Firewall bypass (custom or system). You could use this flag to avoid taking bot-based actions when you’ve explicitly bypassed protection. Handling Verified Bots - NOTE: Handling verified bots is available in botid@1.5.0 and above. It might be the case that you don’t want to block some verified bots because they are not causing damage to you or your users, as it can sometimes be the case for AI-related bots that fetch your site to give information to a user. We can use the properties related to verified bots from checkBotId() to handle these scenarios: ` Choosing your BotID mode When leveraging BotID, you can choose between 2 modes: - Basic Mode: Instant session-based protection, available for all Vercel plans. - Deep Analysis Mode: Enhanced Kasada-powered detection, only available for Pro and Enterprise plan users. Using this mode, you will leverage a more advanced detection and will block the hardest to catch bots To specify the mode you want, you must do so in both the client and the server. This is important because if either of the two does not match, the verification will fail! ` Conclusion Stop chasing bots - let BotID handle them for you! Bots are and will get smarter and more sophisticated. BotID gives you a simple way to push back without slowing your customers down. It is simple to install, customize, and use. Stronger protection equals fewer headaches. Add BotID, ship with confidence, and let the bots trample into a wall without knowing what’s going on....

Let's innovate together!

We're ready to be your trusted technical partners in your digital innovation journey.

Whether it's modernization or custom software solutions, our team of experts can guide you through best practices and how to build scalable, performant software that lasts.

Prefer email? hi@thisdot.co