
Welcome to a new episode of the Fire the base of Vue.js! series.
In this episode, I will integrate our Vue.js Notes Writer App with a serverless backend- specifically, the Firebase Cloud Functions.
If you haven’t read the other parts of this series, I highly recommend you do so before starting here.
Vue the Mirage from this angle! Storing your notes in the Cloud Firestore with Vue.js Firebase for user authentication in Vue.js
To follow up on the demo part of this article, you can use this GitHub source code repo as a starting point.
Firebase Cloud Functions, the concept
Cloud Functions are part of the Google Cloud Platform. You use them to write and deploy code that can respond to events coming from Google Cloud Services, including, but not limited to, the Firebase family of products.
With Cloud Functions, you piece together your application using different products. For instance, a user creates a new Document inside Firestore via the Web app. Consequently, a Cloud Function triggers, and responds to the event of Document Creation. The logic of a Cloud Function depends solely on the business scenario you are implementing.
Not only do they let you connect Google Cloud Services together, but they also allow you to create your own set of REST APIs to consume inside your Web or Mobile app.
The Cloud Functions project is a wrapper on top of the Google Cloud project. However, it was made easier for developers to configure and use.
The two major benefits Cloud Functions offer: Centralize your code in a safe way on Google Cloud Servers. Firebase Cloud Functions run on Google Servers. All of your apps, whether they be Web, Mobile or Desktop, can access and use them. Code security. It is better to save the access codes and keys for Firebase Services on the backend (on the Google Servers) rather than exposing them inside the client-side app code.
Cloud Functions are best used to: Trigger code in response to events coming from Firebase products. Perform writes to the Realtime Database and Firestore Upload to your Cloud Storage buckets. Respond to new accounts created in Firebase Authentication. Handle incoming HTTPs Request.
Firebase supports two flavors of Cloud Functions: HTTPs triggered Functions Background triggered Functions
Unlike Google Cloud Functions, Firebase Cloud Functions support only JavaScript/TypeScript with Node.js. The team is working on including more programming languages. Until then, let’s enjoy JavaScript!
HTTPs Triggered Cloud Functions
Let’s explore the anatomy of Cloud Functions for HTTPs triggers.
Start by ensuring Node.js version >= 8.13.0 is installed on your machine.
Next, install the Firebase CLI globally on your computer by running the following command:
npm install -g firebase-tools
Create a Firebase project by running the commands:
mkdir firebase-functions-http
cd firebase-functions-http
The next step is to log into Firebase services to connect the new project. Issue this:
firebase login
That command opens up a new tab in your default browser to ask for some permissions needed by the Firebase account.
Let’s initialize the Firebase project by running the following command:
firebase init
This command guides you through a command-line wizard to choose the Firebase features you want to add to the project.
For our case, let’s pick the following:
Which Firebase CLI features do you want to set up for this folder? Functions
What language would you like to use to write Cloud Functions? JavaScript
Do you want to use ESLint to catch probable bugs and enforce style? Yes
Do you want to install dependencies with npm now? Yes
That’s all!
Let the Firebase CLI do the project scaffolding, and get the project files ready.
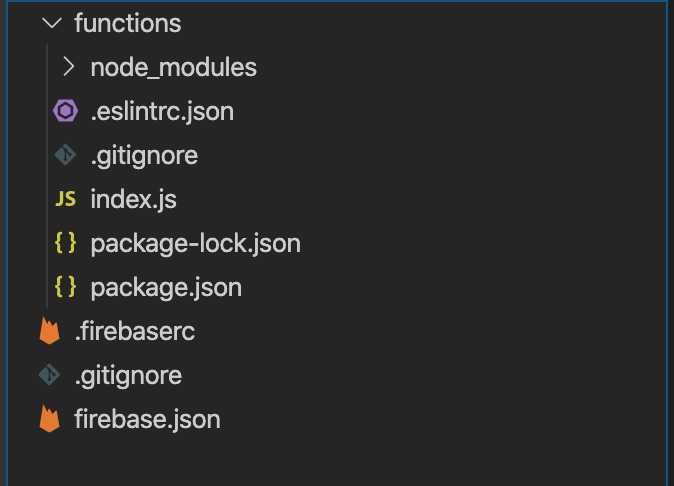
The command scaffolds a Node.js project, and stores the Cloud Function related code inside the /functions folder.
The /functions.package.json lists all the dependencies needed by the Cloud Function. The most important dependencies are:
"dependencies": {
    "firebase-admin": "^8.9.2",
    "firebase-functions": "^3.3.0"
  },
Let’s make sure we have the latest bits of these packages by running the following command:
npm install firebase-admin@latest firebase-functions@latest
The /functions/index.js file contains the Cloud Function code.
const functions = require('firebase-functions');

exports.helloWorld = functions.https.onRequest((request, response) => {
    response.send("Hello from Firebase!");
});
The index.js file is a typical Node.js module file that exports a single Cloud Function named helloWorld. You can export more functions as needed.
The module starts by requiring the firebase-functions library. This library allows you to create Cloud Functions for HTTPs triggers. It exposes the onRequest() function. This function expects two parameters, the Request and Response objects. The callback function is required to return a Promise by issuing a call for response.send() function.
The popular Express.js module for Node.js is behind a Cloud Function for HTTPs trigger. When you deploy a Cloud Function on Firebase, it creates an Express.js app behind the scenes. This app will listen to any HTTPs request for /helloWorld, prepare a Request and Response object, and will call through your Cloud Function, passing it to the two objects.
You can include any code inside the onRequest() callback function like you do when writing Express.js apps.
I highly recommend reading this great article on dissecting the Express.js module, and learning how it’s made under the hood. Understanding how Express.js Works
Let’s run this Cloud Function locally by issuing the following command:
firebase serve --only functions
The command starts the Firebase Cloud Functions emulator to allow you to run the function locally, without the need to deploy it to Firebase servers.
✔  functions: Using node@10 from host.
✔  functions: Emulator started at http://localhost:5000
i  functions: Watching "/.../firebase-functions-http/functions" for Cloud Functions...
✔  functions[helloWorld]: http function initialized (http://localhost:5000/firebase-functions-http/us-central1/helloWorld).
Copy & Paste the Function URL into your browser, and you will see a plain text response of Hello from Firebase!.
To deploy the Cloud Function to Firebase platform, run the following command:
firebase deploy --only functions
Cloud Functions for HTTPs triggers can only be run under HTTPS and not HTTP.
Inside a Cloud Function for HTTPs trigger, you can call any other third party service. You can query the Firestore database, and return data from it, for instance.
You can always refer to the amazing Firebase Cloud Functions documentation to study the full range of capabilities supported by them.
Background Triggered Cloud Functions
The Background Triggered functions is the other type of functions offered and supported by Firebase.
Each and every product in the Firebase family exposes a set of events that are triggered upon a certain action.
For example, when a new Document is created inside Firestore, the OnCreate event is triggered.
Another example is when a new User is created in the Firebase Authentication module, the onCreate event is triggered.
exports.sendWelcomeEmail = functions.auth.user().onCreate((user) => {
  // ...
});
The functions object gives access to all supported types of Cloud Functions. This includes both the HTTPs, and Background triggered ones.
The example above gives you access to the user that was created. Then, you might decide to send the user an email, or push down a notification to the app. The sky's the limit!!
The Firebase Cloud Functions supports all Firebase products, and gives the developer the chance to handle many of the events triggered by them.
For a full list of all the supported background triggered functions, have a look at Trigger background functions
The Firebase Cloud Functions documentation is complete, and is extremely helpful to learning all the ins and outs. Therefore, without any further ado, let’s jump into our Notes App Writer, and add a new background triggered Cloud Function.
Demo
Clone the Notes App Writer at the add-auth branch. This is the branch we worked on in the previous article while authenticating users in the app.
Clone the app
Run the following command to clone the branch:
git clone --single-branch --branch add-auth git@github.com:bhaidar/notes-writer.git
Make sure to install all NPM packages by running this command:
npm install
Add support for Firebase Cloud Functions
If you haven’t logged into Firebase before, it’s time to do it by running this command:
firebase login
Once you log in, let’s initialize the Firebase services once again to include Functions this time.
firebase init
Follow the same steps mentioned in the HTTPs Triggered Cloud Functions section.
You will notice a new folder created under the root folder of the project named functions. This folder, as you know by now, holds all the source code for the Cloud Functions in your project.
It’s always important, whenever you add support for Cloud Functions in your project, to update the Firebase NPM packages by running the following command:
npm install firebase-admin@latest firebase-functions@latest
Use Environment Variables to store configuration settings
Let’s revisit the /firebaseConfig.js file. This file holds the Firebase connection settings as provided by Firebase Console.
I will make use of a hidden gem in Vue.js CLI v3, which allows you to use Environment Variables in your application to store such configuration settings. In fact, this is the recommended way of storing configuration settings in a Vue.js app rather than putting them in plain JSON or JavaScript files.
The CLI documentation referenced above gives you all the details about the Environment Variable files to use in your app. For now, create a new .env file at the root of the project, and paste the following keys:
VUE_APP_API_KEY=
VUE_APP_KEY_AUTH_DOMAIN=
VUE_APP_KEY_DATABASE_URL=
VUE_APP_PROJECT_ID=
VUE_APP_STORAGE_BUCKET=
VUE_APP_MESSAGING_SENDER_ID=
VUE_APP_ID=
Grab the actual keys from the Firebase Console and place them after they == sign on each and every line.
For instance,
VUE_APP_PROJECT_ID=notes-writer-f1e85
Going back to the firebaseConfig.js file, replace its content with the following:
import firebase from 'firebase/app'
import 'firebase/firestore'
import 'firebase/auth'

// firebase init
const config = {
  apiKey: process.env.VUE_APP_API_KEY,
  authDomain: process.env.VUE_APP_KEY_AUTH_DOMAIN,
  databaseURL: process.env.VUE_APP_KEY_DATABASE_URL,
  projectId: process.env.VUE_APP_PROJECT_ID,
  storageBucket: process.env.VUE_APP_STORAGE_BUCKET,
  messagingSenderId: process.env.VUE_APP_MESSAGING_SENDER_ID,
  appId: process.env.VUE_APP_ID
}

firebase.initializeApp(config)

// firebase db
const db = firebase.firestore()

// firebase auth
const auth = firebase.auth()

// firebase collections
const notesCollection = db.collection('notes')

export {
  auth,
  db,
  firebase,
  notesCollection
}
Implement the Cloud Function
Let’s visit the functions/index.js file, and start implementing our function logic.
The purpose of this function is to listen to any new Note Document created inside Firestore, grab its details, and send them in an email.
Replace the contents of the index.js file with the following:
const functions = require('firebase-functions')
const admin = require('firebase-admin')

admin.initializeApp()

exports.onNewNoteCreated =
  functions.firestore.document('notes/{notesId}').onCreate((snap, context) => {
    const { body } = snap.data()
    const { params: { notesId } } = context

    console.log(context)
    console.log(body)
    console.log(notesId)

    return Promise.resolve(true)
  })
The JavaScript module imports the Firebase Functions Admin SDK libraries.
The Firebase Admin SDK lets you interact with Firebase from privileged environments to perform several actions.
The module exposes a single Cloud Function named onNewNoteCreated. This function subscribes to the OnCreate() event handler to run once a new Firestore Document is created.
The onCreate() event handler accepts as callback function having two parameters:
DocumentSnapshot.
EventContext.
The former parameter lets you access the content of the Document created, while the latter lets you access the context in which the event has occurred.
The next line extracts the body property of the Notes Document. Then, the code extracts the notesId from the EventContext parameter.
The variables are then logged to the Cloud Functions Logs database. From my experience, the Cloud Functions Logs is the best tool to debug and test your functions!
Finally, the function returns a resolved Promise. I will further discuss the concept of returning Promises from Cloud Functions in the next section of this article.
Let’s run the Cloud Function locally first by using the Firebase Functions Shell.
Run the following command:
firebase functions:shell
``
You use the Functions Shell to test your functions interactively. You can read more about it by following this link: [Test functions interactively](https://firebase.google.com/docs/functions/local-shell)

Behind the scenes, the Shell loads the Functions emulator, and lists them all for reference.
To execute a single function, simply run the following on the **firebase** command line:
```bash
onNewNoteCreated({ body: "Hello Firebase Functions!" }, { params: { notesId: "note-#001" }})
Hit Enter!
The output is as follows:
'Successfully invoked function.'

firebase > >

{ eventId: 'c6f8eec2-e7e0-463e-9966-c8c8b0a25505',
>    timestamp: '2020-02-15T08:12:02.088Z',
>    eventType: 'google.firestore.document.create',
>    resource:
>     { service: 'firestore.googleapis.com',
>       name:
>        'projects/notes-writer-f1s85/databases/(default)/documents/notes/note-#001' },
>    params: { notesId: 'note-#001' } }

>  Hello Firebase Functions!

>  note-#001
The first block of text represents the ExecutionContext object. It gives you details about the current event, and its context. For instance, the event type is a google.firestore.document.create. The full path of the new document shows inside the resource property. Finally, your Cloud Function has access to the params property that includes the ID of the new Notes Document.
The second block of text prints the body of the new Note Document.
Finally, the third block of text prints the notesId grabbed from the params property on the ExecutionContext object.
Send an email inside the Cloud Function
Let’s make our Cloud Function more useful! You have many options to do so with the Firebase family of products.
For instance, we could send the new Note as a Push Notification using the Firebase Cloud Messaging product. However, I would rather not introduce more than one Firebase product in one article.
Let’s, instead, send the contents of the new Note Document using an email. For that, we need to install an additional NPM package to allow us to send the email.
Make sure you are inside the /functions folder, run the following command:
npm install nodemailer
We are going to use the nodemailer Node.js module to send out the emails.
Replace the contents of the /functions/index.js with the following code:
const functions = require('firebase-functions')
const admin = require('firebase-admin')
const nodemailer = require('nodemailer')

admin.initializeApp()

var transporter = nodemailer.createTransport({
  host: 'smtp.gmail.com',
  port: 465,
  secure: true,
  auth: {
    user: '',
    pass: ''
  }
})

exports.onNewNoteCreated =
  functions.firestore.document('notes/{notesId}').onCreate((snap, context) => {
    const { body } = snap.data()
    const { params: { notesId } } = context

    console.log(body)
    console.log(notesId)

    const mailOptions = {
      from: '',
      to: '',
      subject: 'A new note is created',
      html: `
        <h1>New Note</h1>
        <p>A new note is created with the following details:</p>
        <p>
          Note Id: <br />
          ${notesId}
        </p>
        <p>
          Note Body: <br />
          ${body}
        </p>`
    }

    return transporter.sendMail(mailOptions)
      .then(() => console.log('Email Sent!'))
      .catch(error => console.error(error))
  })
Start by importing the nodemailer library.
Then, create a nodemailer transporter. The transporter is the object responsible for sending out the email. Nodemailer module supports SMTP based transport and other non-SMTP based transport. I will keep it simple, and use an SMTP transport for this Cloud Function.
For this to work, you need to create a new Nodemailer Transport using an SMTP account. I will be using the GMAIL SMTP account details. This is OK for testing locally but never used for production. Other options to use for production are: GMAIL OAUTH 2 and SMTP account you get from your hosting company.
Replace the user and pass fields with a real Gmail account.
Inside the Cloud Function, prepare a mailOptions object containing all the details of the email to send. Make sure to include the from, to, and the rest of the fields.
Finally, send the email by returning the transporter.sendMail(mailOptions) function call. This function returns a Promise.
That’s it! You can follow the steps above to test the function locally, using the Functions Shell.
Let’s deploy the Cloud Function to Firebase, and start receiving emails!
firebase deploy --only functions
The command above deploys all the Cloud Functions in your current app.
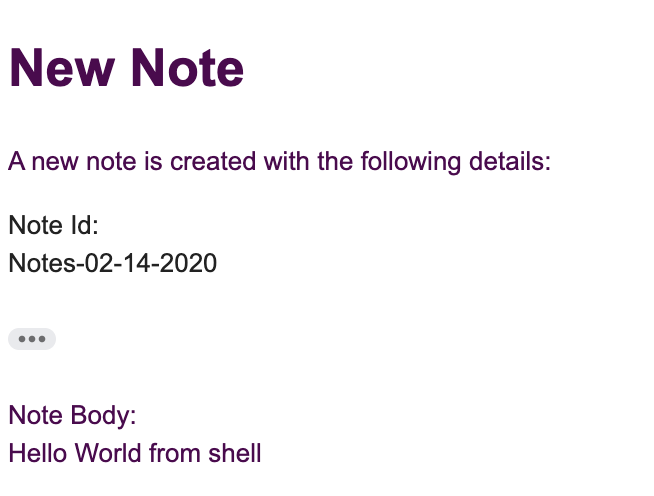
Now, whenever you create a new Note inside the app, the onNewNoteCreated() Cloud Function is triggered and eventually you receive an email similar to the one below:
Cloud Function Execution Process
Firebase internally manages the Server, and all the resources needed to deploy and run a Cloud Function. When a Cloud Function finishes executing, it needs to cleanup the resources used by the function.
How can Firebase tell or decide that now is the correct time to cleanup the resources, and that the Cloud Function has finished executing?
This task is certainly more complicated! Why?
Most of the Cloud Functions’ code you will be writing will interact with other Firebase SDKs, or even third party SDKs. This type of communication happens asynchronously.
A Cloud Function executes code, and returns immediately. However, there might be some kind of work that’s pending in the background, asynchronously. Therefore, Firebase cannot just run the function, and cleanup all the resources. It must wait until the function completely finishes running, and then do so.
For that reason, all of the Firebase SDKs support JavaScript Promises. What’s a JavaScript Promise?
A Promise represents some async work that should eventually complete! When work tracked by a Promise is still executing, the Promise is in a pending state. If the work completes successfully, the Promise is said to be fulfilled. If there is an error, the Promise becomes rejected.
These are the only states a Promise can go through. Once fulfilled or rejected, a Promise cannot go back to any other state.
For instance, the Firebase Admin SDK returns promises when your code: Reads or writes from a database. Interacts with files in the Cloud Storage. Sends a notification with Cloud Messaging.
Therefore, when dealing with Background-triggered Cloud Functions, it’s so important to just return the Firebase SDK API call you perform inside the Cloud Function. The Cloud Function Runner now has access to a Promise. As long as the Promise is in the pending state, it will wait, and will take no action. Once the Promise is fulfilled or rejected, it can safely remove all resources, and do the cleanup.
For an HTTPs-triggered Cloud Function, always make sure you return response.send() as the last line of the code. The Cloud Functions Runner will terminate and cleanup an HTTPs-triggered function only when the function returns a response to the client.
In this article, I’ve shown how to integrate and use a third party library, the Nodemailer. What we have implemented is a Background triggered function, hence we need to return a Promise at the end of the function. How are we doing so?
return transporter.sendMail(mailOptions)
      .then(() => console.log('Email Sent!'))
      .catch(error => console.error(error))
  })
The sendMail() function sends an email, and returns a Promise. In our case, we are sending an Email Sent! message to the logs when the Promise is fulfilled. Also, we are logging any errors when the Promise is rejected. At the same time, we are returning the sendMail() Promise to let the Cloud Functions Runner use that Promise to clean up the resources for this function. This only works because JavaScript Promises are chainnable!
Conclusion
For now, this will be the last episode on Fire the base of Vue.js! series.
Firebase is such a big topic, and requires many articles to cover it all. The team at Firebase did a great job at providing decent documentation. Still, I believe, working with the Firebase SDKs will give you experience and knowledge that theory cannot.
In the future, I might add episodes to this series. However, in the coming two weeks, I will start a new series on Vue.js development. Stay tuned!
Happy Vueing!