
Getting Started with Git Today’s article will cover some of the basics of Git. This article is under the assumption that you have already made a GitHub repository or have access to one and basic understanding of the command line. If you haven’t, I recommend going to https://github.com/, creating an account and setting up a repository.
The Rundown of Common Git Commands
-
git clone This command is used on an existing repository and creates a copy of the target repository
-
git status This command is used to show the state of your working directory and staging area
-
git checkout *The command is used to switch between different branches or versions in a repository *
-
git add This command is used to add changes to the staging area of your current directory
-
git commit This command is used to save your changes to your local repository
-
git push This command is used to upload your local repository to a remote repository
-
git pull This command is used to download the newest updates from the remote repository
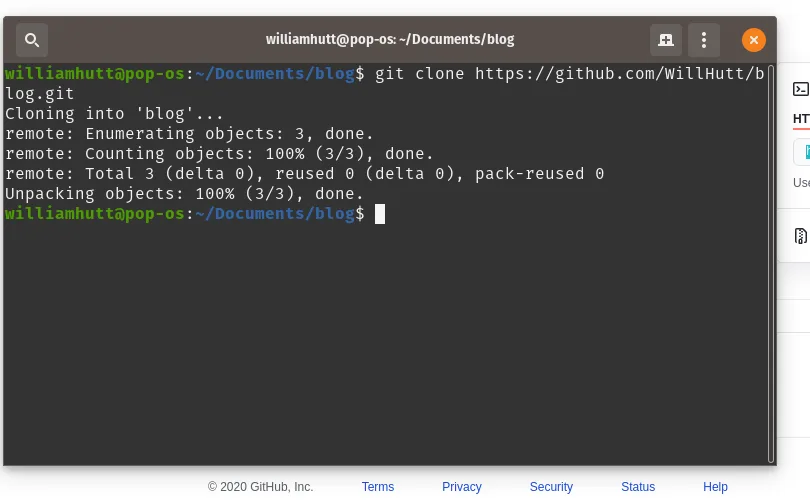
Cloning a Repo Now that we’ve covered some of the basic Git commands, we’ll go through a few examples of how they get used. We’ll start with cloning or copying a remote repository for our local use. To start, you’ll navigate to your repository and find the clone button (now called Code). For this article, we’ll be using HTTPS as our cloning option.

Now that you’ve copied that to your clipboard, we’ll be opening up the terminal and navigating to a folder that you want to clone your repository in. We’ll be using git clone
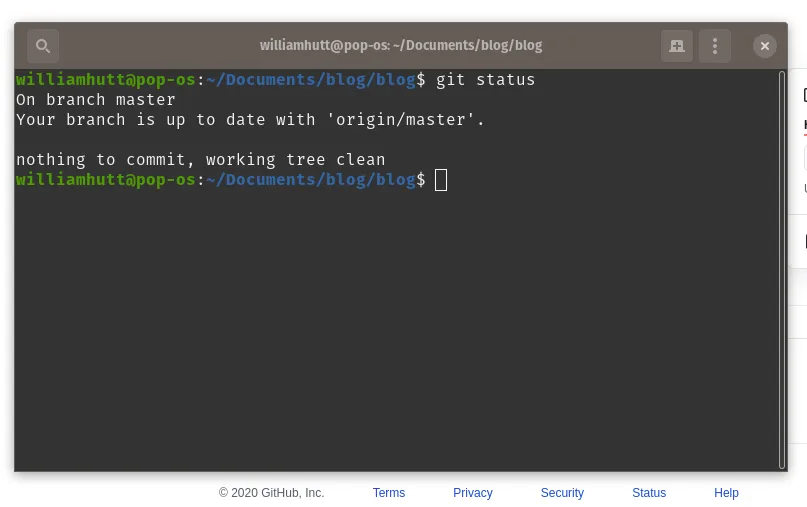
Git Status Now, let's navigate to your new folder (it’s the name of the repo you cloned) and run a git status to see what’s going on.
Git Checkout
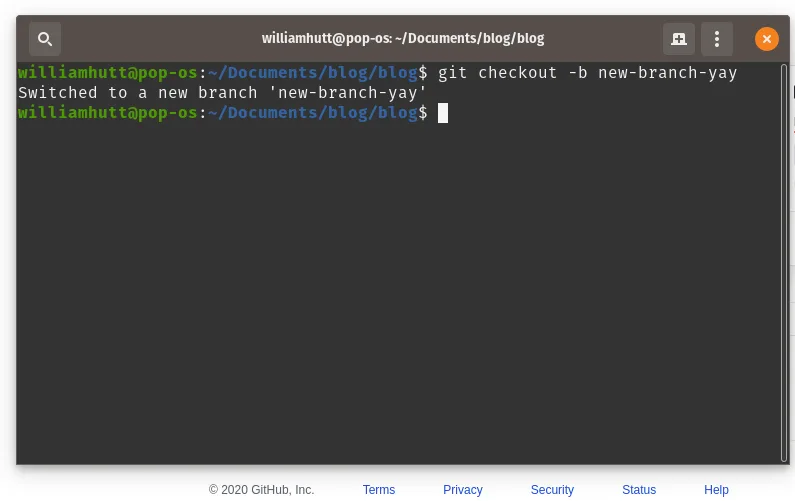
Looks like everything went okay. I’m now sitting in the master branch of my cloned repository. From here, we will leave the master branch and move to a new branch. The general rule of thumb is to always work in a separate branch; that way, if anything goes wrong, you’re not causing errors to the master branch. We’re now going to run git checkout -b
Huzzah! We are now on a new branch.
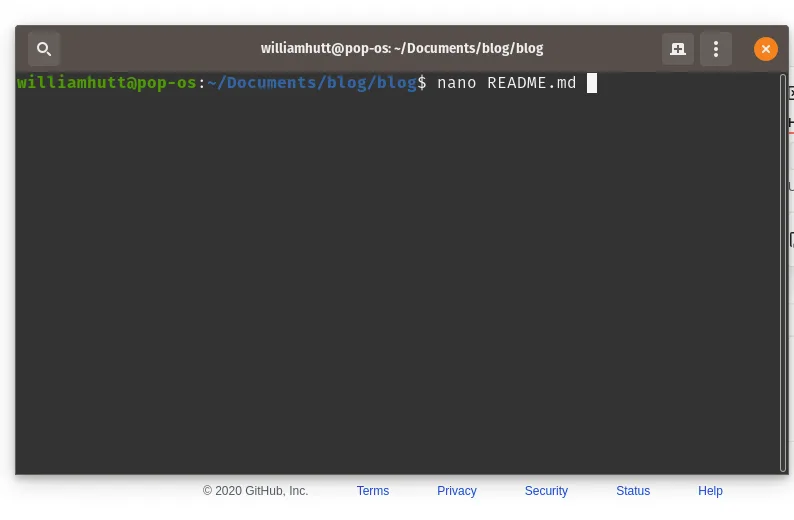
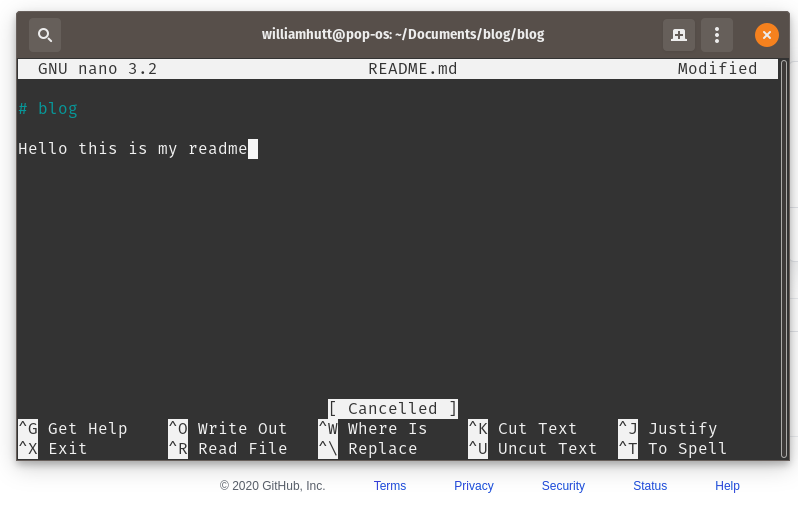
Git Add Now, let's make some changes in your new branch. I’m going to edit my README file. I’ll be using nano README.md to edit my README file.
Making some changes
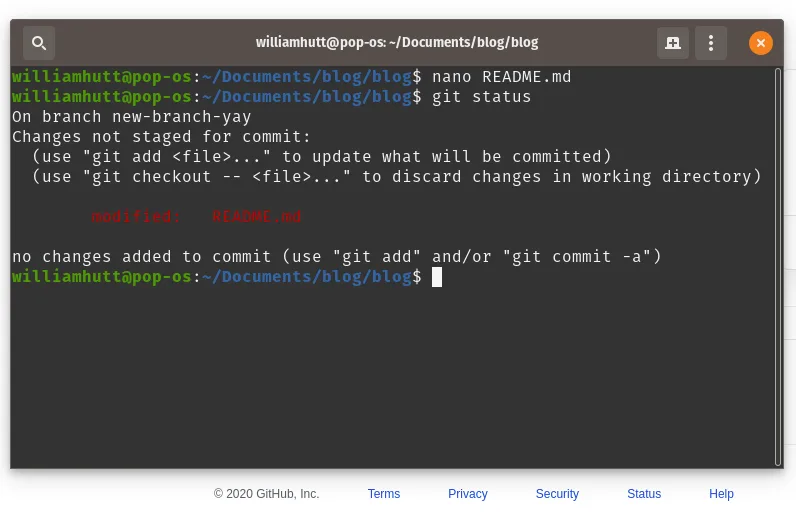
Now that we’ve saved those changes, let's run a git status and see what has been changed.
Sweet! It shows that we’ve made some changes. Let's add those changes to our branch. We’ll be using git add to add those to the staging area. With git add, we can either use git add . to add all of my changes or we can be more specific with git add
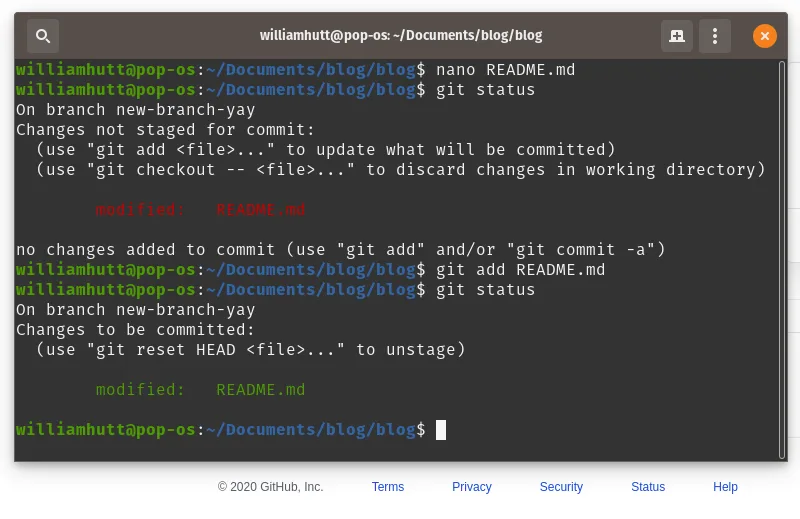
After that git add, I ran a git status and you can see that the text is now green indicating it has been added.
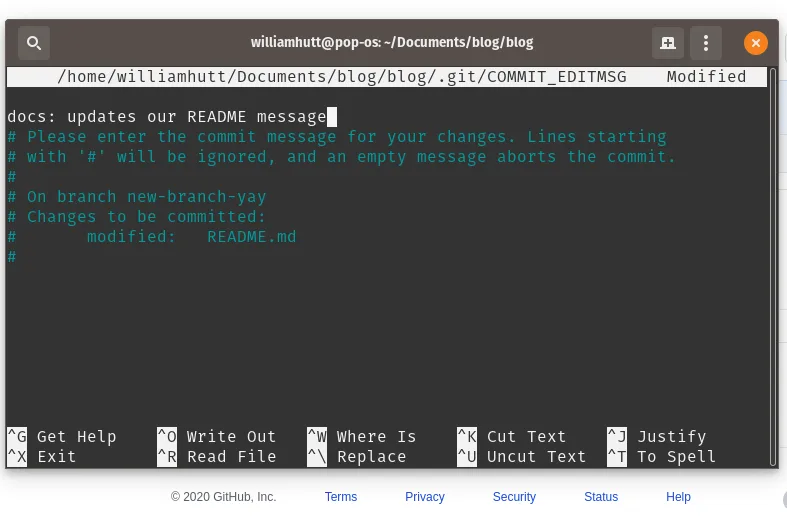
Git Commit Now we want to commit the newest changes to your branch. We’ll start by using git commit, which brings up our handy commit message prompt.
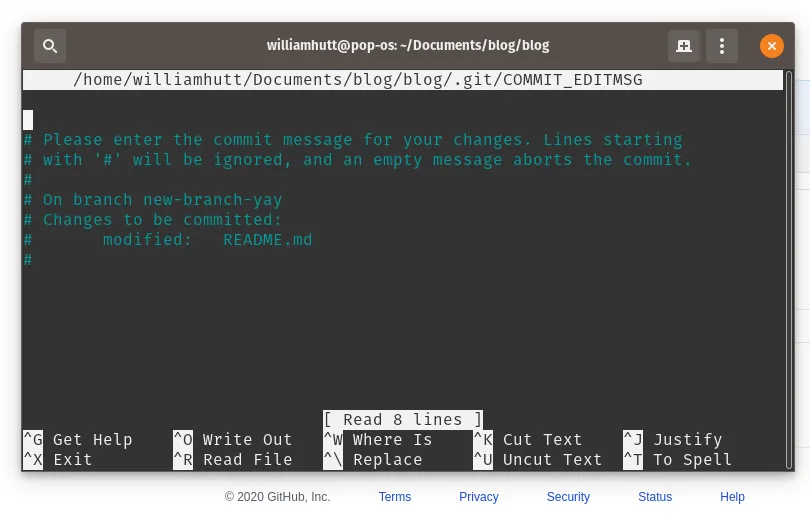
Here we will give a short description of what changed. We won’t go into detail about commit message standards in this article. We’ll keep it super simple and mention that we are updating our README documentation.
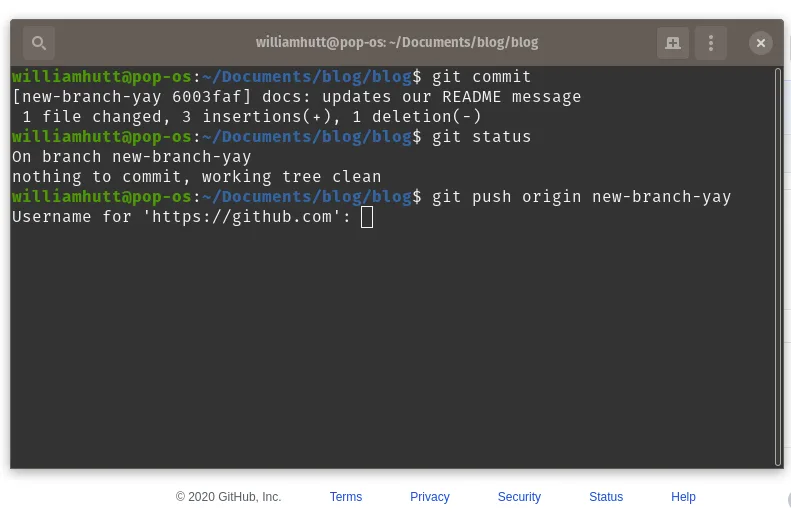
Awesome! Everything went as planned and we’ve now committed our changes.

Git Push
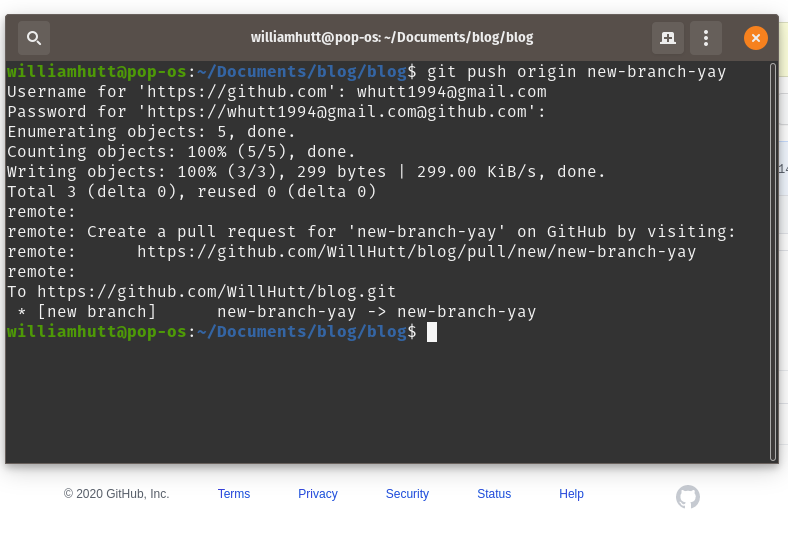
Finally, with all of that done, we can move on to pushing the local changes to your remote repository. We’ll do this with git push origin
Tada! We have pushed to your repository branch
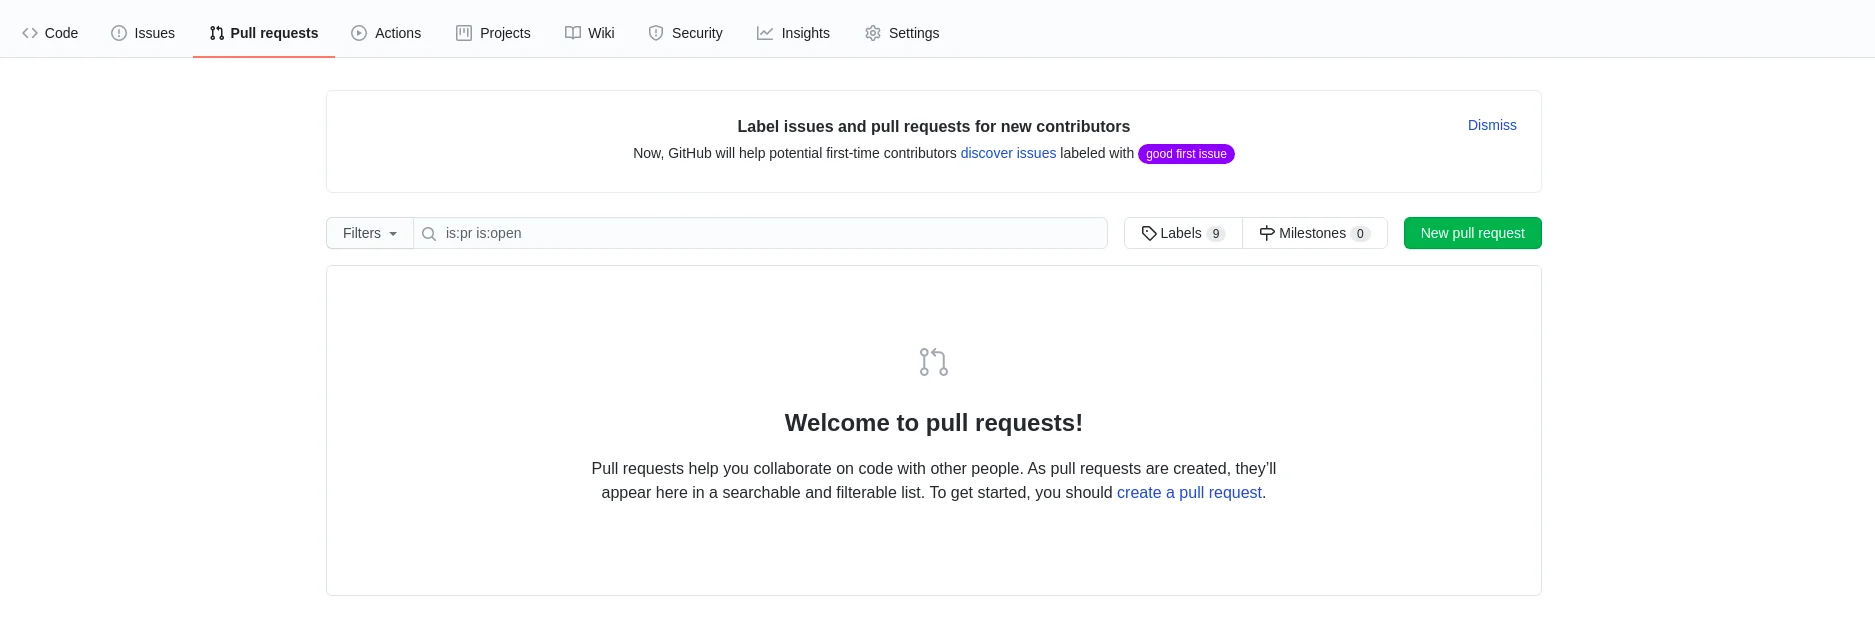
Merging We now need to make a pull request to get that change into the master branch. To do that, go back over to GitHub and head to your repository. Once there, we will select Pull requests and click on the New pull request button.
Sweet! Now that we’ve done that, make sure the branch you want to merge is selected. That branch will be your compare while the place you want to merge into will be the base.
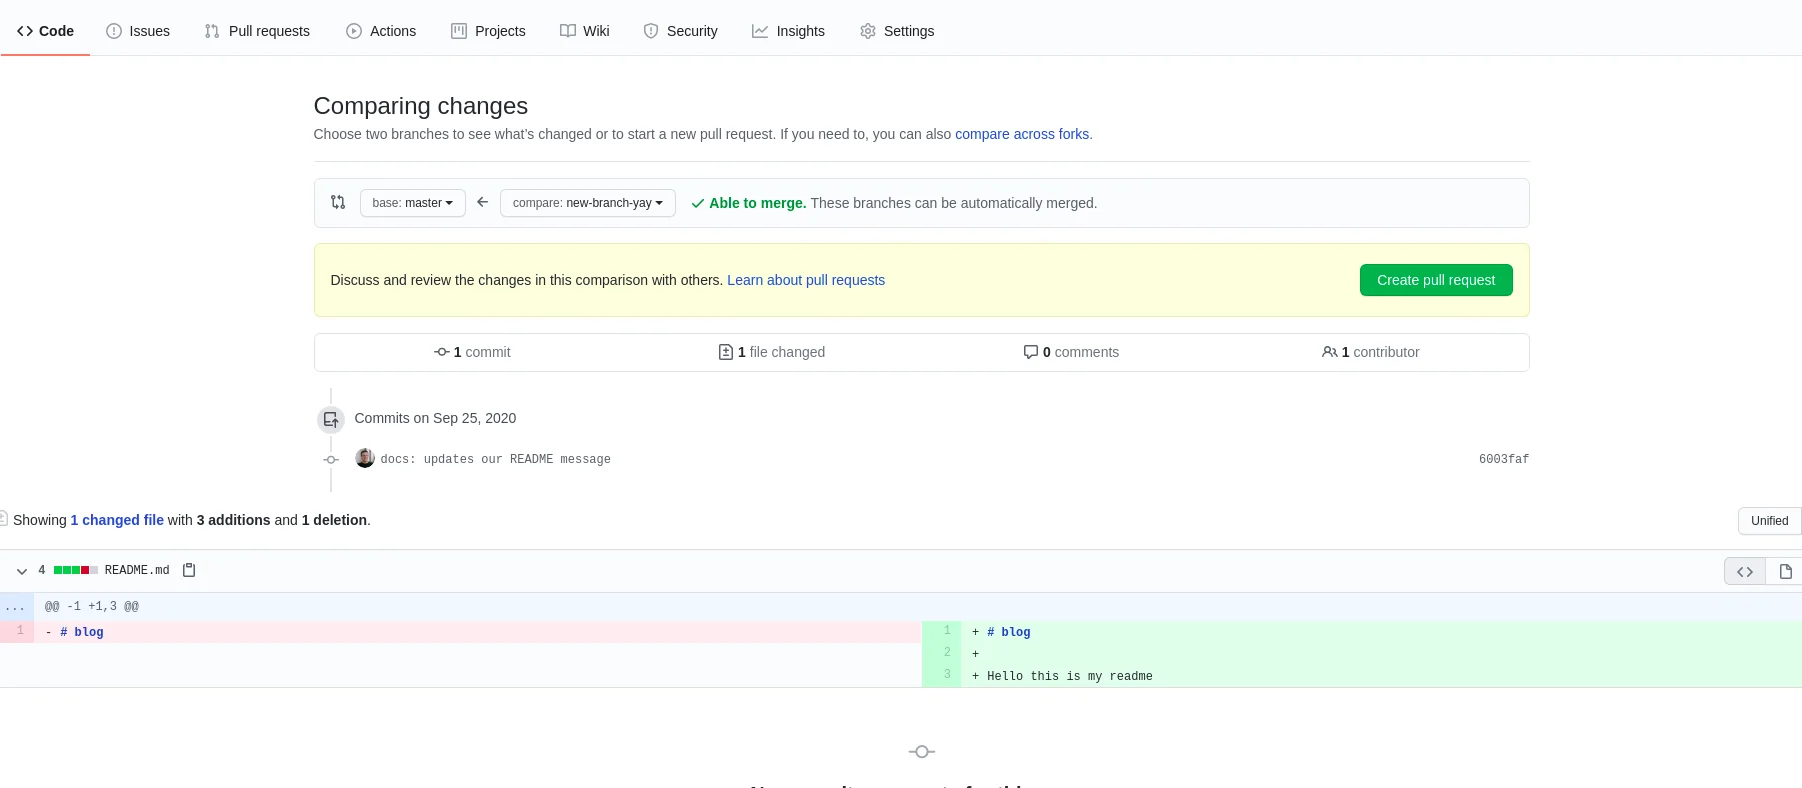
Woot! Now that everything is selected properly, go ahd and click the Create pull request button. This will take us to your last step on creating a pull request.
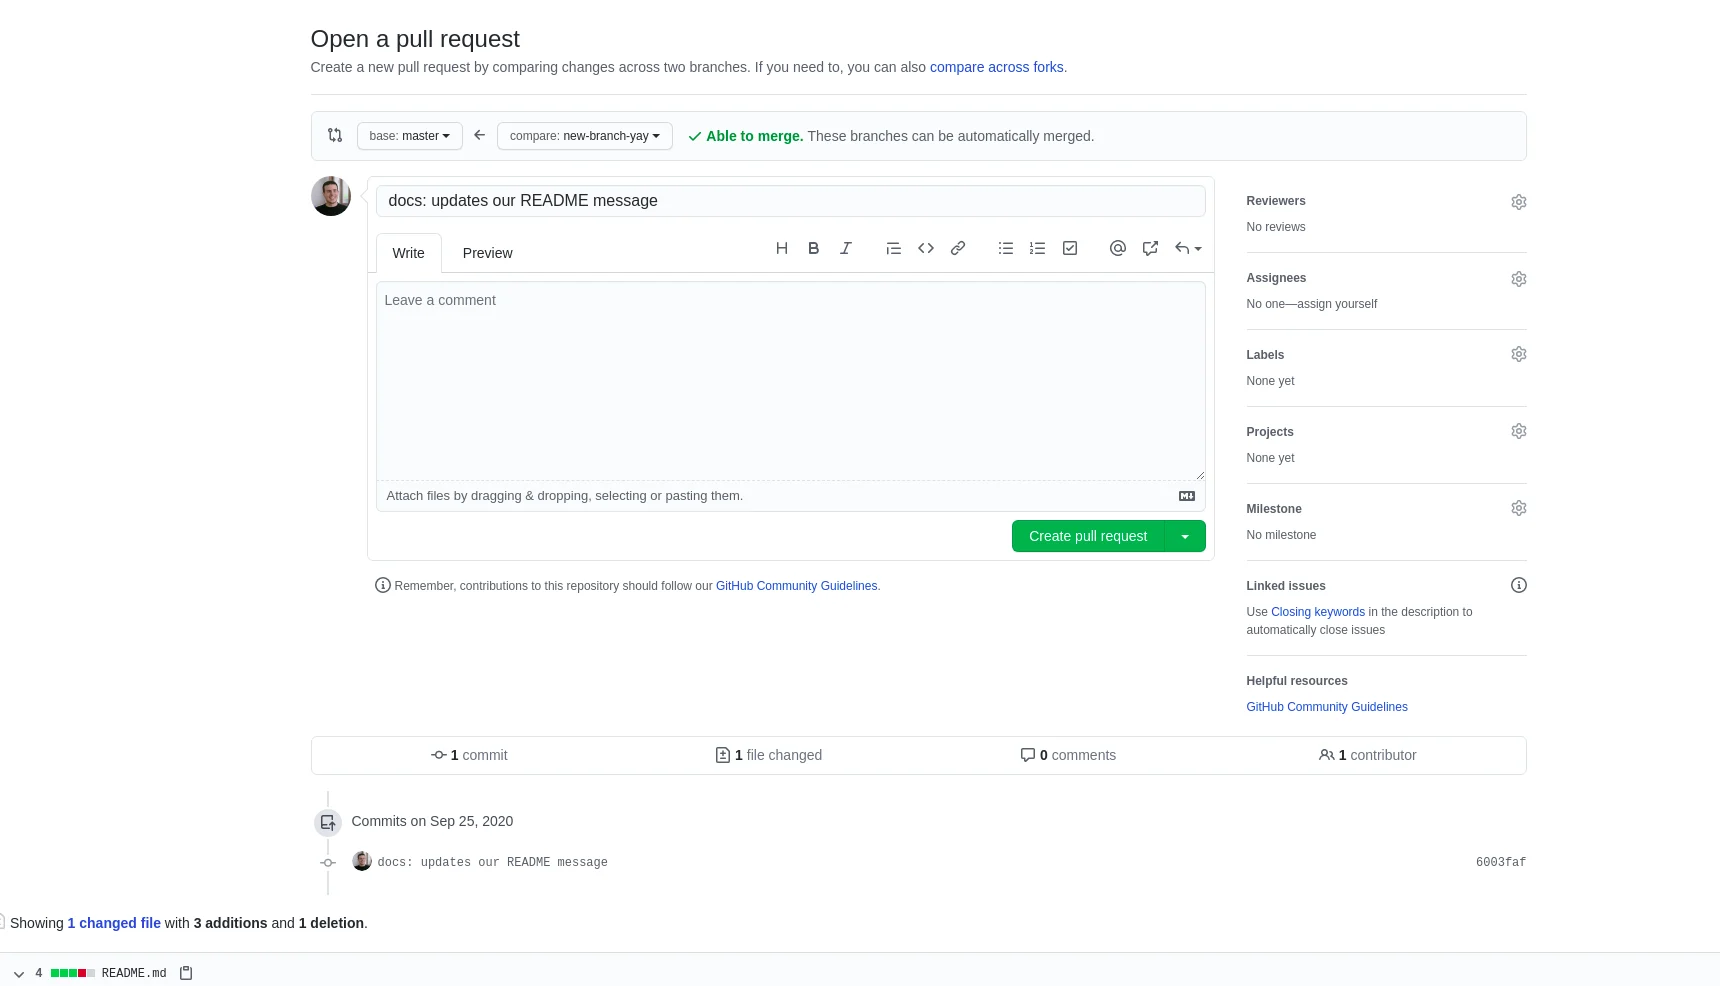
As you can see in the image above, you have a variety of options. We’re just going to focus on hitting the Create pull request button.
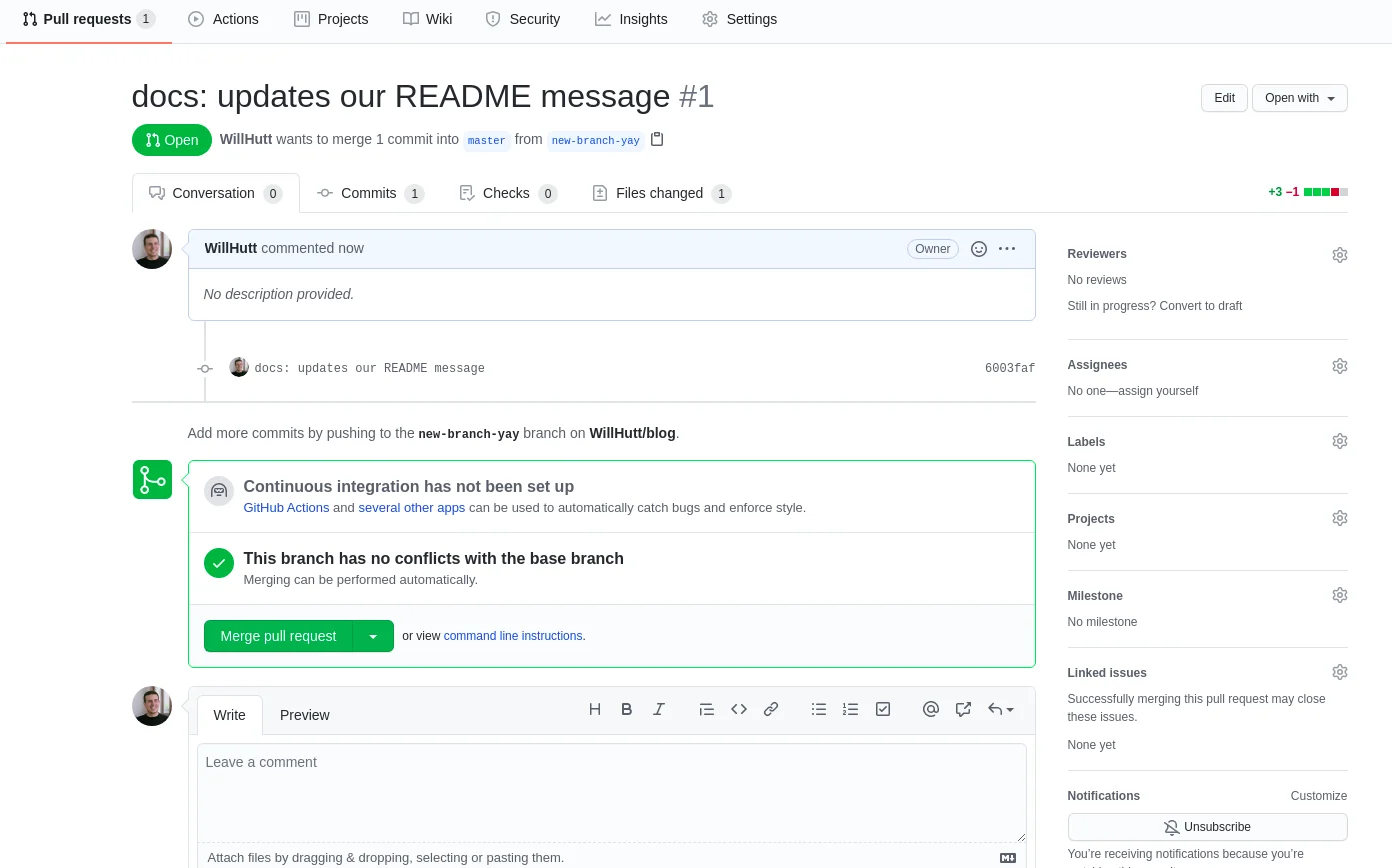
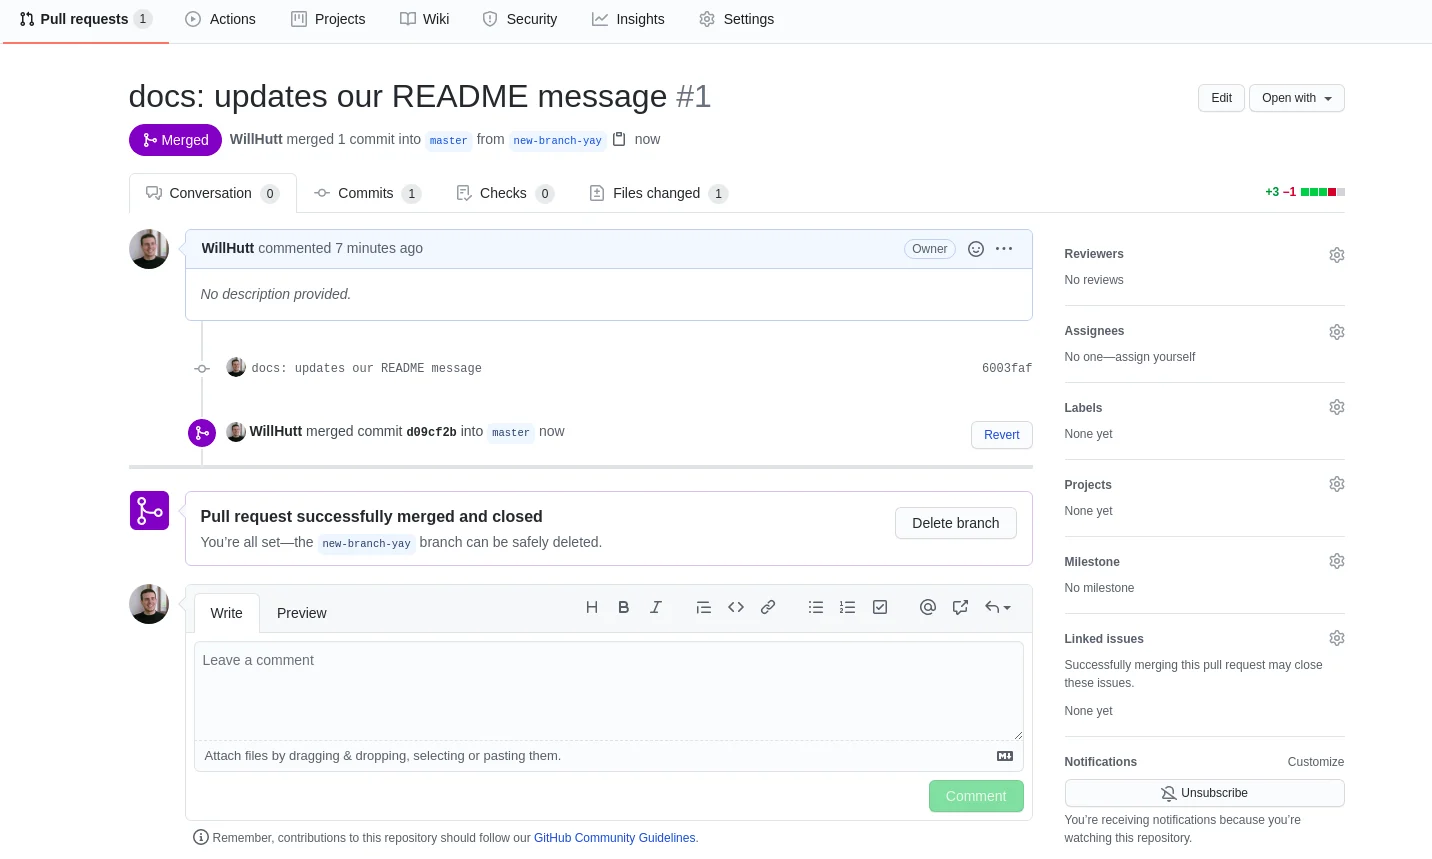
Success! We have merged your pull request and updated master with your latest changes. Now we have one last thing left before we’re done with your now merged pull request. We need to click the Delete branch button to help keep your repository branches nice and clean.
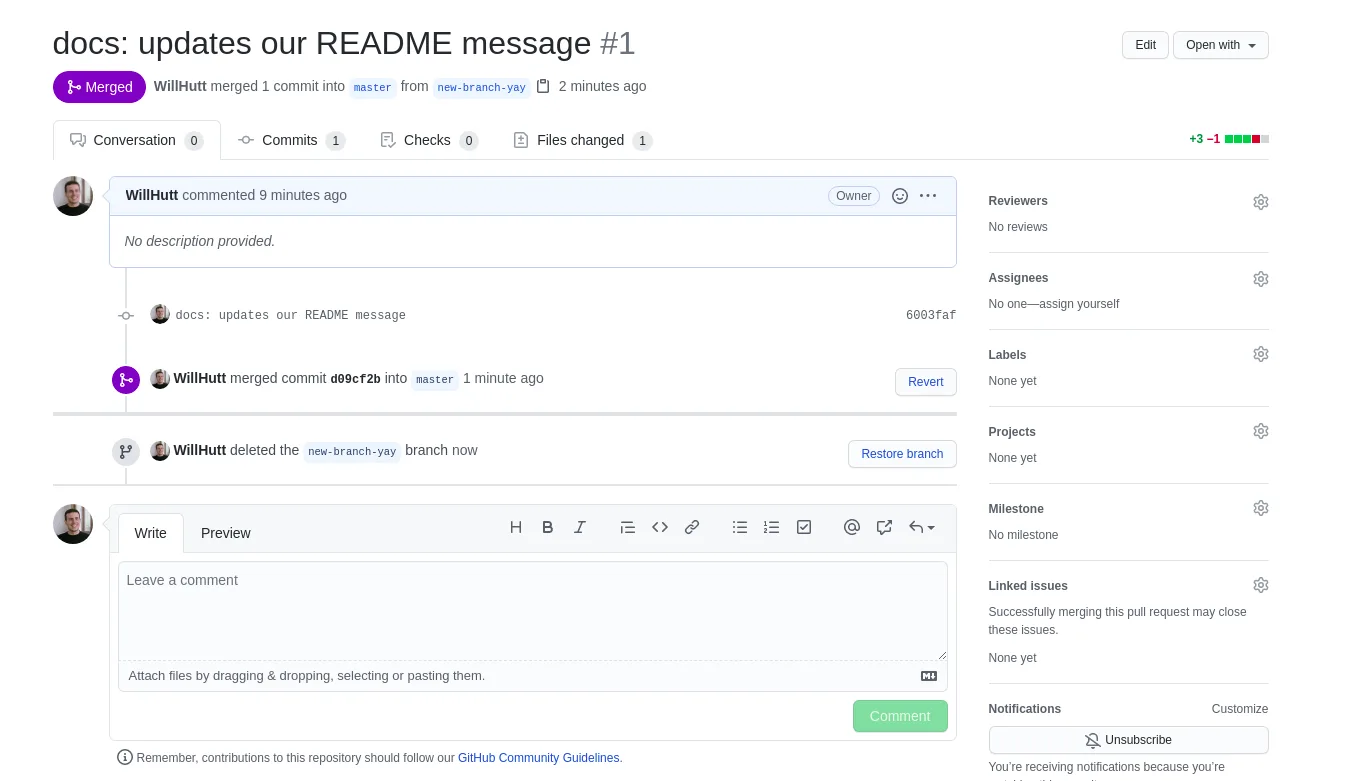
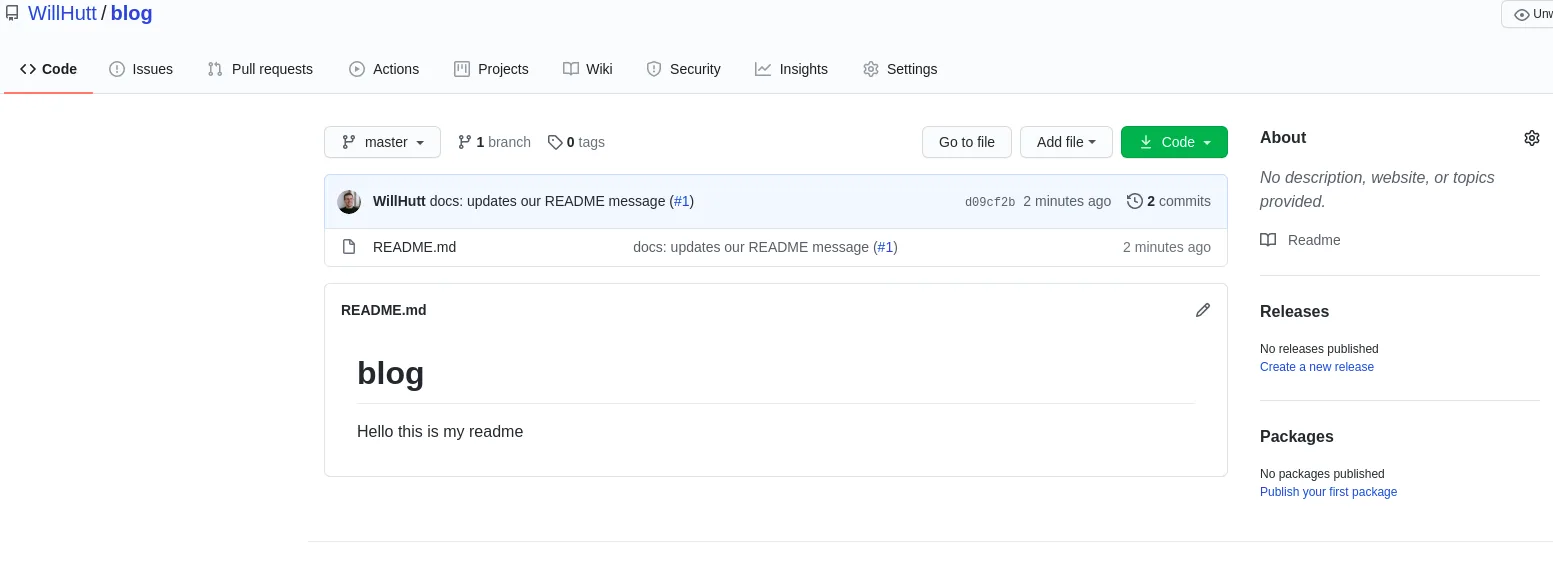
Navigate back to the homepage of the remote repository on GitHub and we can see that the master branch has been updated.
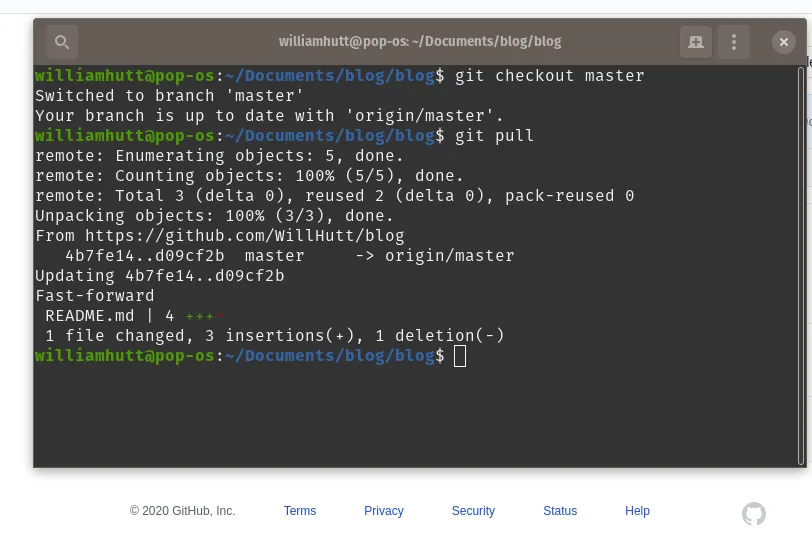
Git Pull Now, we'll do a git pull to get the latest updates from our remote repository. To do that, we’ll change branches in our terminal. In my case, I’ll be moving from my new-branch-yay back to my master branch. In order to do so, we’ll use git checkout master. Once on master, we’ll use a git pull to get the latest update to master.
Conclusion We made it to the end! I hope this article was helpful and you were able to learn and be more comfortable with Git and GitHub. This article covered some of the basics of Git to try and help people starting out or might need a refresher.