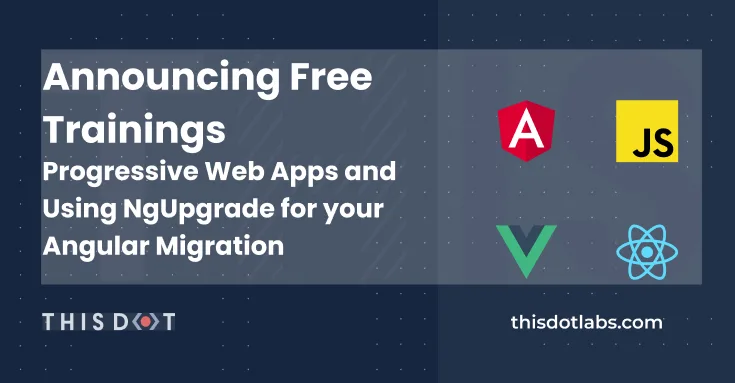
Skip to content

Announcing Free Trainings - Progressive Web Apps and Using NgUpgrade for your Angular Migration

Announcing Free Trainings - Progressive Web Apps and Using NgUpgrade for your Angular Migration

Less than two weeks after wrapping up our inaugural JavaScript Marathon, we are thrilled to share two brand new free trainings from the team at This Dot Labs - available for you to watch anytime.

In Introduction to PWAs and Service Workers, Software Engineer Pato Vargas will walk you through creating your first PWA, implementing push notifications, testing your features, and using Firebase.

"I really enjoyed working on this training," says Vargas, "learning service workers is important for any JavaScript developer, so this training appeals to anyone writing JavaScript!"

Software Engineer, Frederick Prijk, is also excited to present his new training series, Upgrading AngularJS to Angular Using NgUpgrade, which walks you through a simple AngularJS to Angular migration in just over an hour!

You can find these trainings, and all other past trainings, including those presented in the JavaScript Marathon series, by visiting our free resources page!

Introducing a new technology to your enterprise development team, or having trouble with an existing technology? Learn more about how This Dot Labs can tailor a training program to your team by chatting with us, or by reviewing the trainings we already offer!

This Dot Labs is a development consultancy that is trusted by top industry companies, including Stripe, Xero, Wikimedia, Docusign, and Twilio. This Dot takes a hands-on approach by providing tailored development strategies to help you approach your most pressing challenges with clarity and confidence. Whether it's bridging the gap between business and technology or modernizing legacy systems, you’ll find a breadth of experience and knowledge you need. Check out how This Dot Labs can empower your tech journey.

You might also like

Nuxt DevTools v1.0: Redefining the Developer Experience Beyond Conventional Tools cover image

Nuxt DevTools v1.0: Redefining the Developer Experience Beyond Conventional Tools

In the ever-evolving world of web development, Nuxt.js has taken a monumental leap with the launch of Nuxt DevTools v1.0. More than just a set of tools, it's a game-changer—a faithful companion for developers. This groundbreaking release, available for all Nuxt projects and being defaulted from Nuxt v3.8 onwards, marks the beginning of a new era in developer tools. It's designed to simplify our development journey, offering unparalleled transparency, performance, and ease of use. Join me as we explore how Nuxt DevTools v1.0 is set to revolutionize our workflow, making development faster and more efficient than ever. What makes Nuxt DevTools so unique? Alright, let's start delving into the features that make this tool so amazing and unique. There are a lot, so buckle up! In-App DevTools The first thing that caught my attention is that breaking away from traditional browser extensions, Nuxt DevTools v1.0 is seamlessly integrated within your Nuxt app. This ensures universal compatibility across browsers and devices, offering a more stable and consistent development experience. This setup also means the tools are readily available in the app, making your work more efficient. It's a smart move from the usual browser extensions, making it a notable highlight. To use it you just need to press Shift + Option + D` (macOS) or `Shift + Alt + D` (Windows): With simple keystrokes, the Nuxt DevTools v1.0 springs to life directly within your app, ready for action. This integration eliminates the need to toggle between windows or panels, keeping your workflow streamlined and focused. The tools are not only easily accessible but also intelligently designed to enhance your productivity. Pages, Components, and Componsables View The Pages, Components, and Composables View in Nuxt DevTools v1.0 are a clear roadmap for your app. They help you understand how your app is built by simply showing its structure. It's like having a map that makes sense of your app's layout, making the complex parts of your code easier to understand. This is really helpful for new developers learning about the app and experienced developers working on big projects. Pages View lists all your app's pages, making it easier to move around and see how your site is structured. What's impressive is the live update capability. As you explore the DevTools, you can see the changes happening in real-time, giving you instant feedback on your app's behavior. Components View is like a detailed map of all the parts (components) your app uses, showing you how they connect and depend on each other. This helps you keep everything organized, especially in big projects. You can inspect components, change layouts, see their references, and filter them. By showcasing all the auto-imported composables, Nuxt DevTools provides a clear overview of the composables in use, including their source files. This feature brings much-needed clarity to managing composables within large projects. You can also see short descriptions and documentation links in some of them. Together, these features give you a clear picture of your app's layout and workings, simplifying navigation and management. Modules and Static Assets Management This aspect of the DevTools revolutionizes module management. It displays all registered modules, documentation, and repository links, making it easy to discover and install new modules from the community! This makes managing and expanding your app's capabilities more straightforward than ever. On the other hand, handling static assets like images and videos becomes a breeze. The tool allows you to preview and integrate these assets effortlessly within the DevTools environment. These features significantly enhance the ease and efficiency of managing your app's dynamic and static elements. The Runtime Config and Payload Editor The Runtime Config and Payload Editor in Nuxt DevTools make working with your app's settings and data straightforward. The Runtime Config lets you play with different configuration settings in real time, like adjusting settings on the fly and seeing the effects immediately. This is great for fine-tuning your app without guesswork. The Payload Editor is all about managing the data your app handles, especially data passed from server to client. It's like having a direct view and control over the data your app uses and displays. This tool is handy for seeing how changes in data impact your app, making it easier to understand and debug data-related issues. Open Graph Preview The Open Graph Preview in Nuxt DevTools is a feature I find incredibly handy and a real time-saver. It lets you see how your app will appear when shared on social media platforms. This tool is crucial for SEO and social media presence, as it previews the Open Graph tags (like images and descriptions) used when your app is shared. No more deploying first to check if everything looks right – you can now tweak and get instant feedback within the DevTools. This feature not only streamlines the process of optimizing for social media but also ensures your app makes the best possible first impression online. Timeline The Timeline feature in Nuxt DevTools is another standout tool. It lets you track when and how each part of your app (like composables) is called. This is different from typical performance tools because it focuses on the high-level aspects of your app, like navigation events and composable calls, giving you a more practical view of your app's operation. It's particularly useful for understanding the sequence and impact of events and actions in your app, making it easier to spot issues and optimize performance. This timeline view brings a new level of clarity to monitoring your app's behavior in real-time. Production Build Analyzer The Production Build Analyzer feature in Nuxt DevTools v1.0 is like a health check for your app. It looks at your app's final build and shows you how to make it better and faster. Think of it as a doctor for your app, pointing out areas that need improvement and helping you optimize performance. API Playground The API Playground in Nuxt DevTools v1.0 is like a sandbox where you can play and experiment with your app's APIs. It's a space where you can easily test and try out different things without affecting your main app. This makes it a great tool for trying out new ideas or checking how changes might work. Some other cool features Another amazing aspect of Nuxt DevTools is the embedded full-featured VS Code. It's like having your favorite code editor inside the DevTools, with all its powerful features and extensions. It's incredibly convenient for making quick edits or tweaks to your code. Then there's the Component Inspector. Think of it as your code's detective tool. It lets you easily pinpoint and understand which parts of your code are behind specific elements on your page. This makes identifying and editing components a breeze. And remember customization! Nuxt DevTools lets you tweak its UI to suit your style. This means you can set up the tools just how you like them, making your development environment more comfortable and tailored to your preferences. Conclusion In summary, Nuxt DevTools v1.0 marks a revolutionary step in web development, offering a comprehensive suite of features that elevate the entire development process. Features like live updates, easy navigation, and a user-friendly interface enrich the development experience. Each tool within Nuxt DevTools v1.0 is thoughtfully designed to simplify and enhance how developers build and manage their applications. In essence, Nuxt DevTools v1.0 is more than just a toolkit; it's a transformative companion for developers seeking to build high-quality web applications more efficiently and effectively. It represents the future of web development tools, setting new standards in developer experience and productivity....

How to automatically deploy your full-stack JavaScript app with AWS CodePipeline cover image

How to automatically deploy your full-stack JavaScript app with AWS CodePipeline

How to automatically deploy your full-stack JavaScript app from an NX monorepo with AWS CodePipeline In our previous blog post (How to host a full-stack JavaScript app with AWS CloudFront and Elastic Beanstalk) we set up a horizontally scalable deployment for our full-stack javascript app. In this article, we would like to show you how to set up AWS CodePipeline to automatically deploy changes to the application. APP Structure Our application is a simple front-end with an API back-end set up in an NX monorepo. The production built API code is hosted in Elastic Beanstalk, while the front-end is stored in S3 and hosted through CloudFront. Whenever we are ready to make a new release, we want to be able to deploy the new API and front-end versions to the existing distribution. In this article, we will set up a CodePipeline to deploy changes to the main branch of our connected repository. CodePipeline CodeBuild and the buildspec file First and foremost, we should set up the build job that will run the deploy logic. For this, we are going to need to use CodeBuild. Let's go into our repository and set up a build-and-deploy.buildspec.yml` file. We put this file under the `tools/aws/` folder. `yaml version: 0.2 phases: install: runtime-versions: nodejs: 18 on-failure: ABORT commands: - npm ci build: on-failure: ABORT commands: # Build the front-end and the back-end - npm run build:$ENVIRONMENTTARGET # TODO: Push FE to S3 # TODO: Push API to Elastic beanstalk ` This buildspec file does not do much so far, we are going to extend it. In the installation phase, it will run npm ci` to install the dependencies and in the build phase, we are going to run the build command using the `ENVIRONMENT_TARGET` variable. This is useful, because if you have more environments, like `development` and `staging` you can have different configurations and builds for those and still use the same buildspec file. Let's go to the Codebuild page in our AWS console and create a build project. Add a descriptive name, such as your-appp-build-and-deploy`. Please provide a meaningful description for your future self. For this example, we are going to restrict the number of concurrent builds to 1. The next step is to set up the source for this job, so we can keep the buildspec file in the repository and make sure this job uses the steps declared in the yaml file. We use an access token that allows us to connect to GitHub. Here you can read more on setting up a GitHub connection with an access token. You can also connect with Oauth, or use an entirely different Git provider. We set our provider to GitHub and provided the repository URL. We also set the Git clone depth to 1, because that makes checking out the repo faster. In the Environment` section, we recommend using an AWS CodeBuild managed image. We use the Ubuntu Standard runtime with the `aws/codebuild/standard:7.0` version. This version uses Node 18. We want to always use the latest image version for this runtime and as the `Environment type` we are good with `Linux EC2`. We don't need elevated privileges, because we won't build docker images, but we do want to create a new service role. In the Buildspec` section select `Use a buildspec file` and give the path from your repository root as the `Buildspec name`. For our example, it is `tools/aws/build-and-deploy.buildspec.yml`. We leave the `Batch configuration` and the `Artifacts` sections as they are and in the `Logs` section we select how we want the logs to work. For this example, to reduce cost, we are going to use S3 logs and save the build logs in the `aws-codebuild-build-logs` bucket that we created for this purpose. We are finished, so let's create the build project. CodePipeline setup To set up automated deployment, we need to create a CodePipeline. Click on Create pipeline` and give it a name. We also want a new service role to be created for this pipeline. Next, we should set up the source stage. As the source provider, we need to use GitHub (version2)` and set up a connection. You can read about how to do it here. After the connection is set up, select your repository and the branch you want to deploy from. We also want to start the pipeline if the source code changes. For the sake of simplicity, we want to have the Output artefact format as CodePipeline default. At the Build stage, we select AWS CodeBuild` as the build provider and let's select the build that we created above. Remember that we have the `ENVIRONMENT_TARGET` as a variable used in our build, so let's add it to this stage with the `Plaintext` value `prod`. This way the build will run the `build:prod` command from our `package.json`. As the `Build type` we want `Single build`. We can skip the deployment stage because we are going to set up deployment in our build job. Review our build pipeline and create it. After it is created, it will run for the first time. At this time it will not deploy anything but it should run successfully. Deployment prerequisites To be able to deploy to S3 and Elastic Beanstalk, we need our CodeBuild job to be able to interact with those services. When we created the build, we created a service role for it. In this example, the service role is codebuild-aws-test-build-and-deploy-service-role`. Let's go to the IAM page in the console and open the `Roles` page. Search for our codebuild role and let's add permissions to it. Click the `Add permissions` button and select `Attach policies`. We need two AWS-managed policies to be added to this service role. The `AdministratorAccess-AWSElasticBeanstalk` will allow us to deploy the API and the `AmazonS3FullAccess` will allow us to deploy the front-end. The `CloudFrontFullAccess` will allow us to invalidate the caches so CloudFront will send the new front-end files after the deployment is ready. Deployment Upload the front-end to S3 Uploading the front-end should be pretty straightforward. We use an AWS CodeBuild managed image in our pipeline, therefore, we have access to the aws` command. Let's update our buildspec file with the following changes: `yaml phases: ... build: on-failure: ABORT commands: # Build the front-end and the back-end - npm run build:$ENVIRONMENTTARGET # Delete the current front-end and deploy the new version front-end - aws s3 sync dist/apps/frontend/ s3://$FRONTEND_BUCKET --delete # Invalidate cloudfront caches to immediately serve the new front-end files - aws cloudfront create-invalidation --distribution-id $CLOUDFRONTDISTRIBUTION_ID --paths "/index.html" # TODO: Push API to Elastic beanstalk ` First, we upload the fresh front-end build to the S3 bucket, and then we invalidate the caches for the index.html` file, so CloudFront will immediately serve the changes. If you have more static files in your app, you might need to invalidate caches for those as well. Before we push the above changes up, we need to update the environment variables in our CodePipeline. To do this open the pipeline and click on the Edit` button. This will then enable us to edit the `Build` stage. Edit the build step by clicking on the edit button. On this screen, we add the new environment variables. For this example, it is aws-hosting-prod` as `Plaintext` for the `FRONT_END_BUCKET` and `E3FV1Q1P98H4EZ` as `Plaintext` for the `CLOUDFRONT_DISTRIBUTION_ID` Now if we add changes to our index.html file, for example, change the button to HELLO 2`, commit it and push it. It gets deployed. Deploying the API to Elastic Beanstalk We are going to need some environment variables passed down to the build pipeline to be able to deploy to different environments, like staging or prod. We gathered these below: - COMMIT_ID`: `#{SourceVariables.CommitId}` - This will have the commit id from the checkout step. We include this, so we can always check what commit is deployed. - ELASTIC_BEANSTALK_APPLICATION_NAME`: `Test AWS App` - This is the Elastic Beanstalk app which has your environment associated. - ELASTIC_BEANSTALK_ENVIRONMENT_NAME`: `TestAWSApp-prod` - This is the Elastic Beanstalk environment you want to deploy to - API_VERSION_BUCKET`: `elasticbeanstalk-us-east-1-474671518642` - This is the S3 bucket that was created by Elastic Beanstalk With the above variables, we can make some new variables during the build time, so we can make sure that every API version is unique and gets deployed. We set this up in the install phase. `yaml ... phases: install: runtime-versions: nodejs: 18 on-failure: ABORT commands: - APPVERSION=`jq '.version' -j package.json` - APIVERSION=$APP_VERSION-build$CODEBUILD_BUILD_NUMBER - APIZIP_KEY=$COMMIT_ID-api.zip - 'APPVERSION_DESCRIPTION="$AP_VERSION: $COMMIT_ID"' - npm ci ... ` The APP_VERSION` variable is the version property from the `package.json` file. In a release process, the application's version is stored here. The `API_VERSION` variable will contain the `APP_VERSION` and as a suffix, we include the build number. We want to upload this API version by indicating the commit ID, so the `API_ZIP_KEY` will have this information. The `APP_VERSION_DESCRIPTION` will be the description of the deployed version in Elastic Beanstalk. Finally, we are going to update the buildspec file with the actual Elastic Beanstalk deployment steps. `yaml phases: ... build: on-failure: ABORT commands: # ... # ZIP the API - zip -r -j dist/apps/api.zip dist/apps/api # Upload the API bundle to S3 - aws s3 cp dist/apps/api.zip s3://$APIVERSION_BUCKET/$ENVIRONMENT_TARGET/$API_ZIP_KEY # Create new API version in Elastic Beanstalk - aws elasticbeanstalk create-application-version --application-name "$ELASTICBEANSTALK_APPLICATION_NAME" --version-label "$API_VERSION" --description "$APP_VERSION_DESCRIPTION" --source-bundle "S3Bucket=$API_VERSION_BUCKET,S3Key=$ENVIRONMENT_TARGET/$API_ZIP_KEY" # Deploy new API version - aws elasticbeanstalk update-environment --application-name "$ELASTICBEANSTALK_APPLICATION_NAME" --version-label "$API_VERSION" --environment-name "$ELASTIC_BEANSTALK_ENVIRONMENT_NAME" # Wait until the Elastic Beanstalk environment is stable - aws elasticbeanstalk wait environment-updated --application-name "$ELASTICBEANSTALK_APPLICATION_NAME" --environment-name "$ELASTIC_BEANSTALK_ENVIRONMENT_NAME" ` Let's make a change in the API, for example, the message sent back by the /api/hello` endpoint and push up the changes. --- Now every time a change is merged to the main` branch, it gets pushed to our production deployment. Using these guides, you can set up multiple environments, and you can configure separate CodePipeline instances to deploy from different branches. I hope this guide proved to be helpful to you....

Announcing September JavaScript Marathon - Free, online training! cover image

Announcing September JavaScript Marathon - Free, online training!

Join us September 23rd, 2020 for our next JavaScript Marathon!__ 
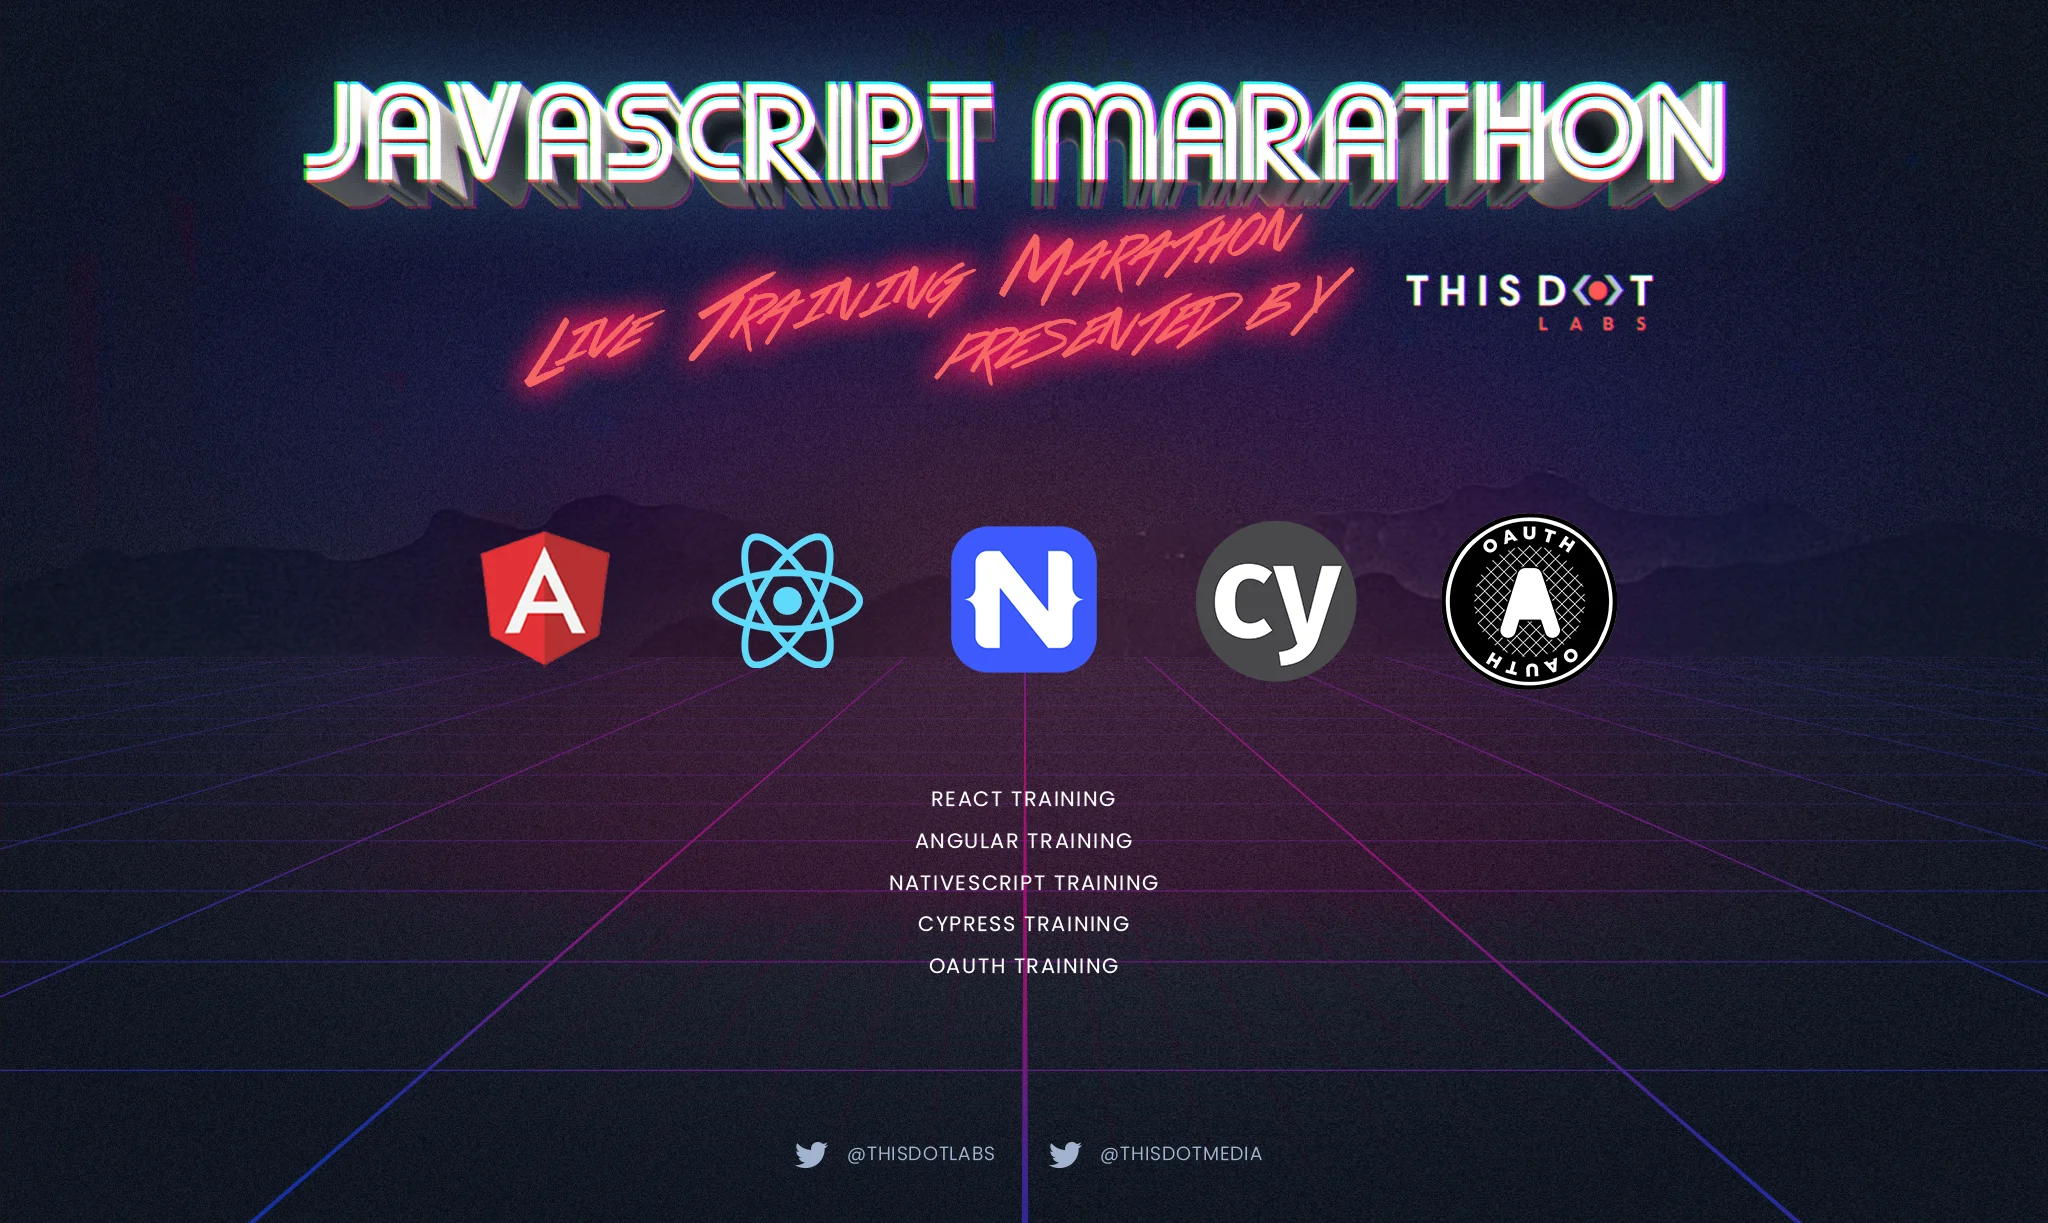
JavaScript Marathon is a full day of free, online courses on Angular, React, Vue, RxJS, Web Performance, and more. Come learn about some of the leading web development technologies, and concepts! Stay for one training, or stick around for the whole day! No two sessions will be the same! --- React Native in 60 Minutes - Introduction to Creating Your First Hybrid Native Application__ Featuring Rob Ocel @ 11:00am - 12:00pm EDT* So, you know React, and you want to build a mobile application - how do you get started? In this training, we'll discuss the architecture of React Native and how it differs from competing approaches such as Progressive Web Applications, Ionic Capacitor, and Apache Cordova. Then, we'll make a basic application from scratch that uses data from remote APIs and device sensors, and we'll show how to test and debug the application on your device and in simulators. --- Using Angular Libraries in an Nx Monorepo__ Featuring Patricio Vargas @ 12:30pm - 1:30pm EDT* Learn how to use Angular libraries and share code between multiple enterprise applications in your current or your future monorepo project using Nx by the Nrwl team. --- JavaScript Animations with GreenSock__ Featuring Christina Gorton @ 2:00pm - 3:00pm EDT* Have you ever been to a website and wondered "Whoa, how did they do that?" In this session you will learn how to get started creating fun, interesting, and complex animations that delight users with the GreenSock animation library. --- Type-Safe Databases with Prisma__ Featuring Ryan Chenkie @ 3:30pm - 4:30pm EDT* TypeScript is seeing huge adoption in all kinds of settings, from enterprises to open source projects to indie side projects. The promise of type safety via TypeScript is compelling: it allows you to catch a whole class of bugs before you even deploy your code. While there's a lot of focus on making your front-end and backend code type-safe, not as much focus is put on applying the same to your database access. That's where Prisma comes in. Prisma is a database toolkit that allows you to build type-safe databases with ease. It gives you a fully typed database client which means you get type hints, autocompletion, and you are prevented from accessing your database in an invalid way. In this session, we'll build a TypeScript node API that uses Prisma for database access. We'll see how Prisma can be used to give you confidence in how you access your data and how you can be more productive by using features such as the Prisma Schema Language, migrations, and more. --- Javascript-free Websites with .NET Blazor WebAssembly__ Featuring Heather Downing @ 5:00pm - 6:00pm EDT* Curious about the development experience of building front-end with C#? Blazor WebAssembly makes it possible to replace all of your Javascript completely - even in the front end! Join us as we build a secure SPA in .NET and discover the tricks of debugging and the trade-offs of the server-side version of Blazor....

Intro to DevRel: What's the Difference Between External and Internal DevRel Programs? cover image

Intro to DevRel: What's the Difference Between External and Internal DevRel Programs?

Developer Relations (DevRel__) is a proactive, multifaceted discipline that bridges the gap between developers and companies to drive adoption while cultivating an energetic and supportive developer community for their product, service, or technology. The term and the profession are often misunderstood even among those in other technical roles. Some have never heard of DevRel before, and others believe it’s a kind of tech support for developers. Many organizations even think starting a DevRel program means just giving away free software and hoping it catches on. But DevRel is none of these things. At its core, a successful DevRel program builds strong bonds within their target market to ensure that developers can interface with a company or organization behind the product they’re using. Great teams establish authentic connections with developers, cultivate trust, and actively engage with them. DevRel defies traditional marketing strategies. Instead of prioritizing numbers and eyes that contribute to a sales funnel, it focuses on enhancing developer satisfaction. This creates a feedback loop between users and a company to better meet their needs, and foster a sense of collaboration within a product’s user community. The Two Main Domains of Developer Relations DevRel is split into 2 main domains__: __external__ and __internal__. External: Accessing an existing developer community If a company already has a product with an existing community or a product that may appeal to an existing community, and they want to establish a DevRel program around it, this would fall within the external domain. A successful external program will establish credibility and support developers through a number of evangelistic measures like blog posts, tutorials, webinars, giving talks at meetups and conferences, or creating useful code examples to teach concepts. These activities and their goals are rarely product-specific. Instead, they incorporate a number of technologies within their product’s technical ecosystem to demonstrate its value to a developer’s workflow. I had the pleasure of working with Doron Sherman during his tenure at Cloudinary as VP of Developer Relations. Doron has extensive experience with building developer communities, and successfully advocated internally to build a website called Media Jams, a learning resource for developers working with media in their apps. By having this initiative live under Developer Relations, and not under Product, Marketing, or Engineering, Doron and his team built quickly and created a site that prioritized education, without needing to meet the business objectives of other parts of the organization. > “Media Jams has had great organic growth as a community resource. We were able to attract non-Cloudinary users as well as organic search traffic of those looking for media use cases who would have otherwise gotten lost in the Cloudinary docs and/or could not find help through the Cloudinary blog or knowledge base.” says Doron. Internal: Building a developer community In order to support the adoption and retention of developers using a product, companies must have a space where developers can interface with them. Building their own community around a product is the best way to do this. By creating open lines of communication, developers can provide immediate feedback about a product in a productive way to product and engineering teams thereby shortening the feedback loop and improving the speed at which a team is able to innovate based on user needs. This strategy falls under the internal domain. These forums also provide synergistic opportunities for developers that are using a product to learn from each other. By working on similar problems, developers are able to bond and feel more ownership or excitement toward a product, increasing user retention. Danny Thompson, a developer influencer and mentor who has built a community of over a quarter million followers, says that he admires Appwrite’s DevRel program, helmed by Tessa Mero, Head of Developer Relations: > “The Appwrite DevRel team is great at answering questions. They are on Discord, jumping on calls with developers, answering questions, and doing office hours, all of which are super valuable in building that community. The main difference between Appwrite DevRel and other teams is, a lot of communities are run very passively and not always available or taking an active approach within community forums to help out.” - Danny Thompson on Appwrite. > “When we think about how to become successful as a company through DevRel, our first consideration is, what made us successful in the first place? Appwrite became an open-source company and a successful open-source project because of community, so we focus on a community-first approach. Contributors and developers that have supported us since before we were a company are what led us to where we are now. Every initiative, every planning, and everything we do on our team, we consider the community's feedback and perspective before we make any decisions.” - Tessa Mero at Appwrite. The Value-First Approach to Developer Relations Successful DevRel programs prioritize delivering value to cultivate credibility among developers and support product adoption free from reciprocal demands. External efforts involve engaging with existing technology communities, establishing credibility through various evangelistic measures, and delivering value to the community. On the other hand, internal programs build communities around their product, facilitating direct communication between developers and the company. These internal forums not only enhance user retention but also foster a space for developers to learn from each other, creating a sense of ownership and excitement around the product. And by diverting equity to these two programs, DevRel teams find new users, retain them, and receive invaluable feedback. Real-world examples, such as Doron Sherman's work at Cloudinary and Tessa Mero's leadership at Appwrite, showcase the effectiveness of DevRel in action, and highlight how DevRel programs contribute to the success and sustainability of developer-focused products. In the ever-evolving landscape of technology, DevRel emerges not only as a bridge between developers and organizations, but as a crucial driver of innovation, ensuring products remain relevant, adaptive, and deeply integrated into the communities they serve. If you’re thinking about building a successful DevRel program for the first time, the best place to start is to reflect on some of your favorite brands and how they connect with the developer community. Do they simply distribute discount codes and free swag, or are they reaching out to their users, and providing them a platform to learn, collaborate with others, and contribute? If they are, what methods do they use, and how do those methods coincide with your team’s existing strengths? And if you ever have any questions or want to connect with a DevRel specialist, do not hesitate to reach out!...