Skip to content

A Tale of Form Autofill, LitElement and the Shadow DOM

This article was written over 18 months ago and may contain information that is out of date. Some content may be relevant but please refer to the relevant official documentation or available resources for the latest information.

Many web applications utilize forms in places be it for logging in, making payments, or editing a user profile. As a user of web applications, you have probably noticed that the browser is able to autofill in certain fields when a form appears so that you don't have to do it yourself. If you've ever written an application in Lit though, you may have noticed that this doesn't always work as expected.

The Problem

I was working on a frontend project utilizing Lit and had to implement a login form. In essence these aren’t very complicated on the frontend side of life. You just need to define a form, put some input elements inside of it with the correct type attributes assigned to it, then you hook the form up to your backend, API, or whatever you need to call to authenticate by adding a submit handler.

However, there was an issue. The autocomplete doesn’t appear to be working as expected. Only the username field was being filled, but not the password. When this happened, I made sure to check documentation sites such as MDN and looked at examples. But I couldn’t find any differences between theirs and mine. At some point, I prepared a minimal reproducible example without Lit, and I was able to get the form working fine, so it had to do something with my usage of Lit.

After doing a little bit of research and some testing, I found out this happened because Lit relies very heavily on something known as the Shadow DOM. I don’t believe the Shadow DOM is necessarily supposed to break this functionality. But for most major browsers, it doesn’t play nice with autocomplete for the time being. I experienced slightly different behavior in all browsers, and the autocomplete even worked under Shadow DOM with Firefox in the Lit app I was working on.

The solution I ended up settling on was ensuring the form was contained inside of the Light DOM instead of the Shadow DOM, whilst also allowing the Shadow DOM to continue to be used in places where autofillable forms are not present. In this article I will show you how to implement this solution, and how to deal with any problems that might arise from it.

Shadow DOM vs. Light DOM

The Shadow DOM is a feature that provides a way to encapsulate your components and prevent unrelated code and components from affecting them in undesired ways. Specifically, it allows for a way to prevent outside CSS from affecting your components and vice versa by scoping them to a specific shadow root.

When it comes to the Light DOM, even if you’ve never heard of the term, you’ve probably used it. If you’ve ever worked on any website before, and interacted with the standard DOM tree, that is the Light DOM. The Light DOM, and any Shadow DOMs under it for that matter, can contain Shadow DOMs inside of them attached to elements. When you add a Lit component to a page, a shadow root will get attached to it that will contain its subelements, and prevent CSS from outside of that DOM from affecting it.

Using Light DOM with Certain Web Components

By default, Lit attaches a shadow root to all custom elements that extend from LitElement. However, web components don’t actually require a shadow root to function. We can do away with the shadow root by overriding the createRenderRoot method, and returning the web component itself:

createRenderRoot(): ShadowRoot | this {
  return this;
}

Although we can just put this method in any element we want exposed into the Light DOM. We can also make a new component called LightElement that overrides this method that we can extend from instead of LitElement on our own components. This will be useful later when we tackle another problem.

Uh oh, where did my CSS styling and slots go?

The issue with not using a shadow root is Lit has no way to encapsulate your component stylesheets anymore. As a result, your light components will now inherit styles from the root that they are contained in. For example, if your components are directly in the body of the page, then they will inherit all global styles on the page. Similarly when your light components are inside of a shadow root, they will inherit any styles attached to that shadow root.

To resolve this issue, one could simply add style tags to the HTML template returned in the render() method, and accept that other stylesheets in the same root could affect your components. You can use naming conventions such as BEM for your CSS classes to mitigate this for the most part. Although this does work and is a very pragmatic solution, this solution does pollute the DOM with multiple duplicate stylesheets if more than one instance of your component is added to the DOM.

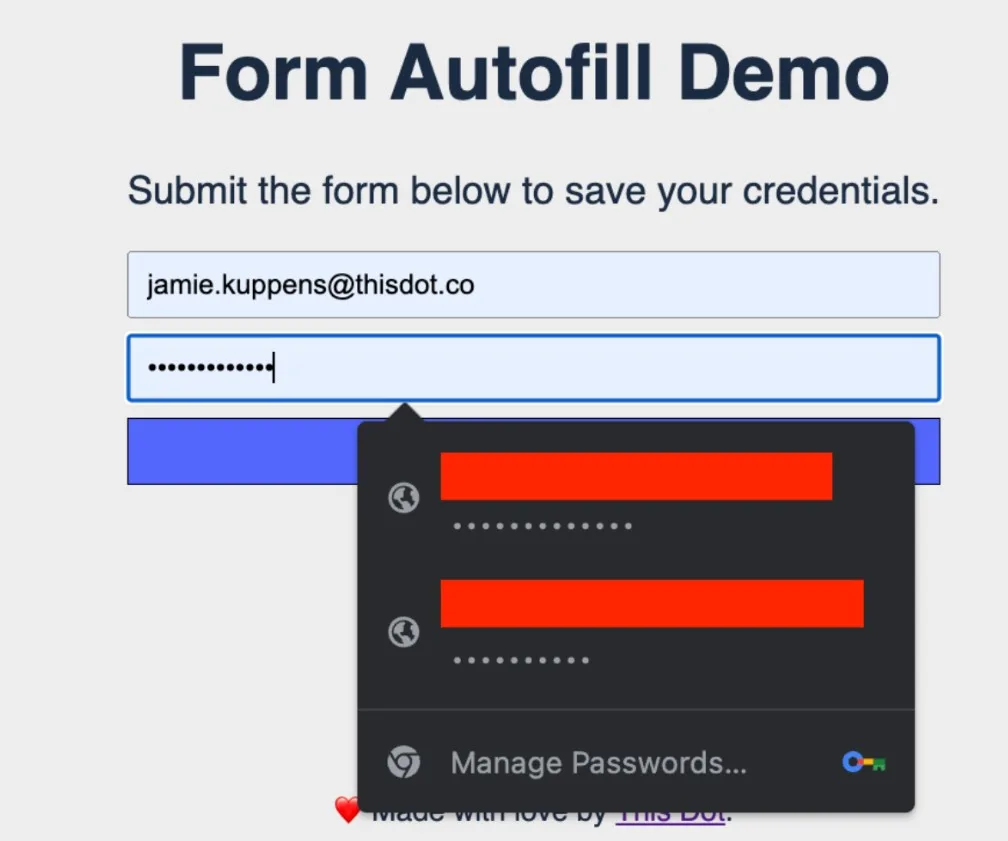
Now, with the CSS problem solved, you can now have a functional Lit web component with form autofill for passwords and other autofillable data! You can view an example using this solution here.

Screenshot 2023-05-23 155514

A Better Approach using Adopted Stylesheets

For a login page where only one instance of the component is in the DOM tree at any given point, the aforementioned solution is not a problem at all. However, this can become a problem if whatever element you need to use the Light DOM with is used in lots of places or repeated many times on a page. An example of this would be a custom input element in a table that contains hundreds of rows. This can potentially cause performance issues, and also pollute the CSS inspector in your devtools resulting in a suboptimal experience both for users and yourself.

The better, though still imperfect, way to work around this problem is to use the adopted stylesheets feature to attach stylesheets related to the web component to the root it is connected in, and reuse that same stylesheet across all instances of the node.

Below is a function that tracks stylesheets using an id and injects them in the root node of the passed in element. Do note that, with this approach, it is still possible for your component’s styles to leak to other components within the same root. And like I advised earlier, you will need to take that into consideration when writing your styles.

export function injectSharedStylesheet(
  element: Element,
  id: string,
  content: string
) {
  const root = element.getRootNode() as DocumentOrShadowRoot;

  if (root.adoptedStyleSheets != null) {
    evictDisconnectedRoots();

    const rootNodes = documentStylesheets[id] ?? [];
    if (rootNodes.find(value => value === root)) {
      return;
    }

    let sharedStylesheet = sharedStylesheets[id];
    if (sharedStylesheet == null) {
      sharedStylesheet = new CSSStyleSheet();
      sharedStylesheet.replaceSync(content);
      sharedStylesheets[id] = sharedStylesheet;
    }

    root.adoptedStyleSheets.push(sharedStylesheet);
    if (documentStylesheets[id] != null) {
      documentStylesheets[id].push(root);
    } else {
      documentStylesheets[id] = [root];
    }
  } else {
    // FALLBACK: Inject <style> manually into the document if adoptedStyleSheets
    // is not supported.

    const target = root === document ? document.head : root;
    if (target?.querySelector(`#${id}`)) {
      return;
    }

    const styleElement = document.createElement('style');
    styleElement.id = id;
    styleElement.appendChild(document.createTextNode(content));

    target.appendChild(styleElement);
  }
}

This solution works for most browsers, and a fallback is included for Safari as it doesn’t support adoptedStylesheets at the time of writing this article. For Safari we inject de-duplicated style elements at the root. This accomplishes the same result effectively.

Let’s go over the evictDisconnectedRoots function that was called inside of the injection function. We need to ensure we clean up global state since the injection function relies on it to keep duplication to a minimum. Our global state holds references to document nodes and shadow roots that may no longer exist in the DOM. We want these to get cleaned up so as to not leak memory. Thankfully, this is easy to iterate through and check because of the isConnected property on nodes.

function evictDisconnectedRoots() {
  Object.entries(documentStylesheets).forEach(([id, roots]) => {
    documentStylesheets[id] = roots.filter(root => root.isConnected);
  });
}

Now we need to get our Lit component to use our new style injection function. This can be done by modifying our LightElement component, and having it iterate over its statically defined stylesheets and inject them. Since our injection function contains the de-duplication logic itself, we don’t need to concern ourselves with that here.

import { CSSResult, LitElement } from 'lit';
import { customElement } from 'lit/decorators.js';
import { injectSharedStylesheet } from './style-injector.js';

export interface SharedStylesheet {
  id: string;
  content: CSSResult;
}

@customElement('light-element')
export class LightElement extends LitElement {
  static sharedStyles: SharedStylesheet[] = [];

  connectedCallback() {
    const { sharedStyles } = this.constructor as any;
    if (sharedStyles) {
      sharedStyles.forEach((stylesheet: SharedStylesheet) => {
        injectSharedStylesheet(
          this,
          stylesheet.id,
          stylesheet.content.toString()
        );
      });
    }

    super.connectedCallback();
  }

  createRenderRoot(): ShadowRoot | this {
    return this;
  }
}

With all that you should be able to get an autocompletable form just like the previous example. The full example using the adopted stylesheets approach can be found here.

Conclusion

I hope this article was helpful for helping you figure out how to implement autofillable forms in Lit. Both examples can be viewed in our blog demos repository. The example using basic style tags can be found here, and the one using adopted stylesheets can be found here.

This Dot is a consultancy dedicated to guiding companies through their modernization and digital transformation journeys. Specializing in replatforming, modernizing, and launching new initiatives, we stand out by taking true ownership of your engineering projects.

We love helping teams with projects that have missed their deadlines or helping keep your strategic digital initiatives on course. Check out our case studies and our clients that trust us with their engineering.

You might also like

Lit 2.0 Released: Building Fast and Lightweight Web Components cover image

Lit 2.0 Released: Building Fast and Lightweight Web Components

In the past months, I've been actively using Web Components to build single-page applications. It has been a great experience so far, not only because I learned a lot about the latest web standards, but also because the web applications ended up being quite fast. The Web Component development story is not something new. In fact, it has been nearly three years since LitElement was introduced as a base class to build Web Components using JavaScript with the addition of great support from TypeScript. On the other hand, lit-html had been released almost four years ago as a way to create small and fast HTML templates in JavaScript. As it was expected, these two worlds evolved favorably. Lit 2.0 was announced as a single library with a major update promising simple and fast Web Components. What's New? Lit 2.0 is coming out with a lot of great new features. Smaller The templating system of Lit 2.0 weights around 2.7 KB minified, and _gzipped_(compressed). Including the component base + reactive elements, it weights 5.8 KB. The previous image shows the bundle size for lit@2.0.0-rc.1 from the BundlePhobia tool. Better This new release also includes several template improvements and a brand new class-based API for creating directives as the below example shows. ` Also, Lit 2.0 introduces the concept of Reactive Controllers which is a powerful primitive for code reuse and composition. A _Reactive Controller_ comes with the ability to "hook" into the component's lifecycle and it has its own creation API. ` In the above code snippet, the component associated with the Reactive Controller instance is called the host component. Faster The Lit team has considered efficient rendering as one of the core values for the library since a good performance is always important when you're building for the web platform. The library authors claim that Lit 2.0 is up to 20% faster on initial rendering and up to 15% faster on updates. Also, it's good to know that Lit templates are efficient in keeping track of the UI, and only updates on re-rendering. These powerful features come along with interoperability in mind: they can work anywhere you use HTML with or without any framework. Server-Side Rendering Yes, Lit 2.0 comes with a server package for rendering Lit templates and components on the server, along with a flexible client-side "hydration". The package name is below @lit-labs/ssr since it's a pre-release software at this time. However, it's expected to support a wide range of use cases: * App rendering frameworks built on top of web components. * Framework-specific plugins for rendering custom elements such as React or Angular. * Integration with static site generators. You can be up-to-date about this server-side rendering support by following the news in this repository. Connect with Lit Lit 2.0 is not only about the cool features that are already described above, it comes along with a brand-new logo, a new website, and a welcoming community. Why Lit? The Web Components written with Lit are natively supported by browsers and they can be a perfect solution to share components across your application. Also, Lit can be a useful solution to create your set of components through the _Design System_ defined by your organization. This is even more helpful when your team uses multiple libraries and frameworks to build applications! Community You can be the first to know the good news about Lit and the upcoming releases. Share your ideas and projects with the community. * Join the conversations on Twitter: @buildWithLit * Send your issues or even better, help with Pull Requests on GitHub * Send your questions and help with technical issues on StackOverflow. Use lit, lit-html and lit-element as the related tags. * Finally, you can be part of lit-and-friends on Slack. Just always remember to be nice to each other! Playground If you are a Developer who really enjoys and thinks through interactive examples, you cannot miss the Lit Playground website, which comes with the classic "Hello World" examples (using JavaScript and TypeScript), and others covering template concepts, directives, and more. Conclusion In case you were using both LitElement and lit-html (like me), it could be a great opportunity to upgrade your code to Lit 2.0. The general idea to do this involves updating the npm packages, importing paths, updating any custom directive, and using the class-based API or even adapt to minor breaking changes. Luckily, there is a guide available for upgrades. If you're new in the world of Web Components, welcome! There is a step-by-step Lit tutorial available too. Feel free to reach out on Twitter if you have any questions. Follow me on GitHub to see more about my work. Be ready for more articles about Lit on this blog....

Building a Lightweight Component with Lit cover image

Building a Lightweight Component with Lit

Component-based apps make it much easier to build independent components and share them across projects. With broken-down units as small as a button or user interactions, project iterations tend to become faster and more developer friendly. For this article, we will use Lit to build web components for our front-end apps. What is Lit? According to the docs, Lit is a simple library for building fast, lightweight web components. Using Lit, you can build highly reusable components with the following features: - Native component for the browser aka Web Component - Framework agnostic, sharable and usable across multiple web frameworks - Lightweight, not requiring too much JavaScript code to implement - Flexible and can easily be plugged into any future project and still work as expected. Prerequisites To follow along with this article, I recommend you have: - Basic knowledge of JavaScript and a frontend framework (React, Angular or Vue) - Code Editor For this, we will be using the Lit JavaScript starter kit. Clone the repo to your local machine ` And change directory ` Install dependencies. ` Open the project with a code editor, and navigate to the file list-element.js: ` Our web component ListElememt is a class that extends to the LitElement base class with the styles() and property() methods. The styles() method returns the CSS for the component that uses the css method imported from Lit to define component-scoped CSS in a template literal. The properties() method returns the properties which expose the component's reactive variables. We declare an internal state of todoList to hold the list of todos. Then, we assign default values to properties in the constructor method. todoList is an empty array. The render() method returns the view using the html imported from Lit to define the html elements in a template literal. In the rendered html, we added an input element with id of fullname and a button with a click event triggering the custom method _pushTodo to push new Todo to the todoList array. Then, we map through the list of todos with map directives imported from Lit and attach a button to each item with an event to remove the item when clicked, calling a custom method _removeTodo that filters through the array, and returns items that satisfy our condition. The getter method _input() returns the input element we created to give access to the input value so we can pass it to the _pushTodo method. Now, to render the component, we will modify the index.html head section. ` We will also need to modify the body element of our index.html file. ` Now, run the app to see our modification, run: ` From the browser, navigate to localhost:8000, and you should see the element rendered below. Benefits of Lit Components Now we have a running app with a reusable component. Let's explore the Lit benefits of this component, and what differentiates it from other tools for building components. Native: Lit is built on top of the Web Components standards and you are able to extend just what you need for productivity: reactivity, declarative templates, and a handful of thoughtful features to reduce boilerplate and make your job easier. In our ListElement code, we defined the custom HTML element with window.customElements.define which defines and registers a new custom element to the browser DOM and associates it with an element name list-element, making our component native. Every Lit component is built with web platform evolution in mind. Fast and Small: Lit has a 5 kb compressed size and a minified bundle which allows your application to load faster without the need to rebuild a virtual tree (No virtual DOM). Lit batches updates to maximize performance and efficiency. Setting multiple properties at once triggers only one update, performed asynchronously at microtask timing. Interoperable & future-ready: Every Lit component is a native web component with the superpower of interoperability. Web components work anywhere you use HTML with any framework, or none at all. This makes Lit ideal for building shareable components, design systems, or maintainable, future-ready sites and apps. Here is how you can quickly make our ListElement component usable and shareable across any project built with any framework or without one. For the dev/index.html head, we simply imported the JavaScript module of list-element.js and quickly add the custom HTML element to the body: ` Reactivity with Lit: Lit components receive input and store their state as JavaScript class fields or properties. Reactive properties are properties that can trigger the reactive update cycle when changed, re-rendering the component, and optionally be read or written to attributes. ` All JavaScript properties in Lit are defined inside this properties object, and then we used the constructor method in our App component class to set an initial value for the properties we created. Events: In addition to the standard addEventListener API, Lit introduces a declarative way to add event listeners. You will notice we used @ expressions in our template to add event listeners to elements in our component's template. We added the @click event and bind it into the template. Declarative event listeners are added when the template is rendered. ` Lifecycle Lit components use the standard custom element lifecycle methods. In addition, Lit introduces a reactive update cycle that renders changes to DOM when reactive properties change. Lit components are standard custom elements and inherit the custom element lifecycle methods. In our ListElement class, we have the constructor() method which is called when an element is created. Also, it’s invoked when an existing element is upgraded, which happens when the definition for a custom element is loaded after the element is already in the DOM. You will notice in our _pushTodo() method we initiated a Lifecycle update by calling requestUpdate() method to perform an update immediately. Lit saves any properties already set on the element. This ensures values set before the upgrade are maintained and correctly override defaults set by the component. This is so we can push new items to the array and immediately re-render the component. Conclusion Congratulations! You`ve learned how to build lightweight components with Lit.dev, and explore some of the benefits of using native web components which can be used across frameworks and non-frameworks apps. What is the exciting thing you will be building with Lit? Let us know on Twitter!...

Integrating Playwright Tests into Your GitHub Workflow with Vercel cover image

Integrating Playwright Tests into Your GitHub Workflow with Vercel

Vercel previews offer a great way to test PRs for a project. They have a predefined environment and don’t require any additional setup work from the reviewer to test changes quickly. Many projects also use end-to-end tests with Playwright as part of the review process to ensure that no regressions slip uncaught. Usually, workflows configure Playwright to run against a project running on the GitHub action worker itself, maybe with dependencies in Docker containers as well, however, why bother setting that all up and configuring yet another environment for your app to run in when there’s a working preview right there? Not only that, the Vercel preview will be more similar to production as it’s running on the same infrastructure, allowing you to be more confident about the accuracy of your tests. In this article, I’ll show you how you can run Playwright against the Vercel preview associated with a PR. Setting up the Vercel Project To set up a project in Vercel, we first need to have a codebase. I’m going to use the Next.js starter, but you can use whatever you like. What technology stack you use for this project won’t matter, as integrating Playwright with it will be the same experience. You can create a Next.js project with the following command: ` If you’ve selected all of the defaults, you should be able to run npm run dev and navigate to the app at http://localhost:3000. Setting up Playwright We will set up Playwright the standard way and make a few small changes to the configuration and the example test so that they run against our site and not the Playwright site. Setup Playwright in our existing project by running the following command: ` Install all browsers when prompted, and for the workflow question, say no since the one we’re going to use will work differently than the default one. The default workflow doesn’t set up a development server by default, and if that is enabled, it will run on the GitHub action virtual machine instead of against our Vercel deployment. To make Playwright run tests against the Vercel deployment, we’ll need to define a baseUrl in playwright.config.ts and send an additional header called X-Vercel-Protection-Bypass where we'll pass the bypass secret that we generated earlier so that we don’t get blocked from making requests to the deployment. I’ll cover how to add this environment variable to GitHub later. ` Our GitHub workflow will set the DEPLOYMENT_URL environment variable automatically. Now, in tests/example.spec.ts let’s rewrite the tests to work against the Next.js starter that we generated earlier: ` This is similar to the default test provided by Playwright. The main difference is we’re loading pages relative to baseURL instead of Playwright’s website. With that done and your Next.js dev server running, you should be able to run npx playwright test and see 6 passing tests against your local server. Now that the boilerplate is handled let’s get to the interesting part. The Workflow There is a lot going on in the workflow that we’ll be using, so we’ll go through it step by step, starting from the top. At the top of the file, we name the workflow and specify when it will run. ` This workflow will run against new PRs against the default branch and whenever new commits are merged against it. If you only want the workflow to run against PRs, you can remove the push object. Be careful about running workflows against your main branch if the deployment associated with it in Vercel is the production deployment. Some tests might not be safe to run against production such as destructive tests or those that modify customer data. In our simple example, however, this isn’t something to worry about. Installing Playwright in the Virtual Machine Workflows have jobs associated with them, and each job has multiple steps. Our test job takes a few steps to set up our project and install Playwright. ` The actions/checkout@v4 step clones our code since it isn’t available straight out of the gate. After that, we install Node v22 with actions/setup-node@v4, which, at the time of writing this article, is the latest LTS available. The latest LTS version of Node should always work with Playwright. With the project cloned and Node installed, we can install dependencies now. We run npm ci to install packages using the versions specified in the lock file. After our JS dependencies are installed, we have to install dependencies for Playwright now. sudo npx playwright install-deps installs all system dependencies that Playwright needs to work using apt, which is the package manager used by Ubuntu. This command needs to be run as the administrative user since higher privilege is needed to install system packages. Playwright’s dependencies aren’t all available in npm because the browser engines are native code that has native library dependencies that aren’t in the registry. Vercel Preview URL and GitHub Action Await Vercel The next couple of steps is where the magic happens. We need two things to happen to run our tests against the deployment. First, we need the URL of the deployment we want to test. Second, we want to wait until the deployment is ready to go before we run our tests. We have written about this topic before on our blog if you want more information about this step, but we’ll reiterate some of that here. Thankfully, the community has created GitHub actions that allow us to do this called zentered/vercel-preview-url and UnlyEd/github-action-await-vercel. Here is how you can use these actions: ` There are a few things to take note of here. Firstly, some variables need to be set that will differ from project to project. vercel_app in the zentered/vercel-preview-url step needs to be set to the name of your project in Vercel that was created earlier. The other variable that you need is the VERCEL_TOKEN environment variable. You can get this by going to Vercel > Account Settings > Tokens and creating a token in the form that appears. For the scope, select the account that has your project. To put VERCEL_TOKEN into GitHub, navigate to your repo, go to Settings > Secrets and variables > Actions and add it to Repository secrets. We should also add VERCEL_AUTOMATION_BYPASS_SECRETl. In Vercel, go to your project then navigate to Settings > Deployment Protection > Protection Bypass for Automation. From here you can add the secret, copy it to your clipboard, and put it in your GitHub action environment variables just like we did with VERCEL_TOKEN. With the variables taken care of, let’s take a look at how these two steps work together. You will notice that the zentered/vercel-preview-url step has an ID set to vercel_preview_url. We need this so we can pass the URL we receive to the UnlyEd/github-action-await-vercel action, as it needs a URL to know which deployment to wait on. Running Playwright After the last steps we just added, our deployment should be ready to go, and we can run our tests! The following steps will run the Playwright tests against the deployment and save the results to GitHub: ` In the first step, where we run the tests, we pass in the environment variables needed by our Playwright configuration that’s stored in playwright.config.ts. DEPLOYMENT_URL uses the Vercel deployment URL we got in an earlier step, and VERCEL_AUTOMATION_BYPASS_SECRET gets passed the secret with the same name directly from the GitHub secret store. The second step uploads a report of how the tests did to GitHub, regardless of whether they’ve passed or failed. If you need to access these reports, you can find them in the GitHub action log. There will be a link in the last step that will allow you to download a zip file. Once this workflow is in the default branch, it should start working for all new PRs! It’s important to note that this won’t work for forked PRs unless they are explicitly approved, as that’s a potential security hazard that can lead to secrets being leaked. You can read more about this in the GitHub documentation. One Caveat There’s one caveat that is worth mentioning with this approach, which is latency. Since your application is being served by Vercel and not locally on the GitHub action instance itself, there will be longer round-trips to it. This could result in your tests taking longer to execute. How much latency there is can vary based on what region your runner ends up being hosted in and whether the pages you’re loading are served from the edge or not. Conclusion Running your Playwright tests against Vercel preview deployments provides a robust way of running your tests against new code in an environment that more closely aligns with production. Doing this also eliminates the need to create and maintain a 2nd test environment under which your project needs to work....

This Dot AI Field Notes - Anatomy of a Coding Harness cover image

This Dot AI Field Notes - Anatomy of a Coding Harness

A coding agent is not magic, it’s a loop. We call this a harness. The harness is a deterministic layer of code that wraps an LLM. Claude Code is a harness. Codex is a harness. Pi is a harness. The harness, on initialization, provides to the LLM a system prompt defining all tools the harness implements for the LLM. Without the harness, you cannot read or modify files on the user’s local filesystem without them having to copy-and-pasting by hand. The harness is the final place where engineers can customize how coding agents do work before the LLM takes over. Think of the LLM as a train and the harness as the rails the train rides on. Below… one full task executed by a harness, traced step by step....

Let's innovate together!

We're ready to be your trusted technical partners in your digital innovation journey.

Whether it's modernization or custom software solutions, our team of experts can guide you through best practices and how to build scalable, performant software that lasts.

Prefer email? hi@thisdot.co