AWS (Amazon Web Services) is popular for the cloud solution it provides across the globe, in various regions with data centers.
In this article, we will be looking at a particular platform by AWS for frontend developers, AWS Amplify.
AWS Amplify is a set of tools and features that let web and mobile developers quickly and easily build full-stack applications on AWS.
This article is a summary of JavaScript Marathon: AWS for Frontend Developers with Michael Liendo. If you want a more detailed explanation of building and deploying frontend apps with AWS Amplify, I recommend you go and check out the video!
Application User Flow
Most applications need certain key features to be created for users. Let’s explore a few of them.
-
User Login:
- This can be created by spinning up an ExpressJS application with Authentication, and handling things like user hashing, password policy, and forgot password.
-
API integration:
- This is another common need as we typically need to handle user data with a backend application.
-
Database:
- Most applications store user information. This would be key in creating an interactive user experience in an application.
Bringing these services together can be a lot for many developers. Developers will also have to consider application scalability as the users increase.
AWS Amplify
AWS Amplify is built to specifically handle scale for frontend developers, and also provides the opportunity for an application to scale as the application and users grow. With scalability handled, this allows developers to focus on providing value for their users versus having to worry about scalability at every stage.
AWS Amplify Tools
AWS Amplify tools for building and deploying frontend applications include:
- CLI: To connect frontend with AWS backend cloud resources.
- UI Components: AWS UI components library is an open-source design system with cloud-connected components and primitives that simplify building accessible, responsive, and beautiful applications.
- Hosting Solution: For deploying frontend applications, static sites, and server-side apps, with a CI/CD pipeline.
- Amplify Studio: A GUI for UI to plug a Figma component and automatically convert it into a ReactJS component.
Walking back to how AWS will help manage the user journey we listed above and make developer lives easier, here are some of the services provided by AWS that help spin up applications with ease:
- User Login: For user login, we can use Amazon Cognito, AWS’s user directory service to handle user authentication, password policies, forgot password, and more.
- API: For API access, we can use AWS AppSync, a serverless GraphQL and Pub/Sub API service.
- Database: for Database, we can use Amazon’s DynamoDB, which is a fully managed, serverless, key-value NoSQL database.
- Storage: for assets storage, we can be use Amazon Simple Storage Service (Amazon S3).
Building a Project & Project Setup
Now that you’re familiar with a few of the services we can use to build an application easily, let’s get started and build one together!
Before we start, let’s install the AWS Amplify CLI.
Run:
npm install -g @aws-amplify/cli
This will give us access to use Amplify’s commands for our application.
The Application
We will be building a Next framework application.
This application will be a collection of pictures of Dogs.
To scaffold a Next application, run:
npx create-next-app thisdot-dogs
Now cd into the application directory.
cd thisdot-dogs
Install the packages and dependencies we will be using from AWS:
npm i @aws-amplify/ui-react aws-amplify
Now, open the project in your code editor. We will be using VS Code.
First, we will wrap the root component in an AmplifyProvider component. Open _app.js and replace the code:
import { AmplifyProvider } from '@aws-amplify/ui-react';
import '@aws-amplify/ui-react/style.css';
import '../styles/globals.css'

function MyApp({ Component, pageProps }) {
  return (
    <AmplifyProvider>
      <Component {...pageProps} />
    </AmplifyProvider>
  )
}

export default MyApp
This is to make the application aware of Amplify. We also imported the style library from the React Amplify library.
We will be using the install amplify CLI tool to initialize the Amplify configuration in our project.
To do this, run:
amplify init
You can modify the properties as well, but for this demo, we will leave it as default, and when it asks Initialize the project with the above configuration? we will choose NO.
This is because we will replace the src directory with a . directory and the build directory replace with .next directory.
If you don’t already have AWS credentials set up, Amplify will walk you through setting up new credentials.
For this demo, we will be accepting the default credentials settings provided, but we recommend you follow with the required information for your project. Check out the Documentation to learn more.
AWS will add a few cloud functions and create a configuration file in the project directory, aws-exports.js.
You can add services to your Amplify project by running the amplify add command.
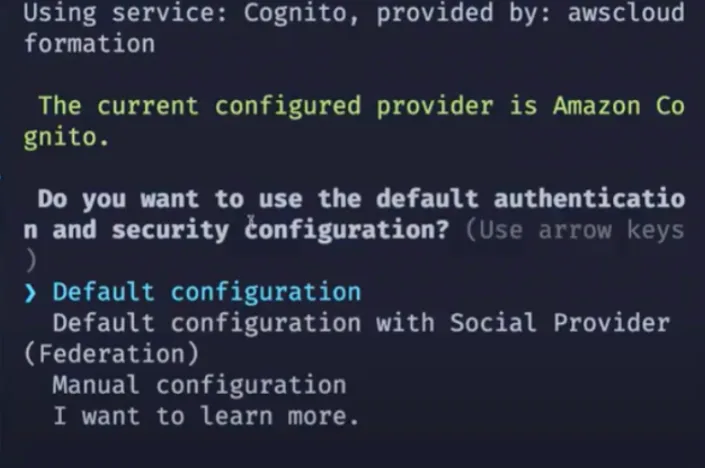
For example, to add the authentication service (AWS Cognito), run:
amplify add auth
This will ask for the type of security configuration you want for the project.
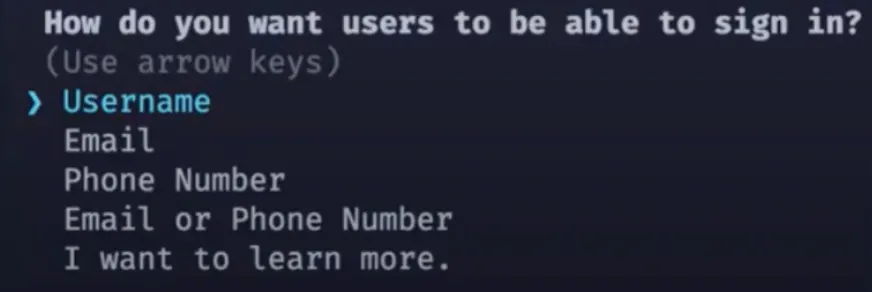
Next, it asks how you want users to authenticate.
This will add authentication to your application. To test it out, let's edit the index.js file and replace the content:
import { withAuthenticator } from "@aws-amplify/ui-react"

function Home() {
  return (
    `Home`
  )
}

export default withAuthenticator(Home)
Now, run the application in dev environment:
npm run dev
Navigate to the dev localhost URL in the browser, http://localhost:3000/.
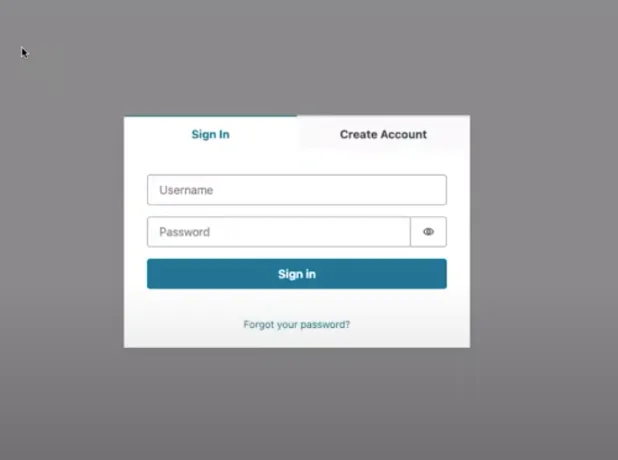
The landing URL is now authenticated, and requires a username and password to login.
The application now has full authentication with the ability to sign in:
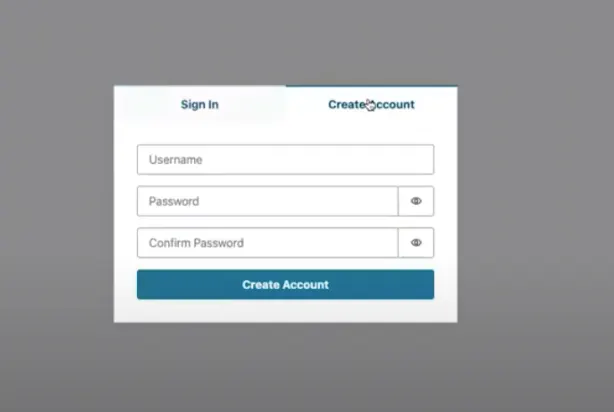
There is a registration function and user detail fields:
There is also a forgotten password function that emails the user a code to reset the password, all from just a few lines of code:
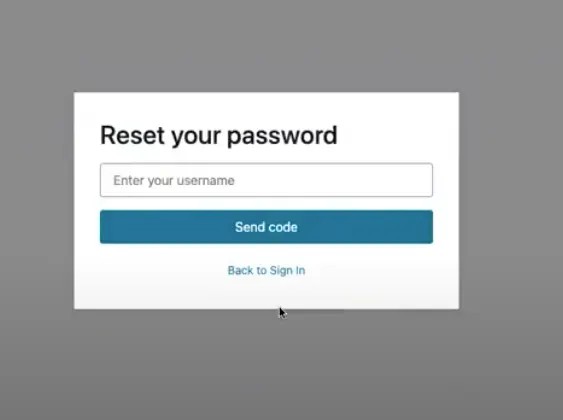
This is a fully functioning application with authentication included locally.
To use the full authentication, we will need to push the application to AWS service.
To do that, run:
amplify push
This will list services created in the application and prompt if you want to continue with the command.
Upon accepting, it will push the application to the cloud and update the amplify-exports.js configuration file with the cloud configuration and AWS services that we enabled in our application.
Now, let's modify the _app.js to apply the Amplify configurations.
Add the Amplify and config imports as follows:
import {Amplify} from 'aws-amplify';
import config from "../amplify-exports.js";

Amplify.configure(config)

function MyApp({ Component, pageProps }) {
…
The authentication configuration handles form validation out-of-the-box including password policy and email, or phone number verification depending on what you choose.
You can view ampliy-exports.js to confirm the configuration options available for the project.
Now to add an API to the application, run:
amplify add api
For this demo, we will choose GraphQL for the API service, API key for authentication, and Amazon Cognito. Everything else will be the default.
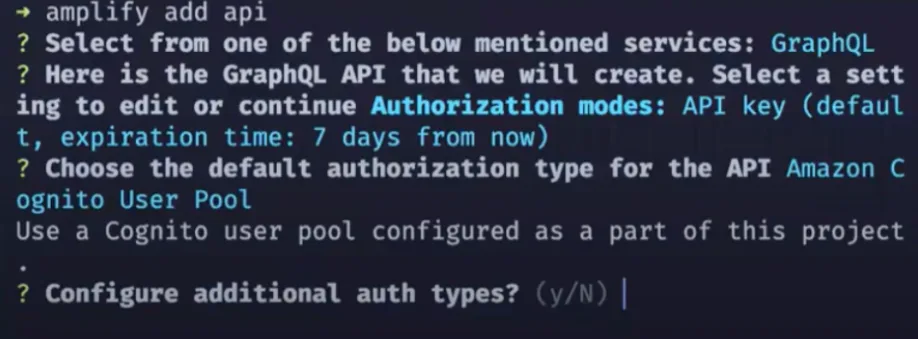
Amplify will auto generate the GraphQL schema for the project, which you can modify to fit your use case.
Push the API updates to AWS:
amplify push
Amplify will trigger to generate code for your GraphQL API. We suggest you accept the default options.

Storage
We’ll add a storage service to our project to allow users to upload favorite dog images.
Run:
amplify add storage

You can apply default settings or modify it to fit your use case.
Building a Demo app
Now that we have prepared the project, let’s modify index.js to implement file upload for authenticated users.
import { Button, Card, Flex, Heading, Image, Text, TextField, withAuthenticator } from "@aws-amplify/ui-react"
import { API, Storage } from "aws-amplify"
import { useEffect, useState } from "react"
import { createDogs } from "../src/graphql/mutations"
import { listDogs } from "../src/graphql/queries"

function Home({ signOut }) {
  const [ dogItems, setDogItems ] = useState([])
  const handleOnSubmit = async (e) => {
    e.preventDefault()
    const picTitle = e.target.dogTitle.value
    const dogPicFile = e.target.dogPic.files[ 0 ]
    const dogPicName = dogPicFile.name

    const picData = await Storage.put(dogPicName, dogPicFile, {
      level: 'protected'
    })

    const { data } = await API.graphql({
      query: createDogs,
      variables: {
        input: {
          title: picTitle,
          imageId: dogPicName,

        }
      }
    })
    setDogItems([ data.createDogs, ...dogItems ])
  }

  useEffect(() => {
    async function fetchDogData() {
      const res = await API.graphql({ query: listDogs })

      const dogItems = await Promise.all(
        res.data.listDogs.items.map(async (dogItem) => {
          const dogUrl = await Storage.get(dogItem.imageId, { level: 'protected' })
          return {
            ...dogItem,
            dogUrl
          }
        })
      )

      setDogItems(dogItems)
    }

    fetchDogData()
  }, [])

  return (
    <Flex direction='column' alignItems='center'>
      <Button onClick={signOut}>Sign Out</Button>
      <Heading level={2}>ThisDot Dogs</Heading>
      <form onSubmit={handleOnSubmit}>
        <TextField label='Title' name="dogTitle" placeholder="Enter a dog Title" />
        <TextField type="file" name="dogPic" label="Choose a dog image" />
        <Button variation="primary" type="submit">Submit</Button>
      </form>
      <Flex wrap='wrap' justifyContent="center" >
        {dogItems.map((dogItem) => (
          <Card key={dogItem.id} variation="elevated">
            <Image height={'200px'} width="200px" src={dogItem.dogUrl} alt="hassan" objectFit="contain" />
            <Text>{dogItem.createdAt}</Text>
            <Text>{dogItem.Title}</Text>
          </Card>
        ))}
      </Flex>
    </Flex>
  )
}

export default withAuthenticator(Home)
Walk Through
First, we created a state to hold a list of dogs’ data from the API.
We then declared an async function to handle the form submission.
Using the AWS component library, we loop through the dogItems, rendering each item to display the uploaded image and details of the dog.
We imported the Storage module from amplify, passed dogPicFile to dogPicName for upload, and set the level to protected to give user access only to read and update data.
Then, we imported the API module from amplify, and the destructured data property.
Using the GraphQL code generated for us by amplify when we run amplify add api, we imported createDogs from mutations so we can post form data to the database with GraphQL. We set a new state with the return data from the database.
With React’s useEffect, we declared an async function to fetch data from the database with GraphQL query, and set the state with the returned data, and we call the fetchDogData.
To test the application, run:
npm run dev
Conclusion
In this article, we learned how to use AWS Amplify to implement authentication, integrate an API with your frontend application, connect with a database, and also how to store files in AWS storage. This can all be accomplished within a short time, and using very few lines of code.
If you want a more detailed explanation of the content covered in this write up, I recommend you watch the video by JavaScript Marathon: AWS for Frontend Developers with Michael Liendo on This Dot’s YouTube Channel.
What are you planning on building with AWS Amplify?