The Fresh framework is the new kid on the block among frontend meta-frameworks. Just like other React meta-frameworks such as Next.js, Fresh allows you to build pages using React syntax. Unlike Next.js, though, Fresh uses Preact, a fast React alternative with the same API, instead of React. Fresh also stands out by using Deno instead of Node, a fast runtime that supports JavaScript, TypeScript, and WebAssembly.
In this blog post, I will guide you through writing a full-stack app using the Fresh framework.
The App Architecture
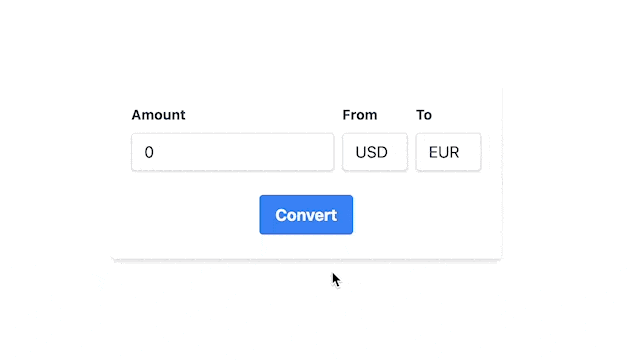
The app will be a currency converter that will let you input an amount, the currency to convert from, and the currency to convert to and will show you the converted amount on the screen. It will do this through a combination of client-side rendered code, and server-rendered code.
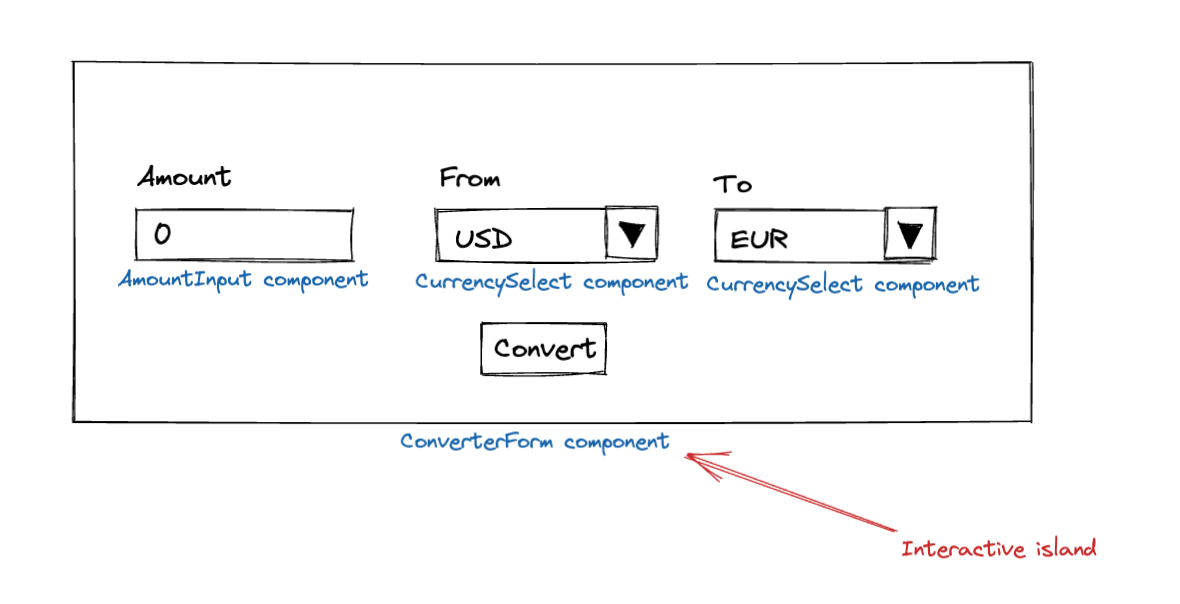
The app will utilize most of Fresh's framework features for building full-stack apps. As seen in the above picture, it will have a small interactive "island" which is basically a form with the input amount, the source currency, and the target currency.
Once you hit the "Convert" button, the Convert button will change its label (this is the client-side "interactive" part) and trigger form submission to the /convert?amount=X&from=Y&to&Z route that will, before rendering the page, execute a request towards an external currency exchange API, fetch the exchange rate, and display the converted amount in the returned page.
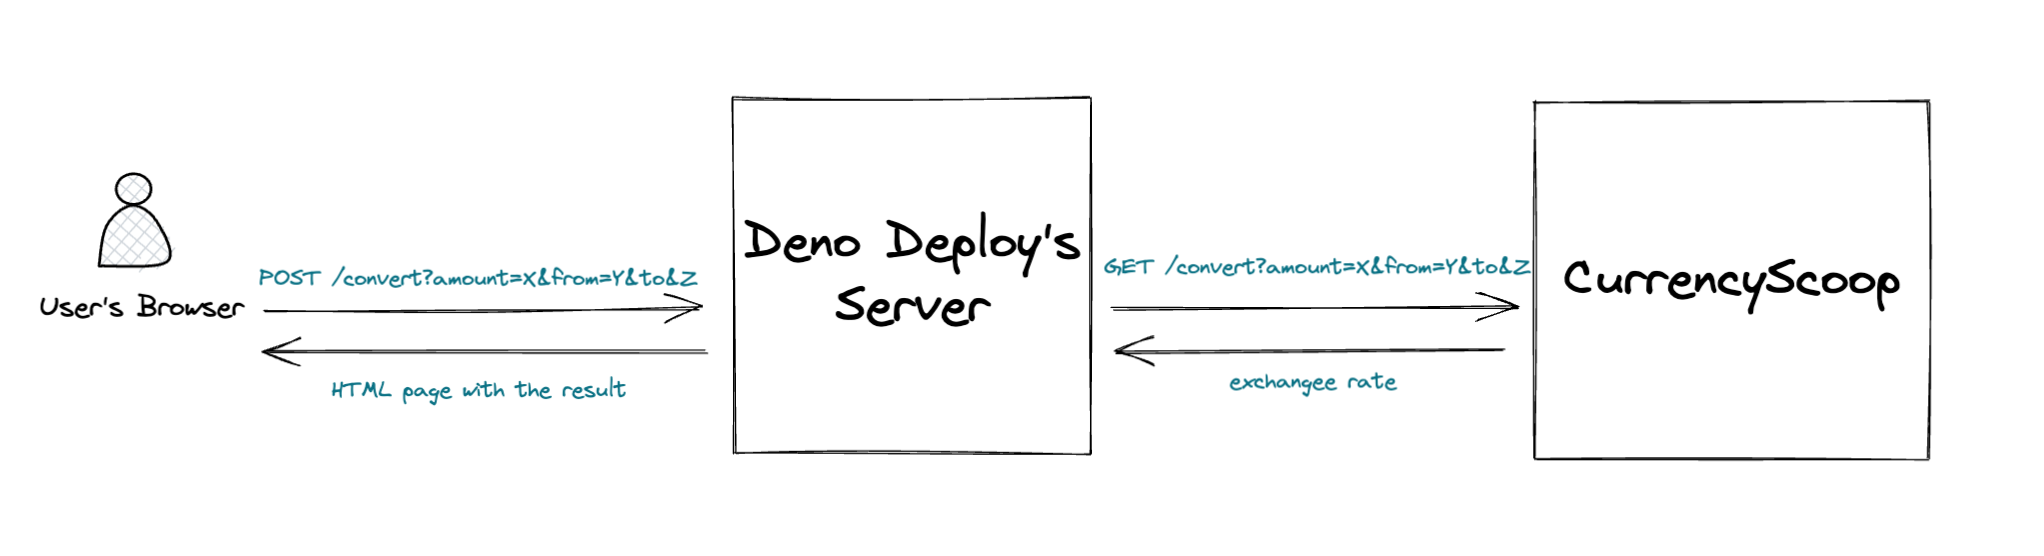
For the server-side part, we will utilize Deno Deploy, the recommended way of deploying Fresh apps to production. The external currency exchange will be provided by CurrencyScoop, which offers a nice API with a generous free tier.
Finally, we will use Tailwind for decorating our page, since Fresh comes with first-class support for Tailwind, as you'll see further down when we scaffold the app.
Getting API Key from CurrencyScoop
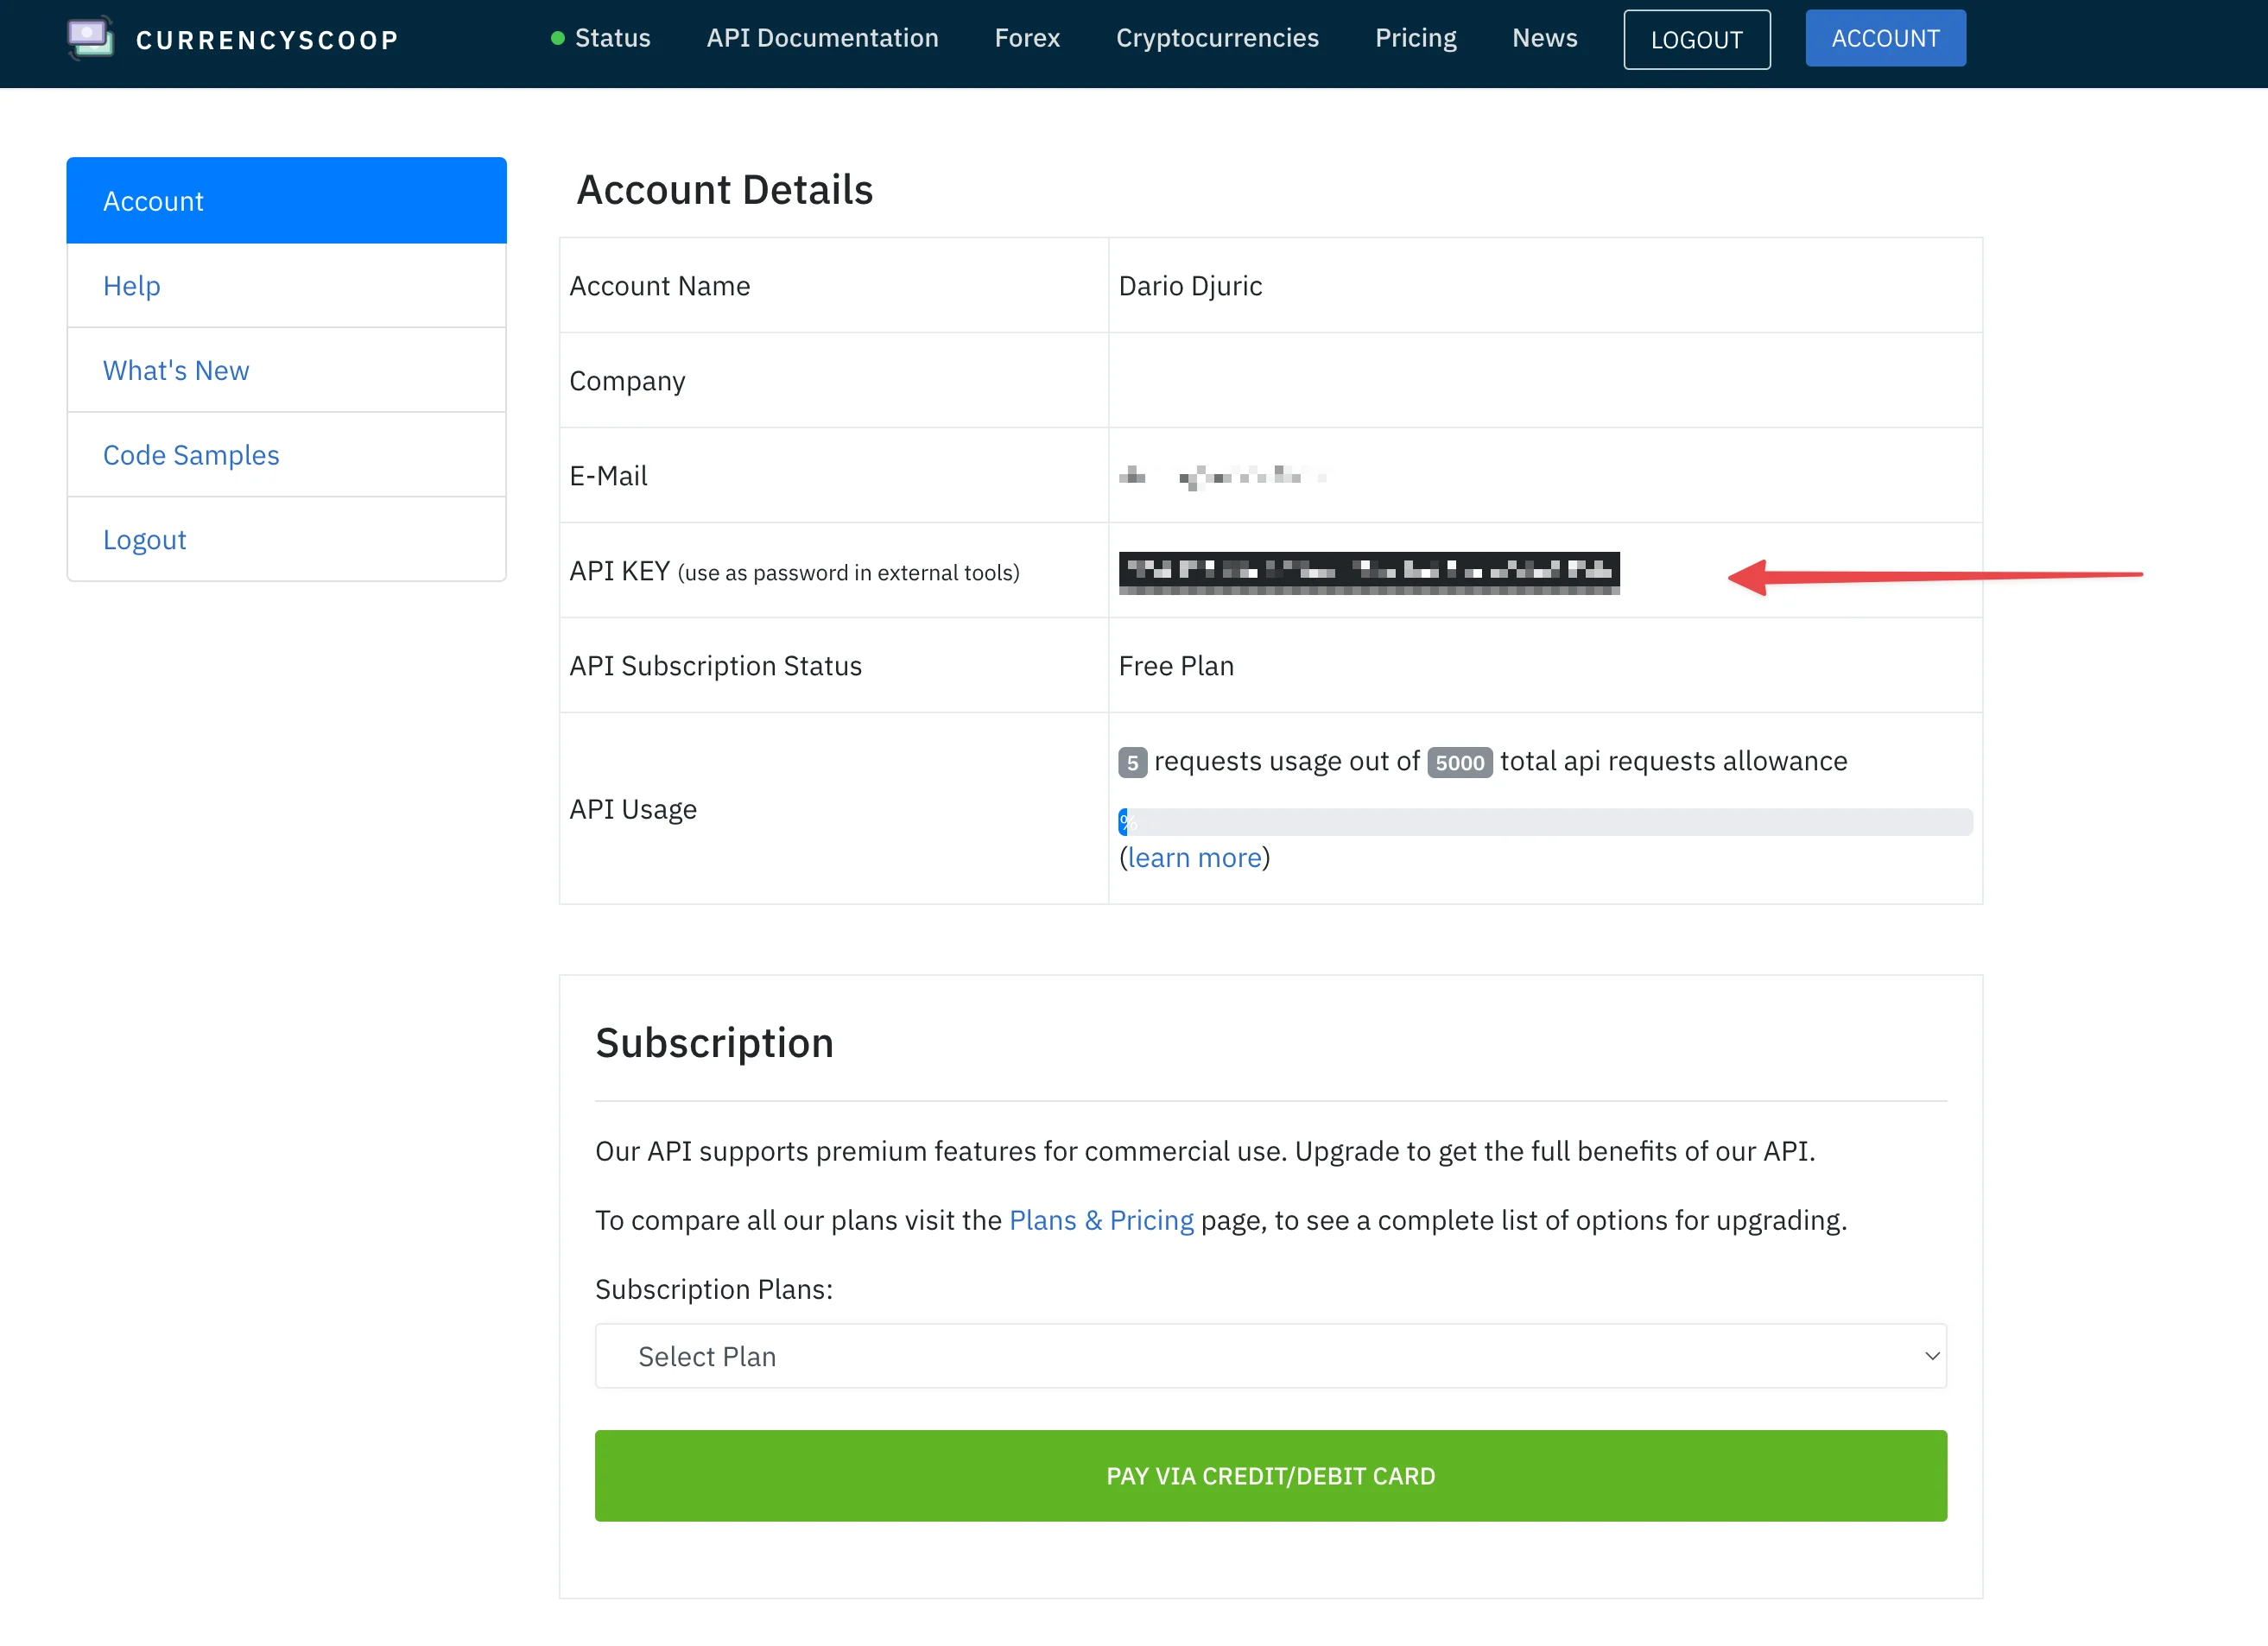
Although CurrencyScoop has a free tier that allows you to fetch their currency exchange rates, you'll need to register first and obtain an API key in order to authenticate and use the service. The API key is located on the accounts page as shown in the screenshot below. Copy it and save it for later.
Scaffolding the Fresh app
To scaffold the Fresh app, install Deno if you still haven't, and then execute the following command:
deno run -A -r https://fresh.deno.dev fresh-currency-converter
This will start generating the project, and ask you a couple of questions along the way:
➜  Temp deno run -A -r https://fresh.deno.dev fresh-currency-converter
Download https://fresh.deno.dev/
Download https://deno.land/x/fresh@1.1.1/init.ts
...
Download https://deno.land/std@0.140.0/path/_util.ts

  🍋 Fresh: the next-gen web framework.

Let's set up your new Fresh project.

Fresh has built-in support for styling using Tailwind CSS. Do you want to use this? [y/N] y
Do you use VS Code? [y/N] n
The manifest has been generated for 3 routes and 1 islands.
As you can see, Fresh has first-class support for Tailwind, so we've enabled that. I did not choose the VS Code option myself, but if you use VS Code, then you can use the Deno extension to add Deno support to VS Code. If you happen to be using Webstorm like myself, you can install the Deno plugin to add Deno support to Webstorm.
Creating the components
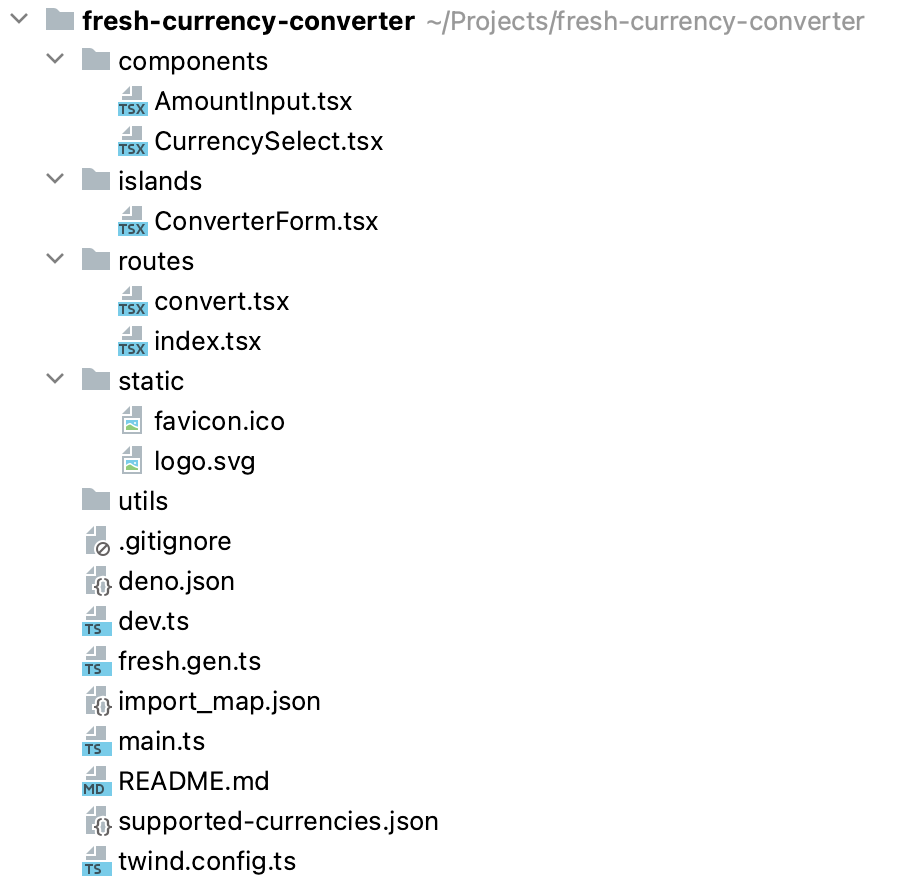
Fresh has a really simple project structure. The islands folder is the place where you'd place your "island" components. The isolated Preact components add interactivity to your pages, unlike route components, which are located in the routes folder and are rendered on the server. The components folder is a generic folder for storing any reusable components that are used within islands or routes.
Home and Convert components
The Home and Convert components are page components that are located under routes/index.tsx and routes/convert.tsx, representing the / and the /convert routes, respectively. When you reach to one of those routes, Fresh will render the respective components on the server, and return the full HTML to the client. Both routes are similar in the manner that both use the ConverterForm island component. However, the /convert route has some extra functionality. It needs to perform the following actions server-side:
- Parse the amount, from, and to query parameters
- Use those parameters to execute a request toward the CurrencyScoop API
- Show the result from the API to the user
interface Data {
  amount: number;
  from: string;
  to: string;
  convertedAmount: number;
}

const DEFAULT_CURRENCY = 'USD';

export const handler: Handlers<Data> = {
  async GET(req, ctx) {
    const url = new URL(req.url);
    const amount = Number(url.searchParams.get('amount')) || 0;
    const from = url.searchParams.get('from') || DEFAULT_CURRENCY;
    const to = url.searchParams.get('to') || DEFAULT_CURRENCY;
    const csResponse = await fetch(`https://api.currencyscoop.com/v1/convert?api_key=${Deno.env.get('API_KEY')}&from=${from}&to=${to}&amount=${amount}`)
    const csResult = await csResponse.json();
    return ctx.render({ convertedAmount: csResult.response.value, amount, from, to });
  },
};

export default function Convert({ data }: PageProps<Data>) {
  return (
    <main className="flex justify-center items-center h-screen">
      <div className="p-4 max-w-screen-md bg-white shadow-md rounded px-8 pt-6 pb-6">
        <ConverterForm amount={data.amount} from={data.from} to={data.to}></ConverterForm>
        <div className="font-medium">
          <span className="text-slate-200">{data.amount} {data.from} = </span><br/>
          <span className="text-2xl">{data.convertedAmount.toFixed(2)} {data.to}</span>
        </div>
      </div>
    </main>
  );
}
It does this through custom handlers which you can attach to any route. Handlers are functions in the form of Request => Response or Request => Promise<Response> that are called when a request is made to a particular route. You can return any kind of response in a custom handler (for example, a JSON), or you can render a component. In our case, we're parsing the query parameters and then fetching the latest currency exchange rate based on the query parameters.
One thing to note here is that we're using Deno.env.get() to obtain the API key from the environment. API keys such as this one are usually sensitive information, so it wouldn't be wise to hardcode it in the code.
Once we get the result from CurrencyScoop, this is passed in to the Convert component so it can be displayed to the user.
ConverterForm component
The ConverterForm component is an island component. Island components add interactivity to your app, and you can use them like any other client-side Preact component. This involves using hooks such as useState() to update the state of the component based on user interactions.
In our case, we will hook into the form's SubmitEvent, and then change the button's label from "Convert" to "Converting..." as an indicator to the user that the currency conversion is taking place.
const currencyCodes = Object.entries(supportedCurrencies.fiats).map(([, currency]) => currency.currency_code);

interface ConverterFormProps {
  amount?: number,
  from?: string,
  to?: string
}

export default function ConverterForm({ amount, from, to }: ConverterFormProps) {
  const [submitted, setSubmitted] = useState(false);
  const [form, setForm] = useState({
    amount,
    from,
    to,
  });

  return (
    <form className="" action="/convert" onSubmit={() => setSubmitted(true)}>
      <div className="flex">
        <AmountInput value={form.amount} onChange={(amount) => setForm({ ...form, amount })}></AmountInput>
        <CurrencySelect currencies={currencyCodes} defaultCurrency="USD" name="from" selectedCurrency={form.from}
                        label="From" onChange={(from) => setForm({ ...form, from })}></CurrencySelect>
        <CurrencySelect currencies={currencyCodes} defaultCurrency="EUR" name="to" selectedCurrency={form.to} label="To"
                        onChange={(to) => setForm({ ...form, to })}></CurrencySelect>
      </div>
      <div className="flex items-center justify-center px-2">
        <button
          className="bg-blue-500 hover:bg-blue-700 text-white font-bold py-2 px-4 rounded focus:outline-none focus:shadow-outline"
          type="submit" disabled={submitted}>
          {submitted ? 'Converting...' : 'Convert'}
        </button>
      </div>
    </form>
  )
}
AmountInput and CurrencySelect components
The AmountInput and CurrencySelect components are pure components that have no internal state and are simply containers for the text input and the select input elements. They are used by the ConverterForm component.
interface AmountInputProps {
  value?: number;
  onChange: (newValue: string) => void
}

export default function AmountInput({ value, onChange }: AmountInputProps) {
  return (
    <div className="mb-4 px-1">
      <label className="block text-gray-700 text-sm font-bold mb-2" htmlFor="amount">
        Amount
      </label>
      <input
        className="shadow appearance-none border rounded py-2 px-3 text-gray-700 leading-tight focus:outline-none focus:shadow-outline"
        id="amount" name="amount" type="number" placeholder="0.0" value={value || 0} required onChange={(e: any) => onChange(e.target.value)} />
    </div>
  );
}
interface CurrencySelectProps {
  name: string;
  currencies: string[];
  selectedCurrency?: string;
  defaultCurrency: string;
  label: string;
  onChange: (newValue: string) => void
}

export default function CurrencySelect({ name, currencies, defaultCurrency, selectedCurrency, label, onChange }: CurrencySelectProps) {
  return (
    <div className="mb-6 px-1">
      <label className="block text-gray-700 text-sm font-bold mb-2" htmlFor={name}>
        {label}
      </label>
      <select
        className="shadow appearance-none border rounded py-2 px-3 text-gray-700 leading-tight focus:outline-none focus:shadow-outline"
        id={name}
        name={name}
        onChange={(e: any) => onChange(e.target.value)}>
        {currencies.map((currency) => <option key={currency} selected={selectedCurrency ? selectedCurrency === currency : currency === defaultCurrency}
                                                 value={currency}>{currency}</option>)}
      </select>
    </div>
  );
}
Deployment
Deploying Fresh apps is super-easy using Deno Deploy. All you need to do is sign up and link the GitHub repository of the project you need to deploy, and that is all. In our case, we had just one extra step of defining the API_KEY environment variable, and that was pretty much it.
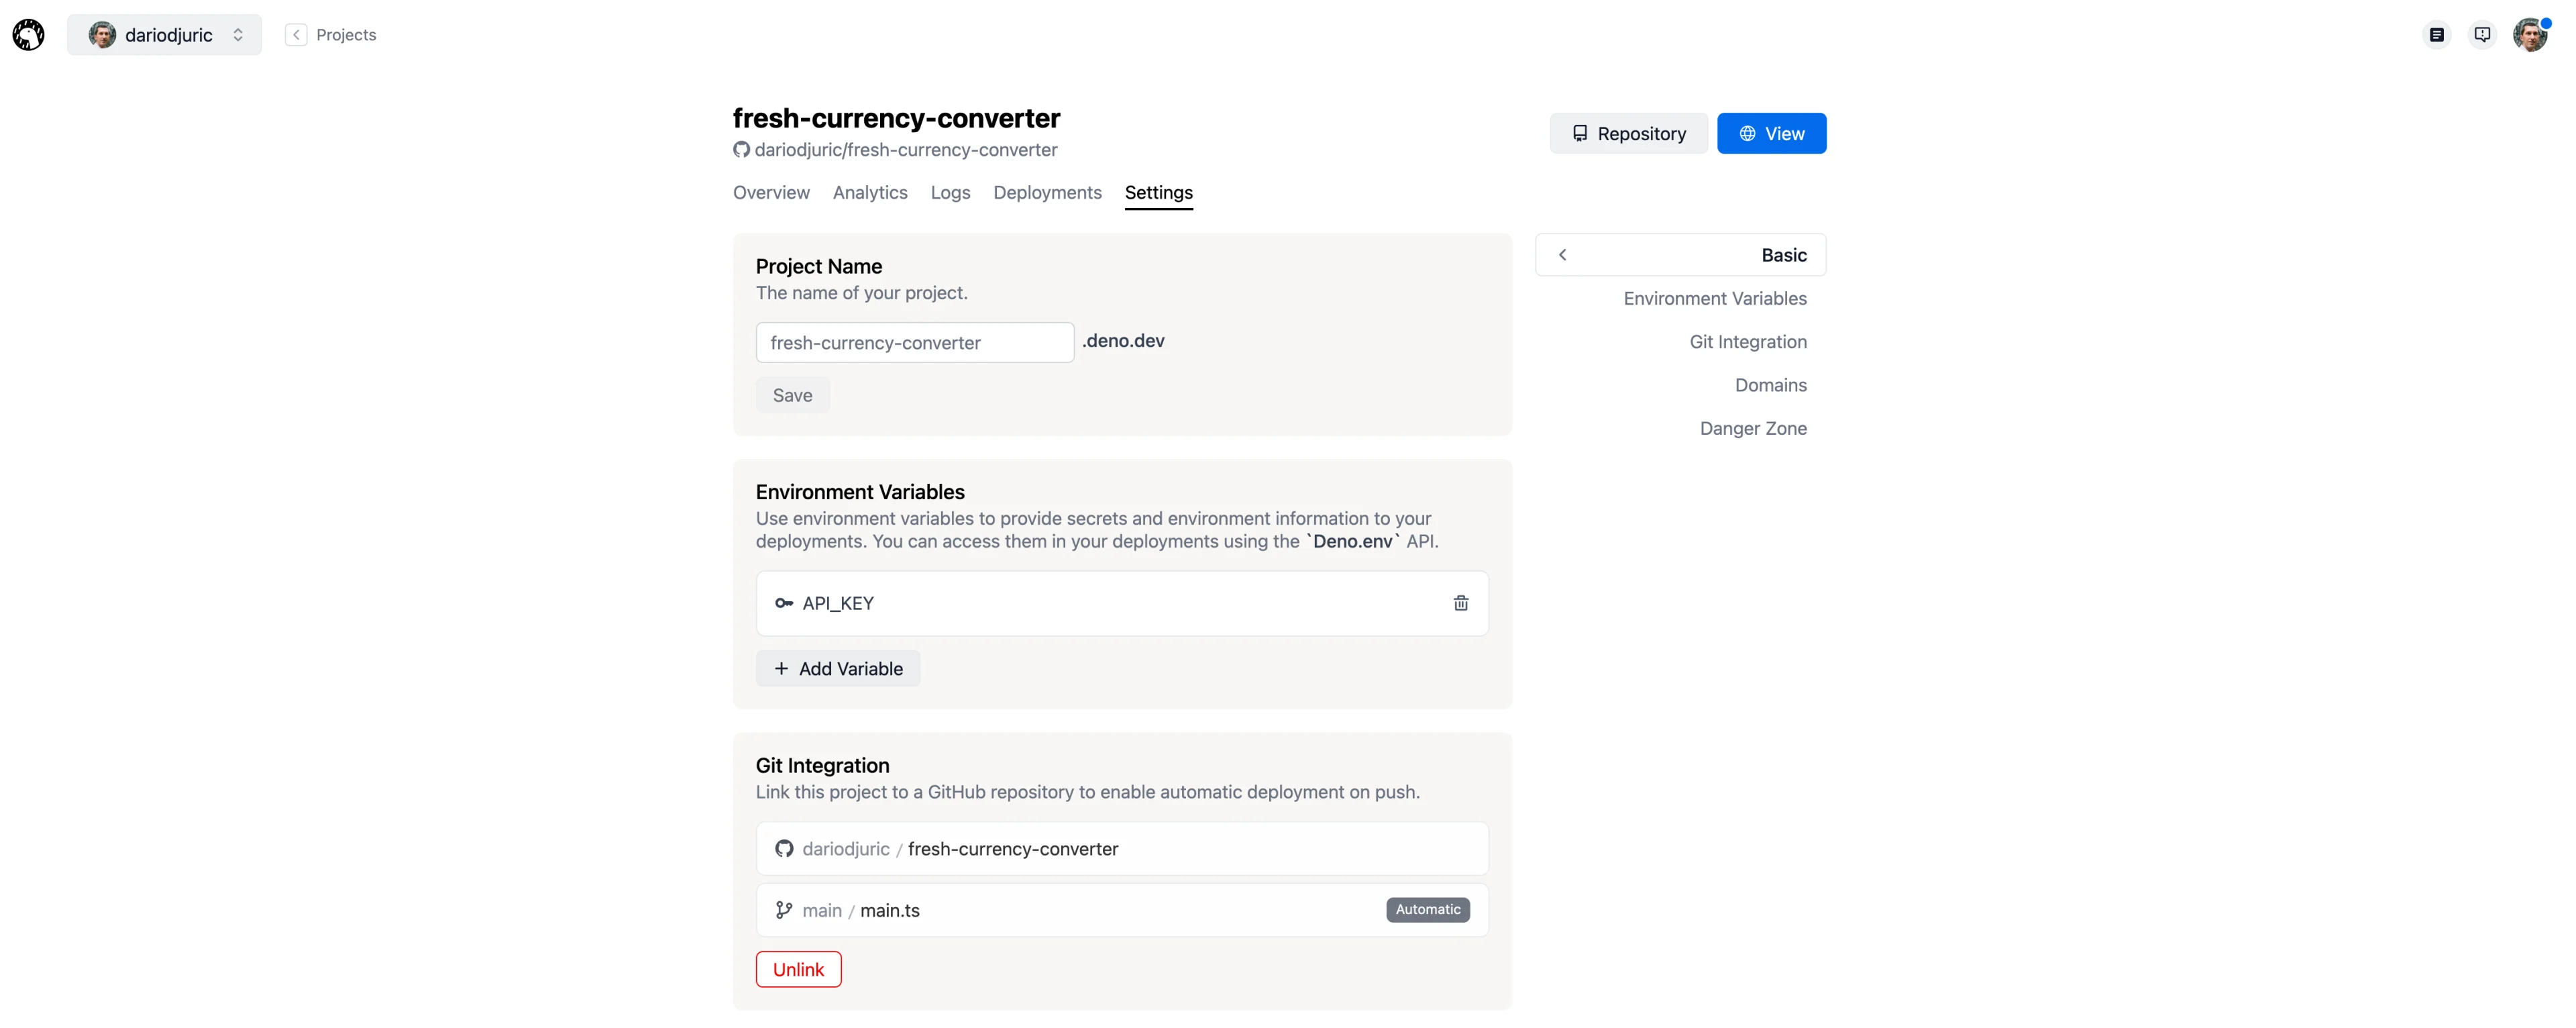
Conclusion
Once the app is uploaded to Deno Deploy, it is fully usable as can be seen in the video below:
The app is available at https://fresh-currency-converter.deno.dev/ - feel free to play around with it! If you'd like to check out the source code, please visit our GitHub repository.
The Fresh framework is a fantastic new framework that is fast, well-documented, and easy to use. We've been able to spin up our currency conversion app in less than half of the day. If you're looking for a new framework to pick for your next project, then Fresh should definitely be at the top of your list.